Yamaha RX-V2500 Owner's Manual - Page 32
For Equalizing, press, to select Setup Type, then select - error
 |
View all Yamaha RX-V2500 manuals
Add to My Manuals
Save this manual to your list of manuals |
Page 32 highlights
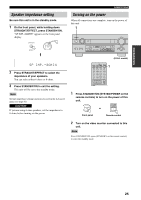
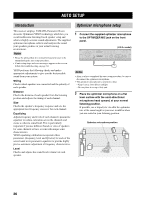
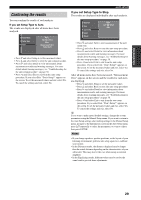
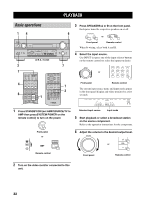
AUTO SETUP For Equalizing, press k/n to select: Skip To skip the selected item and perform no adjustments. Check: Natural To average out the frequency response of all speakers with higher frequencies being less emphasized. Recommended if the "Flat" setting sounds a little harsh. Check: Flat To average the frequency response of all speakers. Recommended if all of your speakers are of similar quality. Check: Front To adjust the frequency response of each speaker in accordance with the sound of your front speakers. Recommended if your front speakers are of much higher quality than your other speakers. 7 Once you have selected the desired setting, press l to move back to Setup Menu. Information Setup Menu Setup Type Start Wiring Distance Size 9 Press n to select Start, then press ENTER. Loud test tones are output from each speaker and "Measuring" appears during the auto setup procedure. Setup Menu Setup Type Start Press ENTER • To stop the auto setup procedure, press one of the cursor buttons (k / n / l / h) or ENTER. In the pause mode, press k to retry the procedure, l to cancel auto setup. • If an error message appears during testing, refer to "Troubleshooting for the auto setup procedure" on page 30, and after carrying out the remedy, retry the auto setup procedure. 8 Press n to select Setup Type, then select: Auto Step To automatically perform the entire auto setup procedure. To pause for confirmation between each check in the auto setup procedure. Information Setup Menu Setup Type Auto Start Step 28
-
 1
1 -
2
-
3
-
4
-
5
-
6
-
7
-
8
-
9
-
10
-
11
-
12
-
13
-
14
-
15
-
16
-
17
-
18
-
19
-
20
-
21
-
22
-
23
-
24
-
25
-
26
-
 27
27 -
 28
28 -
 29
29 -
 30
30 -
 31
31 -
 32
32 -
 33
33 -
 34
34 -
 35
35 -
 36
36 -
 37
37 -
38
-
39
-
40
-
41
-
42
-
43
-
44
-
45
-
46
-
47
-
48
-
49
-
50
-
51
-
52
-
53
-
54
-
55
-
56
-
57
-
58
-
59
-
60
-
61
-
62
-
63
-
64
-
65
-
66
-
67
-
68
-
69
-
70
-
71
-
72
-
73
-
74
-
75
-
76
-
77
-
78
-
79
-
80
-
81
-
82
-
83
-
84
-
85
-
86
-
87
-
88
-
89
-
90
-
91
-
92
-
93
-
94
-
95
-
96
-
97
-
98
-
99
-
100
-
101
-
102
-
103
-
104
-
105
-
106
-
107
-
108
-
109
-
110
-
111
-
112
 |
 |