Yamaha RX-V2500 Owner's Manual - Page 85
FRONT PANEL DISPLAY MENUS, Advanced setup menu - cooling
 |
View all Yamaha RX-V2500 manuals
Add to My Manuals
Save this manual to your list of manuals |
Page 85 highlights
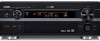
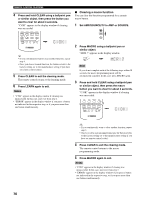
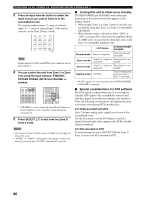
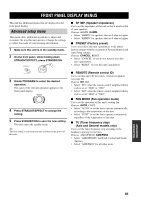
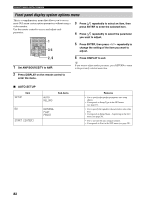
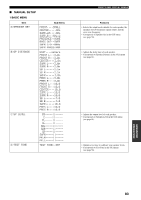
FRONT PANEL DISPLAY MENUS FRONT PANEL DISPLAY MENUS This unit has additional menus that are displayed in the front panel display. Advanced setup menu This menu offers additional operations to adjust and customize the way this unit operates. Change the settings to reflect the needs of your listening environment. 1 Make sure this unit is in the standby mode. 2 On the front panel, while holding down STRAIGHT/EFFECT, press STANDBY/ON. STRAIGHT EFFECT STANDBY /ON 3 Rotate PROGRAM to select the desired operation. The name of the selected operation appears in the front panel display. PROGRAM 4 Press STRAIGHT/EFFECT to change the setting. 5 Press STANDBY/ON to save the new setting This unit enters the standby mode. y The new setting is activated next time you turn on the power of this unit. ■ SP IMP. (Speaker impedance) Use to set the impedance of this unit so that it matches that of your speakers. Choices: 6ΩMIN, 8ΩMIN • Select "6ΩMIN" for speakers that are 6 ohm or higher. • Select "8ΩMIN" for speakers that are 8 ohm or higher. ■ PRESET (Factory preset) Use to reset all of this unit's parameters to the initial factory settings with the exception of System Memory and Auto Setup settings. Choices: CANCEL, RESET • Select "CANCEL" if you do not want to reset this unit's parameters. • Select "RESET" to reset this unit's parameters. ■ REMOTE (Remote control ID) Use to set this unit's ID for remote control recognition (see page 68). Choices: ID1, ID2 • Select "ID1" when the remote control amplifier library code is set to "2000" or "2001". • Select "ID2" when the remote control amplifier library code is set to "2002" or "2003". ■ FAN MODE (Fan operation mode) Use to set the operation of this unit's cooling fan. Choices: AUTO, CONT • Select "AUTO" to set the fan to operate automatically according to the temperature of this unit. • Select "CONT" to set the fan to operate continuously regardless of the temperature of this unit. ■ TU (Tuner frequency step) (Asia and General models only) Use to set the tuner frequency step according to the frequency spacing in your area. Choices: AM10/FM100, AM9/FM50 • Select "AM10/FM100" for North, Central and South America. • Select "AM9/FM50" for all other areas. ADVANCED OPERATION 81
-
 1
1 -
2
-
3
-
4
-
5
-
6
-
7
-
8
-
9
-
10
-
11
-
12
-
13
-
14
-
15
-
16
-
17
-
18
-
19
-
20
-
21
-
22
-
23
-
24
-
25
-
26
-
27
-
28
-
29
-
30
-
31
-
32
-
33
-
34
-
35
-
36
-
37
-
38
-
39
-
40
-
41
-
42
-
43
-
44
-
45
-
46
-
47
-
48
-
49
-
50
-
51
-
52
-
53
-
54
-
55
-
56
-
57
-
58
-
59
-
60
-
61
-
62
-
63
-
64
-
65
-
66
-
67
-
68
-
69
-
70
-
71
-
72
-
73
-
74
-
75
-
76
-
77
-
78
-
79
-
 80
80 -
 81
81 -
 82
82 -
 83
83 -
 84
84 -
 85
85 -
 86
86 -
 87
87 -
 88
88 -
 89
89 -
 90
90 -
91
-
92
-
93
-
94
-
95
-
96
-
97
-
98
-
99
-
100
-
101
-
102
-
103
-
104
-
105
-
106
-
107
-
108
-
109
-
110
-
111
-
112
 |
 |