Acer Aspire iDEA 500 Aspire iDea 500/510 User Guide EN - Page 44
Using PnR, Selecting a usage mode, Quick Burn, Customized Burn: Burn to DVD
 |
View all Acer Aspire iDEA 500 manuals
Add to My Manuals
Save this manual to your list of manuals |
Page 44 highlights
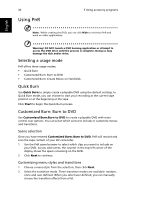
36 Using PnR 5 Using accessory programs English Note: While creating the DVD, you can click Hide to minimize PnR and work on other applications. Warning! DO NOT launch a DVD burning application or attempt to access the DVD drive until the process is complete. Doing so may damage the disk and/or drive. Selecting a usage mode PnR offers three usage modes: • Quick Burn • Customized Burn: Burn to DVD • Customized Burn: Create Movie on Hard Disk. Quick Burn Use Quick Burn to simply create a playable DVD using the default settings. In Quick Burn mode, you can choose to start your recording at the current tape position or at the beginning at the tape. Click Start to begin the Quick Burn process. Customized Burn: Burn to DVD Use Customized Burn:Burn to DVD to create a playable DVD with more control over options. You can select which scenes to include or customize menus and transitions. Scene selection Once you have entered Customized Burn: Burn to DVD, PnR will rewind and scan the tape content of your DV camcorder. 1 Use the PnR scene browser to select which clips you want to include on your DVD. As you add scenes, the counter in the top left corner of the display shows the space remaining on the DVD. 2 Click Next to continue. Customizing menu styles and transitions 1 Choose a menu style from the selection, then click Next. 2 Select the transition mode. Three transition modes are available: random, none and user-defined. When you select user-defined, you can manually choose the transition effects from a list.
-
 1
1 -
2
-
3
-
4
-
5
-
6
-
7
-
8
-
9
-
10
-
11
-
12
-
13
-
14
-
15
-
16
-
17
-
18
-
19
-
20
-
21
-
22
-
23
-
24
-
25
-
26
-
27
-
28
-
29
-
30
-
31
-
32
-
33
-
34
-
35
-
36
-
37
-
38
-
 39
39 -
 40
40 -
 41
41 -
 42
42 -
 43
43 -
 44
44 -
 45
45 -
 46
46 -
 47
47 -
 48
48 -
 49
49 -
50
-
51
-
52
-
53
-
54
-
55
-
56
-
57
-
58
-
59
-
60
-
61
-
62
-
63
-
64
-
65
-
66
-
67
-
68
 |
 |
