Acer Aspire iDEA 500 Aspire iDea 500/510 User Guide EN - Page 51
Copying to disks, Creating an incremental backup
 |
View all Acer Aspire iDEA 500 manuals
Add to My Manuals
Save this manual to your list of manuals |
Page 51 highlights
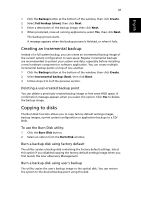
English 43 1 Click the Backup button at the bottom of the window, then click Create. 2 Select Full backup (slow), then click Next. 3 Enter a description of the backup image, then click Next. 4 When prompted, close all running applications, select Yes, then click Next. The backup process starts. A message appears when the backup process is finished, or when it fails. Creating an incremental backup Instead of a full system backup, you can create an incremental backup image of the current system configuration to save space. Regular incremental backups are recommended to protect your system and data, especially before installing a new hardware component or software application. You can create multiple incremental backup points on top of one another. 1 Click the Backup button at the bottom of the window, then click Create. 2 Select Incremental backup (fast), then click Next. 3 Follow steps 3 to 4 of the previous section. Deleting a user-created backup point You can delete a previously created backup image to free some HDD space. A confirmation message appears when you select this option. Click Yes to delete the backup image. Copying to disks The Burn Disk function allows you to copy factory default settings images, backup images, current system configuration or application backups to a CD/ DVD. To use the Burn Disk utility: 1 Click the Burn Disk button. 2 Select an option from the Burn Disk window. Burn a backup disk using factory default The utility creates a backup disk containing the factory default settings. Select this option if you disabled copying the factory default settings image when you first launch the Acer eRecovery Management. Burn a backup disk using user's backup The utility copies the user's backup image to the optical disk. You can restore the system to the desired backup point using this disk.
-
 1
1 -
2
-
3
-
4
-
5
-
6
-
7
-
8
-
9
-
10
-
11
-
12
-
13
-
14
-
15
-
16
-
17
-
18
-
19
-
20
-
21
-
22
-
23
-
24
-
25
-
26
-
27
-
28
-
29
-
30
-
31
-
32
-
33
-
34
-
35
-
36
-
37
-
38
-
39
-
40
-
41
-
42
-
43
-
44
-
45
-
 46
46 -
 47
47 -
 48
48 -
 49
49 -
 50
50 -
 51
51 -
 52
52 -
 53
53 -
 54
54 -
 55
55 -
 56
56 -
57
-
58
-
59
-
60
-
61
-
62
-
63
-
64
-
65
-
66
-
67
-
68
 |
 |