Belkin F5D7633uk4 F5D7633uk4A - Manual - Page 53
Setting Up WPA for a Non-Belkin Wireless Desktop and Wireless
 |
View all Belkin F5D7633uk4 manuals
Add to My Manuals
Save this manual to your list of manuals |
Page 53 highlights
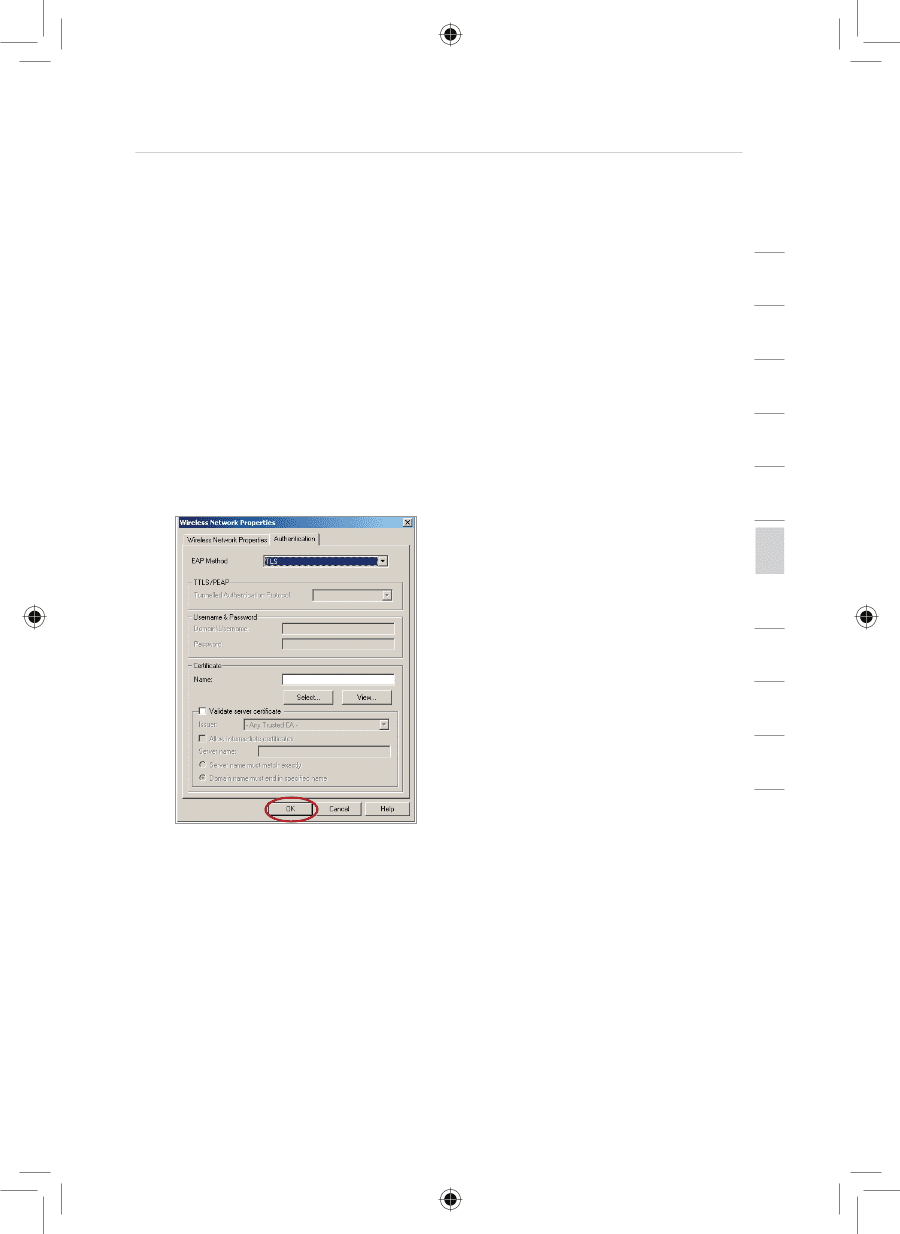
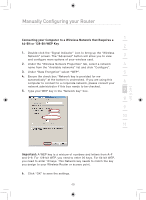
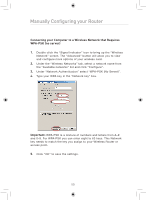
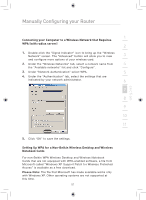
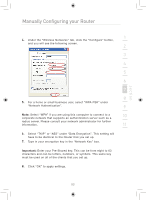
Manually Configuring your Router section 1 Connecting your Computer to a Wireless Network that Requires WPA (with radius server) 2 1. Double-click the "Signal Indicator" icon to bring up the "Wireless Network" screen. The "Advanced" button will allow you to view 3 and configure more options of your wireless card. 2. Under the "Wireless Networks" tab, select a network name from 4 the "Available networks" list and click "Configure". 3. Under "Network Authentication" select WPA. 5 4. Under the "Authentication" tab, select the settings that are indicated by your network administrator. 6 7 8 9 10 11 12 5. Click "OK" to save the settings. Setting Up WPA for a Non-Belkin Wireless Desktop and Wireless Notebook Cards For non-Belkin WPA Wireless Desktop and Wireless Notebook Cards that are not equipped with WPA-enabled software, a file from Microsoft called "Windows XP Support Patch for Wireless Protected Access" is available as a free download. Please Note: The file that Microsoft has made available works only with Windows XP. Other operating systems are not supported at this time. 51
-
 1
1 -
2
-
3
-
4
-
5
-
6
-
7
-
8
-
9
-
10
-
11
-
12
-
13
-
14
-
15
-
16
-
17
-
18
-
19
-
20
-
21
-
22
-
23
-
24
-
25
-
26
-
27
-
28
-
29
-
30
-
31
-
32
-
33
-
34
-
35
-
36
-
37
-
38
-
39
-
40
-
41
-
42
-
43
-
44
-
45
-
46
-
47
-
 48
48 -
 49
49 -
 50
50 -
 51
51 -
 52
52 -
 53
53 -
 54
54 -
 55
55 -
 56
56 -
 57
57 -
 58
58 -
59
-
60
-
61
-
62
-
63
-
64
-
65
-
66
-
67
-
68
-
69
-
70
-
71
-
72
-
73
-
74
-
75
-
76
-
77
-
78
-
79
-
80
-
81
-
82
-
83
-
84
-
85
-
86
-
87
-
88
-
89
-
90
-
91
-
92
-
93
-
94
 |
 |