Brother International MFC 8870DW Users Manual - English - Page 150
CAUTION, Clear/Back
 |
UPC - 012502615101
View all Brother International MFC 8870DW manuals
Add to My Manuals
Save this manual to your list of manuals |
Page 150 highlights
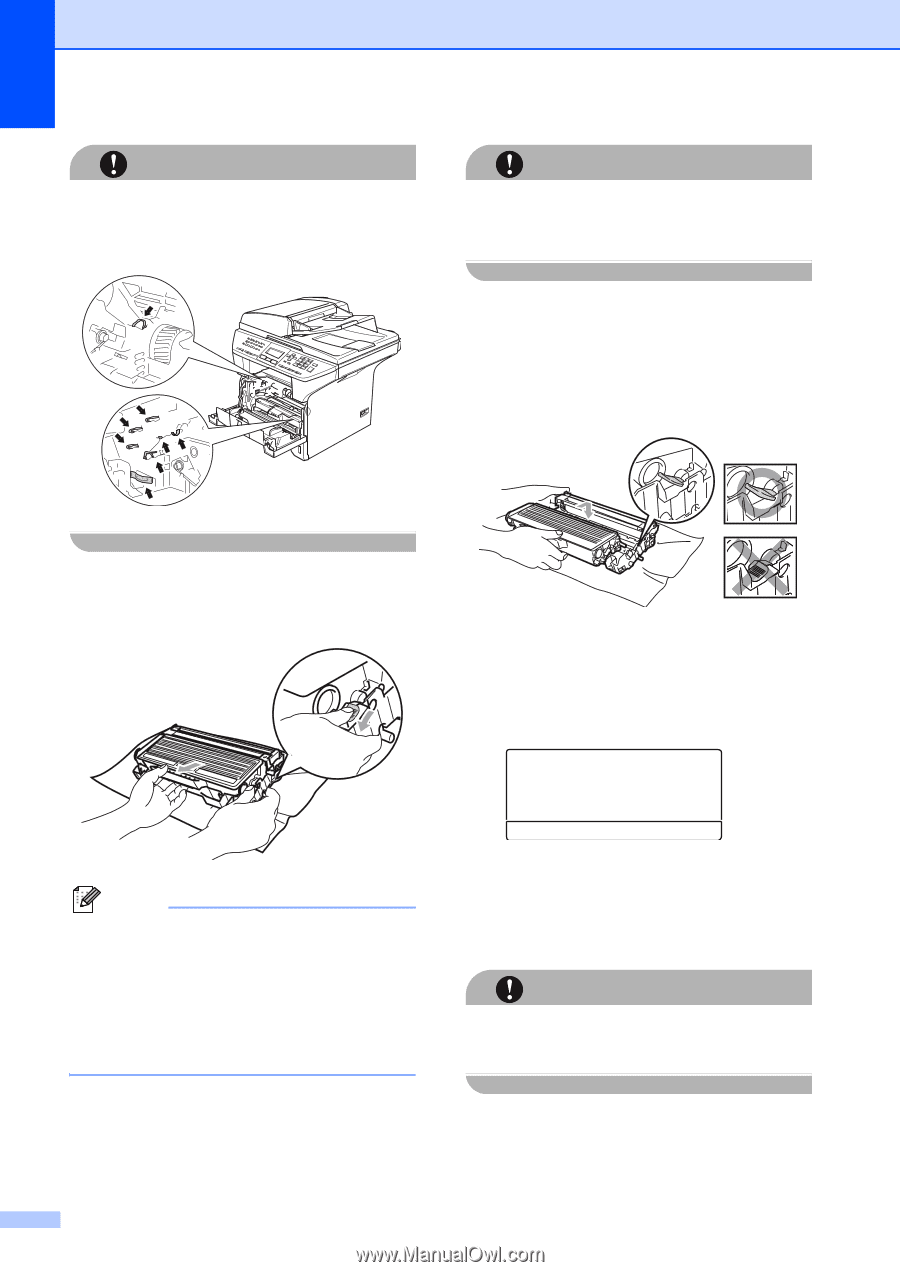
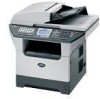
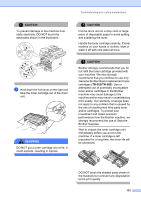
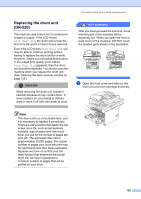
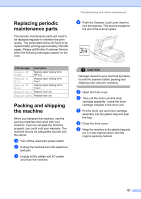
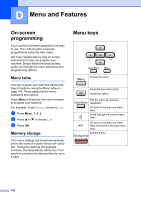
CAUTION To prevent damage to the printer from static electricity, DO NOT touch the electrodes shown in the illustration. CAUTION Wait to unpack a new drum unit until immediately before installing it. Put the old drum unit into the plastic bag. c Unpack the new drum unit. d Put the toner cartridge firmly into the new drum unit until you hear it lock into place. If you put it in properly, the lock lever will lift automatically. b Hold down the lock lever on the right and take the toner cartridge out of the drum unit. Note Discard the used drum unit according to local regulations, keeping it separate from domestic waste. Be sure to seal up the drum unit tightly so that toner powder does not spill out of the unit. If you have questions, call your local waste disposal office. e Put the drum unit and toner cartridge assembly back in the machine. Do not close the front cover. f Press Clear/Back. Replace Drum? a 1.Yes b 2.No Select ab & OK To confirm you are installing a new drum, press 1. g When the LCD shows Accepted, close the front cover. CAUTION If toner scatters on your hands or clothes, wipe or wash it off with cold water at once. 136
-
 1
1 -
2
-
3
-
4
-
5
-
6
-
7
-
8
-
9
-
10
-
11
-
12
-
13
-
14
-
15
-
16
-
17
-
18
-
19
-
20
-
21
-
22
-
23
-
24
-
25
-
26
-
27
-
28
-
29
-
30
-
31
-
32
-
33
-
34
-
35
-
36
-
37
-
38
-
39
-
40
-
41
-
42
-
43
-
44
-
45
-
46
-
47
-
48
-
49
-
50
-
51
-
52
-
53
-
54
-
55
-
56
-
57
-
58
-
59
-
60
-
61
-
62
-
63
-
64
-
65
-
66
-
67
-
68
-
69
-
70
-
71
-
72
-
73
-
74
-
75
-
76
-
77
-
78
-
79
-
80
-
81
-
82
-
83
-
84
-
85
-
86
-
87
-
88
-
89
-
90
-
91
-
92
-
93
-
94
-
95
-
96
-
97
-
98
-
99
-
100
-
101
-
102
-
103
-
104
-
105
-
106
-
107
-
108
-
109
-
110
-
111
-
112
-
113
-
114
-
115
-
116
-
117
-
118
-
119
-
120
-
121
-
122
-
123
-
124
-
125
-
126
-
127
-
128
-
129
-
130
-
131
-
132
-
133
-
134
-
135
-
136
-
137
-
138
-
139
-
140
-
141
-
142
-
143
-
144
-
 145
145 -
 146
146 -
 147
147 -
 148
148 -
 149
149 -
 150
150 -
 151
151 -
 152
152 -
 153
153 -
 154
154 -
 155
155 -
156
-
157
-
158
-
159
-
160
-
161
-
162
-
163
-
164
-
165
-
166
-
167
-
168
-
169
-
170
-
171
-
172
-
173
-
174
-
175
-
176
-
177
-
178
-
179
-
180
-
181
-
182
-
183
-
184
-
185
-
186
-
187
-
188
-
189
-
190
-
191
-
192
-
193
-
194
-
195
-
196
 |
 |