Brother International MFC 8870DW Users Manual - English - Page 151
Replacing periodic maintenance parts, Packing and shipping the machine - parts list
 |
UPC - 012502615101
View all Brother International MFC 8870DW manuals
Add to My Manuals
Save this manual to your list of manuals |
Page 151 highlights
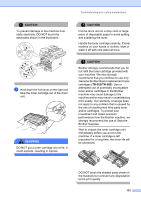
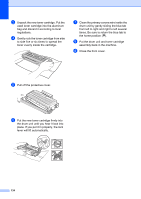
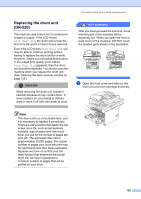
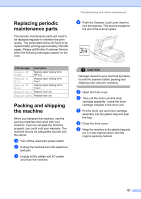
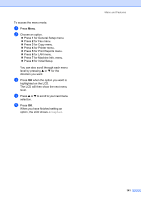
Replacing periodic maintenance parts C The periodic maintenance parts will need to be replaced regularly to maintain the print quality. The parts listed below will have to be replaced after printing approximately 100,000 pages. Please call Brother Customer Service when the following messages appear on the LCD. Troubleshooting and routine maintenance d Push the Scanner Lock Lever down to lock the scanner. This lever is located on the left of the scanner glass. LCD message Description Replace PF KitMP Replace paper feeding kit for MP tray. Replace PF Kit1 Replace paper feeding kit for Tray 1. Replace PF Kit2 Replace paper feeding kit for Tray 2. Replace Fuser Replace fuser unit. Replace Laser Replace laser unit. Packing and shipping the machine C When you transport the machine, use the packing materials that came with your machine. If you do not pack the machine properly, you could void your warranty. The machine should be adequately insured with the carrier. a Turn off the machine's power switch. b Unplug the machine from the telephone wall jack. c Unplug all the cables and AC power cord from the machine. CAUTION Damage caused to your machine by failure to lock the scanner before packing and shipping may void your warranty. e Open the front cover. f Take out the drum unit and toner cartridge assembly. Leave the toner cartridge installed in the drum unit. g Put the drum unit and toner cartridge assembly into the plastic bag and seal the bag. h Close the front cover. i Wrap the machine in the plastic bag and put it in the original carton with the original packing material. 137
-
 1
1 -
2
-
3
-
4
-
5
-
6
-
7
-
8
-
9
-
10
-
11
-
12
-
13
-
14
-
15
-
16
-
17
-
18
-
19
-
20
-
21
-
22
-
23
-
24
-
25
-
26
-
27
-
28
-
29
-
30
-
31
-
32
-
33
-
34
-
35
-
36
-
37
-
38
-
39
-
40
-
41
-
42
-
43
-
44
-
45
-
46
-
47
-
48
-
49
-
50
-
51
-
52
-
53
-
54
-
55
-
56
-
57
-
58
-
59
-
60
-
61
-
62
-
63
-
64
-
65
-
66
-
67
-
68
-
69
-
70
-
71
-
72
-
73
-
74
-
75
-
76
-
77
-
78
-
79
-
80
-
81
-
82
-
83
-
84
-
85
-
86
-
87
-
88
-
89
-
90
-
91
-
92
-
93
-
94
-
95
-
96
-
97
-
98
-
99
-
100
-
101
-
102
-
103
-
104
-
105
-
106
-
107
-
108
-
109
-
110
-
111
-
112
-
113
-
114
-
115
-
116
-
117
-
118
-
119
-
120
-
121
-
122
-
123
-
124
-
125
-
126
-
127
-
128
-
129
-
130
-
131
-
132
-
133
-
134
-
135
-
136
-
137
-
138
-
139
-
140
-
141
-
142
-
143
-
144
-
145
-
 146
146 -
 147
147 -
 148
148 -
 149
149 -
 150
150 -
 151
151 -
 152
152 -
 153
153 -
 154
154 -
 155
155 -
 156
156 -
157
-
158
-
159
-
160
-
161
-
162
-
163
-
164
-
165
-
166
-
167
-
168
-
169
-
170
-
171
-
172
-
173
-
174
-
175
-
176
-
177
-
178
-
179
-
180
-
181
-
182
-
183
-
184
-
185
-
186
-
187
-
188
-
189
-
190
-
191
-
192
-
193
-
194
-
195
-
196
 |
 |
