Brother International NX-450Q Users Manual - English - Page 123
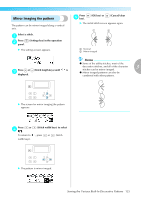
Changing the pattern size
 |
View all Brother International NX-450Q manuals
Add to My Manuals
Save this manual to your list of manuals |
Page 123 highlights
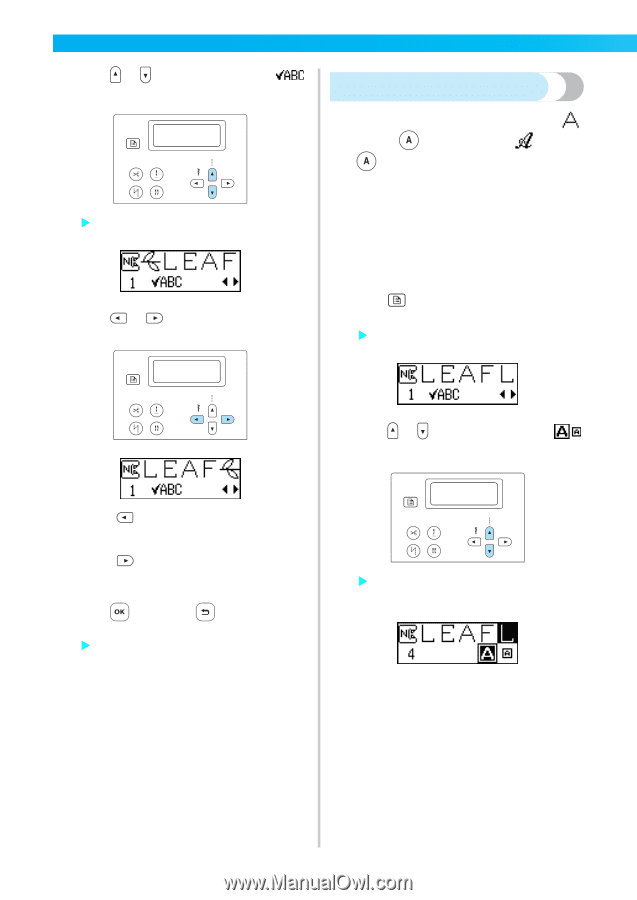
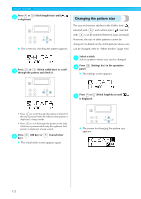
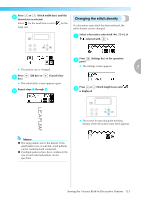
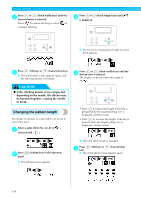
UTILITY STITCHES Press or (Stitch length keys) until b is displayed. Changing the pattern size X The screen for checking the pattern appears. The size of character stitches in the Gothic font ( selected with ) and outline style ( selected with ) can be switched between large and small. However, the size of other patterns cannot be changed. For details on the stitch patterns whose size can be changed, refer to "Other stitches" (page 138). Press or (Stitch width keys) to scroll c through the pattern and check it. Select a stitch. a Select a pattern whose size can be changed. Press b panel. (Settings key) in the operation X The settings screen appears. Press or (Stitch length keys) until c is displayed. • Press to scroll through the pattern to the left. If the key is pressed while the leftmost (first) pattern is displayed, a beep sounds. • Press to scroll through the pattern to the right. If the key is pressed while only the rightmost (last) pattern is displayed, a beep sounds. Press d key). (OK key) or (Cancel/clear X The initial stitch screen appears again. X The screen for changing the pattern size appears. 122
-
 1
1 -
2
-
3
-
4
-
5
-
6
-
7
-
8
-
9
-
10
-
11
-
12
-
13
-
14
-
15
-
16
-
17
-
18
-
19
-
20
-
21
-
22
-
23
-
24
-
25
-
26
-
27
-
28
-
29
-
30
-
31
-
32
-
33
-
34
-
35
-
36
-
37
-
38
-
39
-
40
-
41
-
42
-
43
-
44
-
45
-
46
-
47
-
48
-
49
-
50
-
51
-
52
-
53
-
54
-
55
-
56
-
57
-
58
-
59
-
60
-
61
-
62
-
63
-
64
-
65
-
66
-
67
-
68
-
69
-
70
-
71
-
72
-
73
-
74
-
75
-
76
-
77
-
78
-
79
-
80
-
81
-
82
-
83
-
84
-
85
-
86
-
87
-
88
-
89
-
90
-
91
-
92
-
93
-
94
-
95
-
96
-
97
-
98
-
99
-
100
-
101
-
102
-
103
-
104
-
105
-
106
-
107
-
108
-
109
-
110
-
111
-
112
-
113
-
114
-
115
-
116
-
117
-
 118
118 -
 119
119 -
 120
120 -
 121
121 -
 122
122 -
 123
123 -
 124
124 -
 125
125 -
 126
126 -
 127
127 -
 128
128 -
129
-
130
-
131
-
132
-
133
-
134
-
135
-
136
-
137
-
138
-
139
-
140
-
141
-
142
-
143
-
144
-
145
-
146
-
147
-
148
-
149
-
150
-
151
-
152
-
153
-
154
-
155
 |
 |