Brother International ZE-856A Instruction Manual - English and Spanish - Page 227
Operation panel
 |
View all Brother International ZE-856A manuals
Add to My Manuals
Save this manual to your list of manuals |
Page 227 highlights
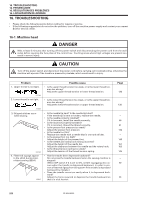
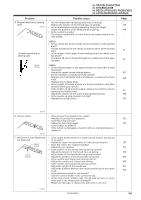
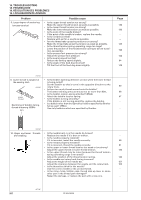
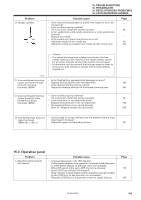
Problem 11. Broken needles 16. TROUBLESHOOTING 16. FEHLERSUCHE 16. RESOLUTION DES PROBLEMES 16. LOCALIZACION DE AVERIAS Possible cause • Is the material being pushed or pulled with excessive force during sewing? • Is the needle properly installed? If it is incorrect, install the needle correctly. • Is the needle bent, is the needle tip broken, or is the needle hole blocked? Replace the needle. • Is the needle and rotary hook timing incorrect? Adjust the height of the needle bar. Adjust the clearance between the needle and the rotary hook. Page - 46 - 151 153 Caution • It is extremely dangerous to leave any pieces of broken needle sticking in the material. If the needle breaks, search for all pieces until the whole of the needle is found again. • Furthermore, we recommend that through steps be taken to account for such needles to comply with product liability regulations. 0469M 12. Incorrect thread trimming • Is the fixed knife or movable knife damaged or worn? (upper and lower threads Replace the fixed knife or the movable knife. 138 are both not being • Is the thread trimming timing correct? trimmed). (856A) Adjust the rotating direction of the thread trimming cam. 165 13. Incorrect thread trimming • Is the neelde properly installed? (upper thread or lower If it is incorrect, install the needle correclty. 46 thread is not being • Is the fixed knife or movable knife blunt? trimmed). (856A) Replace the fixed knife or the movable knife. 138 • Do skipped stitches occur during sewing? Refer to "Skipped stitches during sewing". 205 14. The thread wiper does not • Is the length of thread trailing from the needle hole too long wipe the thread. after thread trimming? (856A-40 [ ] , 90 [ ] ) Adjust the upper thread feeding device. 161 15-2. Operation panel Problem 1. Operation panel keys do not operate. Possible cause • Is AA AA appearing in the LED display? If this display appears, key operation has been locked because of a DIP switch setting, so the keys cannot be operated. When DIP switch 2-8 is set to OFF, the lock is released. • Is the LOCK key indicator illuminated? If the indicator is illuminated, the key operation has been locked by the LOCK key, so key operation is not possible. Press the LOCK key for 2 seconds or more to cancel the lock. Page 173 124 ZE-855A,856A 208
-
 1
1 -
2
-
3
-
4
-
5
-
6
-
7
-
8
-
9
-
10
-
11
-
12
-
13
-
14
-
15
-
16
-
17
-
18
-
19
-
20
-
21
-
22
-
23
-
24
-
25
-
26
-
27
-
28
-
29
-
30
-
31
-
32
-
33
-
34
-
35
-
36
-
37
-
38
-
39
-
40
-
41
-
42
-
43
-
44
-
45
-
46
-
47
-
48
-
49
-
50
-
51
-
52
-
53
-
54
-
55
-
56
-
57
-
58
-
59
-
60
-
61
-
62
-
63
-
64
-
65
-
66
-
67
-
68
-
69
-
70
-
71
-
72
-
73
-
74
-
75
-
76
-
77
-
78
-
79
-
80
-
81
-
82
-
83
-
84
-
85
-
86
-
87
-
88
-
89
-
90
-
91
-
92
-
93
-
94
-
95
-
96
-
97
-
98
-
99
-
100
-
101
-
102
-
103
-
104
-
105
-
106
-
107
-
108
-
109
-
110
-
111
-
112
-
113
-
114
-
115
-
116
-
117
-
118
-
119
-
120
-
121
-
122
-
123
-
124
-
125
-
126
-
127
-
128
-
129
-
130
-
131
-
132
-
133
-
134
-
135
-
136
-
137
-
138
-
139
-
140
-
141
-
142
-
143
-
144
-
145
-
146
-
147
-
148
-
149
-
150
-
151
-
152
-
153
-
154
-
155
-
156
-
157
-
158
-
159
-
160
-
161
-
162
-
163
-
164
-
165
-
166
-
167
-
168
-
169
-
170
-
171
-
172
-
173
-
174
-
175
-
176
-
177
-
178
-
179
-
180
-
181
-
182
-
183
-
184
-
185
-
186
-
187
-
188
-
189
-
190
-
191
-
192
-
193
-
194
-
195
-
196
-
197
-
198
-
199
-
200
-
201
-
202
-
203
-
204
-
205
-
206
-
207
-
208
-
209
-
210
-
211
-
212
-
213
-
214
-
215
-
216
-
217
-
218
-
219
-
220
-
221
-
 222
222 -
 223
223 -
 224
224 -
 225
225 -
 226
226 -
 227
227 -
 228
228 -
 229
229 -
 230
230 -
 231
231 -
 232
232 -
233
-
234
-
235
-
236
-
237
-
238
-
239
-
240
-
241
-
242
-
243
-
244
-
245
-
246
-
247
-
248
 |
 |
