Canon CR-N500 Remote Camera Settings Guide - Page 100
Restoring to the Factory Default Settings, Restoring to the Initial Settings from a Web Browser
 |
View all Canon CR-N500 manuals
Add to My Manuals
Save this manual to your list of manuals |
Page 100 highlights
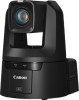
Restoring to the Factory Default Settings If the settings have been forgotten and want to set the camera from the beginning, restore the factory default settings first. It is recommended to use [System] > [Maintenance] > [Backup/Restore] on the Settings Page to create a backup file before restoring the factory default settings (P. 82). Important If restored to the factory default settings, the camera will be unable to connect because the administrator account is also initialized. Use the Camera Search Tool to configure the initial settings. Note For the factory default settings, refer to P. 102. Restoring to the Initial Settings from a Web Browser Use [System] > [Maintenance] > [General] > [Initialization] > [Network Settings and Management Information] > [Do not save] on the Settings Page (P. 80). Restoring to the Factory Default Settings with the RESET Switch on the Camera If the IP address or the Administrator password on the camera is forgotten, operating the camera via the network is not possible. In this case, press the RESET switch to reset the camera. 1 Turn the camera off. The camera does not have a power switch. In order to turn the camera on or off, connect or disconnect the power supply cable. 2 Turn on the power while pushing the RESET switch, confirm that the POWER lamp lights up (green), and then release the RESET switch after about five seconds. The RESET switch is located in a recessed area. Push the switch using the tip of a pointed object such as a clip. When the POWER lamp stops blinking (green), the reset procedure is complete. N500 RESET Switch POWER Lamp 100
-
 1
1 -
2
-
3
-
4
-
5
-
6
-
7
-
8
-
9
-
10
-
11
-
12
-
13
-
14
-
15
-
16
-
17
-
18
-
19
-
20
-
21
-
22
-
23
-
24
-
25
-
26
-
27
-
28
-
29
-
30
-
31
-
32
-
33
-
34
-
35
-
36
-
37
-
38
-
39
-
40
-
41
-
42
-
43
-
44
-
45
-
46
-
47
-
48
-
49
-
50
-
51
-
52
-
53
-
54
-
55
-
56
-
57
-
58
-
59
-
60
-
61
-
62
-
63
-
64
-
65
-
66
-
67
-
68
-
69
-
70
-
71
-
72
-
73
-
74
-
75
-
76
-
77
-
78
-
79
-
80
-
81
-
82
-
83
-
84
-
85
-
86
-
87
-
88
-
89
-
90
-
91
-
92
-
93
-
94
-
 95
95 -
 96
96 -
 97
97 -
 98
98 -
 99
99 -
 100
100 -
 101
101 -
 102
102 -
 103
103 -
 104
104 -
 105
105 -
106
-
107
-
108
-
109
-
110
-
111
-
112
-
113
-
114
-
115
-
116
-
117
-
118
-
119
 |
 |
