Canon PIXMA MP470 MP470 series Quick Start Guide - Page 47
Print Head Deep Cleaning - ink cartridge
 |
View all Canon PIXMA MP470 manuals
Add to My Manuals
Save this manual to your list of manuals |
Page 47 highlights
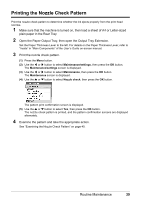
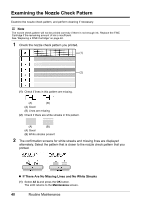
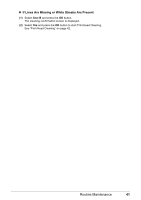
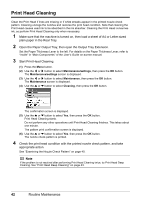
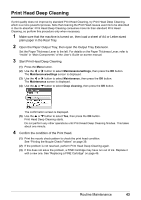
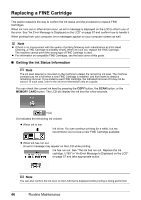
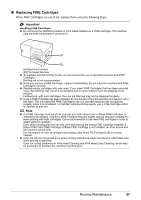
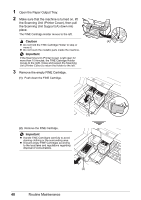
Print Head Deep Cleaning If print quality does not improve by standard Print Head Cleaning, try Print Head Deep Cleaning, which is a more powerful process. Note that cleaning the Print Head causes used ink to be absorbed in the ink absorber. Print Head Deep Cleaning consumes more ink than standard Print Head Cleaning, so perform this procedure only when necessary. 1 Make sure that the machine is turned on, then load a sheet of A4 or Letter-sized plain paper in the Rear Tray. 2 Open the Paper Output Tray, then open the Output Tray Extension. Set the Paper Thickness Lever to the left. For details on the Paper Thickness Lever, refer to "Inside" in "Main Components" of the User's Guide on-screen manual. 3 Start Print Head Deep Cleaning. (1) Press the Menu button. (2) Use the [ or ] button to select Maintenance/settings, then press the OK button. The Maintenance/settings screen is displayed. (3) Use the [ or ] button to select Maintenance, then press the OK button. The Maintenance screen is displayed. (4) Use the { or } button to select Deep cleaning, then press the OK button. The confirmation screen is displayed. (5) Use the { or } button to select Yes, then press the OK button. Print Head Deep Cleaning starts. Do not perform any other operations until Print Head Deep Cleaning finishes. This takes about one minute. 4 Confirm the condition of the Print Head. (1) Print the nozzle check pattern to check the print head condition. See "Printing the Nozzle Check Pattern" on page 39. (2) If the problem is not resolved, perform Print Head Deep Cleaning again. (3) If this does not solve the problem, a FINE Cartridge may have run out of ink. Replace it with a new one. See "Replacing a FINE Cartridge" on page 46. Routine Maintenance 43
-
 1
1 -
2
-
3
-
4
-
5
-
6
-
7
-
8
-
9
-
10
-
11
-
12
-
13
-
14
-
15
-
16
-
17
-
18
-
19
-
20
-
21
-
22
-
23
-
24
-
25
-
26
-
27
-
28
-
29
-
30
-
31
-
32
-
33
-
34
-
35
-
36
-
37
-
38
-
39
-
40
-
41
-
 42
42 -
 43
43 -
 44
44 -
 45
45 -
 46
46 -
 47
47 -
 48
48 -
 49
49 -
 50
50 -
 51
51 -
 52
52 -
53
-
54
-
55
-
56
-
57
-
58
-
59
-
60
-
61
-
62
-
63
-
64
-
65
-
66
-
67
-
68
-
69
-
70
-
71
-
72
-
73
-
74
-
75
-
76
-
77
-
78
-
79
-
80
-
81
-
82
-
83
-
84
-
85
-
86
-
87
-
88
-
89
-
90
-
91
-
92
 |
 |
