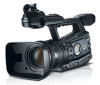
Canon XF305 XF305 / XF300 Instruction Manual - Page 42
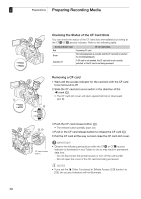
Switching Between the CF Card Slots
 |
View all Canon XF305 manuals
Add to My Manuals
Save this manual to your list of manuals |
Page 42 highlights
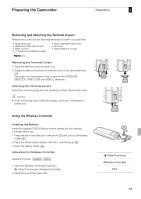
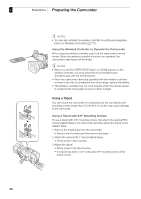
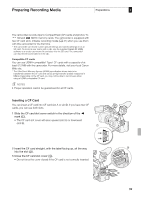
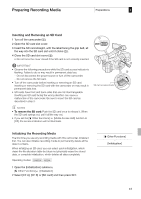
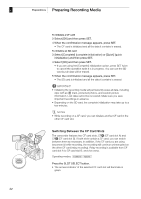
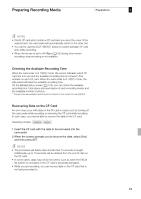
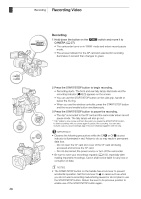
2 Preparations Preparing Recording Media To initialize a CF card 3 Select [OK] and then press SET. 4 When the confirmation message appears, press SET. • The CF card is initialized and all the data it contains is erased. To initialize an SD card 3 Select [Complete] (complete initialization) or [Quick] (quick initialization) and then press SET. 4 Select [OK] and then press SET. • If you are using the [Complete] initialization option, press SET twice to cancel the operation while it is in progress. You can use the SD card but all data will be erased. 5 When the confirmation message appears, press SET. • The SD card is initialized and all the data it contains is erased. IMPORTANT • Initializing the recording media will permanently erase all data, including clips with an e mark, protected photos, and custom picture information. Lost data cannot be recovered. Make sure you save important recordings in advance. • Depending on the SD card, the complete initialization may take up to a few minutes. NOTES • While recording on a CF card, you can initialize another CF card in the other CF card slot. Switching Between the CF Card Slots The camcorder features two CF card slots, CFj (CF card slot A) and CFl (CF card slot B). If both slots contain a CF card, you can switch between them as necessary. In addition, if the CF card you are using becomes full while recording, the recording will continue uninterrupted on the other CF card (relay recording). Relay recording is available from CF card slot A to CF card slot B, and vice versa. Operating modes: Press the SLOT SELECT button. • The access indicator of the selected CF card slot will illuminate in green. 42
-
 1
1 -
2
-
3
-
4
-
5
-
6
-
7
-
8
-
9
-
10
-
11
-
12
-
13
-
14
-
15
-
16
-
17
-
18
-
19
-
20
-
21
-
22
-
23
-
24
-
25
-
26
-
27
-
28
-
29
-
30
-
31
-
32
-
33
-
34
-
35
-
36
-
 37
37 -
 38
38 -
 39
39 -
 40
40 -
 41
41 -
 42
42 -
 43
43 -
 44
44 -
 45
45 -
 46
46 -
 47
47 -
48
-
49
-
50
-
51
-
52
-
53
-
54
-
55
-
56
-
57
-
58
-
59
-
60
-
61
-
62
-
63
-
64
-
65
-
66
-
67
-
68
-
69
-
70
-
71
-
72
-
73
-
74
-
75
-
76
-
77
-
78
-
79
-
80
-
81
-
82
-
83
-
84
-
85
-
86
-
87
-
88
-
89
-
90
-
91
-
92
-
93
-
94
-
95
-
96
-
97
-
98
-
99
-
100
-
101
-
102
-
103
-
104
-
105
-
106
-
107
-
108
-
109
-
110
-
111
-
112
-
113
-
114
-
115
-
116
-
117
-
118
-
119
-
120
-
121
-
122
-
123
-
124
-
125
-
126
-
127
-
128
-
129
-
130
-
131
-
132
-
133
-
134
-
135
-
136
-
137
-
138
-
139
-
140
-
141
-
142
-
143
-
144
-
145
-
146
-
147
-
148
-
149
-
150
-
151
-
152
-
153
-
154
-
155
-
156
-
157
-
158
-
159
-
160
-
161
-
162
-
163
-
164
-
165
-
166
-
167
-
168
-
169
-
170
-
171
-
172
-
173
-
174
-
175
-
176
-
177
-
178
-
179
-
180
-
181
-
182
-
183
-
184
-
185
-
186
-
187
-
188
-
189
-
190
-
191
-
192
-
193
-
194
-
195
-
196
-
197
-
198
-
199
-
200
-
201
-
202
-
203
-
204
-
205
-
206
-
207
-
208
 |
 |
