Canon XF305 XF305 / XF300 Instruction Manual - Page 72
Set the ND FILTER switch to the desired setting.
 |
View all Canon XF305 manuals
Add to My Manuals
Save this manual to your list of manuals |
Page 72 highlights
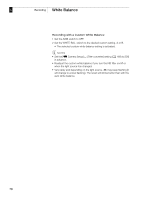
3 Recording Using the ND Filter Using the ND Filter Using the ND filters allows you keep the aperture within an appropriate range when recording in bright surroundings*. * When recording in bright surroundings, the camcorder closes down the aperture. This may cause the picture to appear blurred depending on the zoom position. Using the ND filter or setting a faster shutter speed can reduce such blur. Operating modes: Set the ND FILTER switch to the desired setting. • The filter setting appears on the left side of the screen. ND Filter Settings Switch setting OFF 1 2 3 Screen display No display [ND1 1/4] [ND2 1/16] [ND3 1/64] NOTES • During automatic aperture control (0 69), the ND filter warning will appear if the current setting is not appropriate. Perform the action described in the following table. Warning [ND CLR] (flashes) [ND1 1/4] (flashes) [ND2 1/16] (flashes) [ND3 1/64] (flashes) [ND] appears in red What to do Set the ND FILTER switch to OFF. Set the ND FILTER switch to 1. Set the ND FILTER switch to 2. Set the ND FILTER switch to 3. The ND FILTER switch is between two positions. Set it correctly to the desired position. • Depending on the scene, the color may change when turning the ND filter on/off. Setting a custom white balance (0 75) may be effective in such case. 72
-
 1
1 -
2
-
3
-
4
-
5
-
6
-
7
-
8
-
9
-
10
-
11
-
12
-
13
-
14
-
15
-
16
-
17
-
18
-
19
-
20
-
21
-
22
-
23
-
24
-
25
-
26
-
27
-
28
-
29
-
30
-
31
-
32
-
33
-
34
-
35
-
36
-
37
-
38
-
39
-
40
-
41
-
42
-
43
-
44
-
45
-
46
-
47
-
48
-
49
-
50
-
51
-
52
-
53
-
54
-
55
-
56
-
57
-
58
-
59
-
60
-
61
-
62
-
63
-
64
-
65
-
66
-
 67
67 -
 68
68 -
 69
69 -
 70
70 -
 71
71 -
 72
72 -
 73
73 -
 74
74 -
 75
75 -
 76
76 -
 77
77 -
78
-
79
-
80
-
81
-
82
-
83
-
84
-
85
-
86
-
87
-
88
-
89
-
90
-
91
-
92
-
93
-
94
-
95
-
96
-
97
-
98
-
99
-
100
-
101
-
102
-
103
-
104
-
105
-
106
-
107
-
108
-
109
-
110
-
111
-
112
-
113
-
114
-
115
-
116
-
117
-
118
-
119
-
120
-
121
-
122
-
123
-
124
-
125
-
126
-
127
-
128
-
129
-
130
-
131
-
132
-
133
-
134
-
135
-
136
-
137
-
138
-
139
-
140
-
141
-
142
-
143
-
144
-
145
-
146
-
147
-
148
-
149
-
150
-
151
-
152
-
153
-
154
-
155
-
156
-
157
-
158
-
159
-
160
-
161
-
162
-
163
-
164
-
165
-
166
-
167
-
168
-
169
-
170
-
171
-
172
-
173
-
174
-
175
-
176
-
177
-
178
-
179
-
180
-
181
-
182
-
183
-
184
-
185
-
186
-
187
-
188
-
189
-
190
-
191
-
192
-
193
-
194
-
195
-
196
-
197
-
198
-
199
-
200
-
201
-
202
-
203
-
204
-
205
-
206
-
207
-
208
 |
 |