Canon imageFORMULA DR-G2110 User Manual - Page 107
Cleaning the Scanning Glass, Roller, and Pad, Closing the Upper Unit
 |
View all Canon imageFORMULA DR-G2110 manuals
Add to My Manuals
Save this manual to your list of manuals |
Page 107 highlights
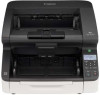
Closing the Upper Unit Smoothly close the upper unit (1). Further, press both ends of the upper unit to verify that it is securely closed (2). (1) (2) Hint If the upper unit is open, an error is displayed. "Error Message" (See p. 138) Cleaning the Scanning Glass, Roller, and Pad If streaks or dirt appear in scanned images, the scanning glass, rollers or separation pad in the scanner may be dirty. Clean them periodically. IMPORTANT Scratches on the sensor glass may cause marks on the images, as well as feeding errors. If you find a scratch on the scanning glass, contact your local authorized Canon dealer or service representative to have the glass replaced. 1 Turn the power switch off, and disconnect the power plug from the power outlet. 2 Close the Document Eject Tray Extension if it is open. 3 Open the upper unit smoothly. (See p. 106) 4 Wipe any dust off the scanning glass with a cleaning cloth or a clean, dry cloth. Make sure that you clean both scanning glasses, the one on the upper unit and the one on the main unit. CAUTION Do not spray water or neutral detergent directly on the scanner. Precision mechanisms, such as the light source, may get wet, and cause a malfunction. Scanning Glass 107
-
 1
1 -
2
-
3
-
4
-
5
-
6
-
7
-
8
-
9
-
10
-
11
-
12
-
13
-
14
-
15
-
16
-
17
-
18
-
19
-
20
-
21
-
22
-
23
-
24
-
25
-
26
-
27
-
28
-
29
-
30
-
31
-
32
-
33
-
34
-
35
-
36
-
37
-
38
-
39
-
40
-
41
-
42
-
43
-
44
-
45
-
46
-
47
-
48
-
49
-
50
-
51
-
52
-
53
-
54
-
55
-
56
-
57
-
58
-
59
-
60
-
61
-
62
-
63
-
64
-
65
-
66
-
67
-
68
-
69
-
70
-
71
-
72
-
73
-
74
-
75
-
76
-
77
-
78
-
79
-
80
-
81
-
82
-
83
-
84
-
85
-
86
-
87
-
88
-
89
-
90
-
91
-
92
-
93
-
94
-
95
-
96
-
97
-
98
-
99
-
100
-
101
-
 102
102 -
 103
103 -
 104
104 -
 105
105 -
 106
106 -
 107
107 -
 108
108 -
 109
109 -
 110
110 -
 111
111 -
 112
112 -
113
-
114
-
115
-
116
-
117
-
118
-
119
-
120
-
121
-
122
-
123
-
124
-
125
-
126
-
127
-
128
-
129
-
130
-
131
-
132
-
133
-
134
-
135
-
136
-
137
-
138
-
139
-
140
-
141
-
142
-
143
-
144
-
145
-
146
-
147
-
148
-
149
-
150
-
151
 |
 |
