Casio QV-R41 Owners Manual - Page 149
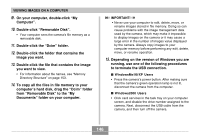
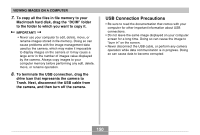
Double-click the drive icon for the camera's, memory as a drive.
 |
View all Casio QV-R41 manuals
Add to My Manuals
Save this manual to your list of manuals |
Page 149 highlights
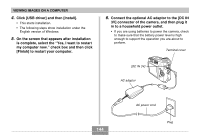
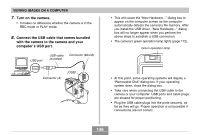
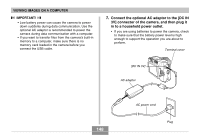
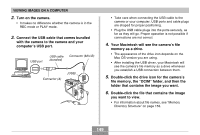
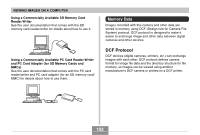
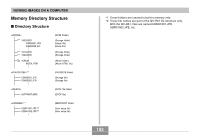
VIEWING IMAGES ON A COMPUTER 2. Turn on the camera. • It makes no difference whether the camera is in the REC mode or PLAY mode. 3. Connect the USB cable that comes bundled with the camera to the camera and your computer's USB port. USB port USB cable (bundled) Connector (Mini-B) [USB] Connector (A) USB • Take care when connecting the USB cable to the camera or your computer. USB ports and cable plugs are shaped for proper positioning. • Plug the USB cable plugs into the ports securely, as far as they will go. Proper operation is not possible if connections are not correct. 4. Your Macintosh will see the camera's file memory as a drive. • The appearance of the drive icon depends on the Mac OS version you are using. • After installing the USB driver, your Macintosh will see the camera's file memory as a drive whenever you establish a USB connection between them. 5. Double-click the drive icon for the camera's file memory, the "DCIM" folder, and then the folder that contains the image you want. 6. Double-click the file that contains the image you want to view. • For information about file names, see "Memory Directory Structure" on page 153. 149
-
 1
1 -
2
-
3
-
4
-
5
-
6
-
7
-
8
-
9
-
10
-
11
-
12
-
13
-
14
-
15
-
16
-
17
-
18
-
19
-
20
-
21
-
22
-
23
-
24
-
25
-
26
-
27
-
28
-
29
-
30
-
31
-
32
-
33
-
34
-
35
-
36
-
37
-
38
-
39
-
40
-
41
-
42
-
43
-
44
-
45
-
46
-
47
-
48
-
49
-
50
-
51
-
52
-
53
-
54
-
55
-
56
-
57
-
58
-
59
-
60
-
61
-
62
-
63
-
64
-
65
-
66
-
67
-
68
-
69
-
70
-
71
-
72
-
73
-
74
-
75
-
76
-
77
-
78
-
79
-
80
-
81
-
82
-
83
-
84
-
85
-
86
-
87
-
88
-
89
-
90
-
91
-
92
-
93
-
94
-
95
-
96
-
97
-
98
-
99
-
100
-
101
-
102
-
103
-
104
-
105
-
106
-
107
-
108
-
109
-
110
-
111
-
112
-
113
-
114
-
115
-
116
-
117
-
118
-
119
-
120
-
121
-
122
-
123
-
124
-
125
-
126
-
127
-
128
-
129
-
130
-
131
-
132
-
133
-
134
-
135
-
136
-
137
-
138
-
139
-
140
-
141
-
142
-
143
-
 144
144 -
 145
145 -
 146
146 -
 147
147 -
 148
148 -
 149
149 -
 150
150 -
 151
151 -
 152
152 -
 153
153 -
 154
154 -
155
-
156
-
157
-
158
-
159
-
160
-
161
-
162
-
163
-
164
-
165
-
166
-
167
-
168
-
169
-
170
-
171
-
172
-
173
-
174
-
175
-
176
-
177
-
178
-
179
-
180
-
181
-
182
-
183
-
184
 |
 |
