Casio QV-R41 Owners Manual - Page 63
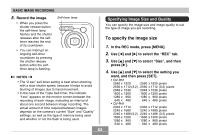
Specifying Image Size and Quality, To specify the image size
 |
View all Casio QV-R41 manuals
Add to My Manuals
Save this manual to your list of manuals |
Page 63 highlights
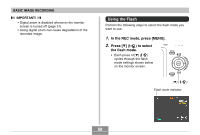
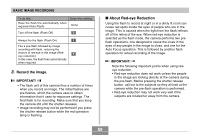
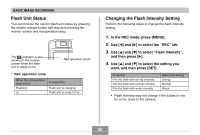
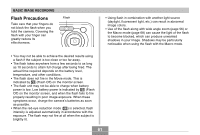
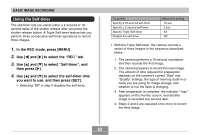
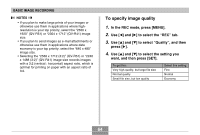
BASIC IMAGE RECORDING 5. Record the image. • When you press the shutter release button, the self-timer lamp flashes and the shutter releases after the selftimer reaches the end of its countdown. • You can interrupt an ongoing self-timer countdown by pressing the shutter release button while the selftimer lamp is flashing. Self-timer lamp NOTES • The "2 sec" self-timer setting is best when shooting with a slow shutter speed, because it helps to avoid blurring of images due to hand movement. • In the case of the Triple Self-timer, the indicator "1sec" appears on the monitor screen between the recording of each image, indicating an interval of about one second between image recording. The actual amount of time required between images depends on the camera's current "Size" and "Quality" settings, as well as the type of memory being used and whether or not the flash is being used. Specifying Image Size and Quality You can specify the image size and image quality to suit the type of image you are recording. To specify the image size 1. In the REC mode, press [MENU]. 2. Use [̇] and [̈] to select the "REC" tab. 3. Use [̆] and [̄] to select "Size", and then press [̈]. 4. Use [̆] and [̄] to select the setting you want, and then press [SET]. • QV-R51 2560 x 1920 : 2560 x 1920 pixels 2560 x 1712 (3:2) : 2560 x 1712 (3:2) pixels 2048 x 1536 : 2048 x 1536 pixels 1600 x 1200 : 1600 x 1200 pixels 1280 x 960 : 1280 x 960 pixels 640 x 480 : 640 x 480 pixels • QV-R41 2304 x 1712 : 2304 x 1712 pixels 2240 x 1680 : 2240 x 1680 pixels 2240 x 1488 (3:2) : 2240 x 1488 (3:2) pixels 1600 x 1200 : 1600 x 1200 pixels 1280 x 960 : 1280 x 960 pixels 640 x 480 : 640 x 480 pixels 63
-
 1
1 -
2
-
3
-
4
-
5
-
6
-
7
-
8
-
9
-
10
-
11
-
12
-
13
-
14
-
15
-
16
-
17
-
18
-
19
-
20
-
21
-
22
-
23
-
24
-
25
-
26
-
27
-
28
-
29
-
30
-
31
-
32
-
33
-
34
-
35
-
36
-
37
-
38
-
39
-
40
-
41
-
42
-
43
-
44
-
45
-
46
-
47
-
48
-
49
-
50
-
51
-
52
-
53
-
54
-
55
-
56
-
57
-
 58
58 -
 59
59 -
 60
60 -
 61
61 -
 62
62 -
 63
63 -
 64
64 -
 65
65 -
 66
66 -
 67
67 -
 68
68 -
69
-
70
-
71
-
72
-
73
-
74
-
75
-
76
-
77
-
78
-
79
-
80
-
81
-
82
-
83
-
84
-
85
-
86
-
87
-
88
-
89
-
90
-
91
-
92
-
93
-
94
-
95
-
96
-
97
-
98
-
99
-
100
-
101
-
102
-
103
-
104
-
105
-
106
-
107
-
108
-
109
-
110
-
111
-
112
-
113
-
114
-
115
-
116
-
117
-
118
-
119
-
120
-
121
-
122
-
123
-
124
-
125
-
126
-
127
-
128
-
129
-
130
-
131
-
132
-
133
-
134
-
135
-
136
-
137
-
138
-
139
-
140
-
141
-
142
-
143
-
144
-
145
-
146
-
147
-
148
-
149
-
150
-
151
-
152
-
153
-
154
-
155
-
156
-
157
-
158
-
159
-
160
-
161
-
162
-
163
-
164
-
165
-
166
-
167
-
168
-
169
-
170
-
171
-
172
-
173
-
174
-
175
-
176
-
177
-
178
-
179
-
180
-
181
-
182
-
183
-
184
 |
 |
