D-Link DSL 504G User Guide - Page 16
Hardware Installation - default ip address
 |
View all D-Link DSL 504G manuals
Add to My Manuals
Save this manual to your list of manuals |
Page 16 highlights
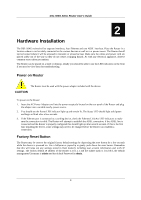
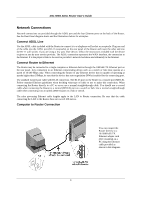
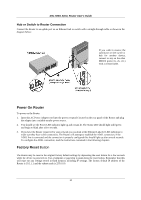
DSL-504G ADSL Router User's Guide 2 Hardware Installation The DSL-504G maintains five separate interfaces, four Ethernet and one ADSL interface. Place the Router in a location where it can be safely connected to the various devices as well as to a power source. The Router should not be located where it will be exposed to moisture or excessive heat. Make sure the cables and power cord are placed safely out of the way so they do not create a tripping hazard. As with any electrical appliance, observe common sense safety precautions. The Router can be placed on a shelf or desktop, ideally you should be able to see the LED indicators on the front if you need to view them for troubleshooting. Power on Router The Router must be used with the power adapter included with the device. CAUTION To power on the Router: 1. Insert the AC Power Adapter cord into the power receptacle located on the rear panel of the Router and plug the adapter into a suitable nearby power source. 2. You should see the Power LED indicator light up and remain lit. The Status LED should light solid green and begin to blink after a few seconds. 3. If the Ethernet port is connected to a working device, check the Ethernet Link/Act LED indicators to make sure the connection is valid. The Router will attempt to establish the ADSL connection, if the ADSL line is connected and the Router is properly configured this should light up after several seconds. If this is the first time installing the device, some settings may need to be changed before the Router can establish a connection. Factory Reset Button The Router may be reset to the original factory default settings by depressing the reset button for a few seconds while the device is powered on. Use a ballpoint or paperclip to gently push down the reset button. Remember that this will wipe out any settings stored in flash memory including user account information and LAN IP settings. The factory default IP address of the Router is 10.1.1.1 and the subnet mask is 255.0.0.0, the default management Username is admin and the default Password is admin. 8
-
 1
1 -
2
-
3
-
4
-
5
-
6
-
7
-
8
-
9
-
10
-
 11
11 -
 12
12 -
 13
13 -
 14
14 -
 15
15 -
 16
16 -
 17
17 -
 18
18 -
 19
19 -
 20
20 -
 21
21 -
22
-
23
-
24
-
25
-
26
-
27
-
28
-
29
-
30
-
31
-
32
-
33
-
34
-
35
-
36
-
37
-
38
-
39
-
40
-
41
-
42
-
43
-
44
-
45
-
46
-
47
-
48
-
49
-
50
-
51
-
52
-
53
-
54
-
55
-
56
-
57
-
58
-
59
-
60
-
61
-
62
-
63
-
64
-
65
-
66
-
67
-
68
-
69
-
70
-
71
 |
 |