Dell B1163 Dell Users Guide
Dell B1163 Manual
 |
View all Dell B1163 manuals
Add to My Manuals
Save this manual to your list of manuals |
Dell B1163 manual content summary:
- Dell B1163 | Dell Users Guide - Page 1
User's Guide Dell B1163/B1163w BBAASSIICC This guide provides information concerning installation, basic operation and troubleshooting on windows. ADVANCED This guide provides information about installation, advanced configuration, operation and troubleshooting on various OS environments. Some - Dell B1163 | Dell Users Guide - Page 2
user's guide 10 Installing accessories 49 Safety information 11 Storing the toner cartridge 50 Machine overview 16 Redistributing toner 52 Control panel overview 19 Replacing the toner cartridge 54 Turning the machine ON 21 Cleaning the machine 56 Installing the driver locally - Dell B1163 | Dell Users Guide - Page 3
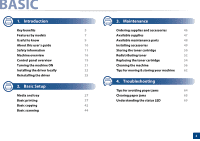
BASIC 5. Appendix Specifications 72 Regulatory information 81 Copyright 94 3 - Dell B1163 | Dell Users Guide - Page 4
to know before using the machine. • Key benefits 5 • Features by models 7 • Useful to know 9 • About this user's guide 10 • Safety information 11 • Machine overview 16 • Control panel overview 19 • Turning the machine ON 21 • Installing the driver locally 22 • Reinstalling the - Dell B1163 | Dell Users Guide - Page 5
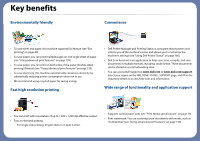
Dell Printer Status" on page 166). • Dell Scan Assistant is an application to help users scan, compile, and save documents in multiple formats, including .epub format. These documents can be shared via social networking sites. • You can access Dell Support at www.dell.com or www.dell.com/support - Dell B1163 | Dell Users Guide - Page 6
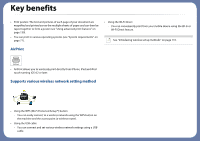
the Wi-Fi or Wi-Fi Direct feature. See "Introducing wireless set up methods" on page 110. AirPrint • AirPrint allows you to wirelessly print directly from iPhone, iPad and iPod touch running iOS 4.2 or later. Supports various wireless network setting method • Using the WPS (Wi-Fi Protected Setup - Dell B1163 | Dell Users Guide - Page 7
. Operating System Operating System Windows Mac Linux (●: Included, Blank: Not available) B1163 ● ● ● B1163w ● ● ● Software Software SPL printer driver XPS printer driver Dell Printer Manager Scan to PC settings Device Settings Dell Scan Assistant Dell Printer Status (●: Included, Blank: Not - Dell B1163 | Dell Users Guide - Page 8
panel) Duplex (2-sided) printing (Manual)b Scan Scan to PC PaperPort 14 (found in CD2) (excluding China) Copy ID card copying Reduced or enlarged copying Adjust background B1163 ● B1163w ● ● ● ● ● ● ● ● ● ● ● ● ● ● ● ● a. Depending on your country, wireless LAN card may not - Dell B1163 | Dell Users Guide - Page 9
). A paper jam has occurred. • Open and close the scan unit (see "Front view" on page 17). • Check the instructions on removing jammed paper in this manual and troubleshoot accordingly (see "Clearing paper jams" on page 65). Printouts are blurry. • The toner level might be low or uneven. Shake the - Dell B1163 | Dell Users Guide - Page 10
the safety information before using the machine. • If you have a problem using the machine, refer to the troubleshooting chapter. • Terms used in this user's guide are explained in the glossary chapter. • All illustrations in this user's guide may differ from your machine depending on its options or - Dell B1163 | Dell Users Guide - Page 11
damage to your machine. Be sure to read and understand all of these instructions before using the machine. After reading this section, keep it in a safe unplug the machine. • The user should be able to access the power outlet in case of emergencies that might require the user to pull the plug out. - Dell B1163 | Dell Users Guide - Page 12
result in electric shock or fire. If the machine does not operate properly after these instructions have been followed, unplug the machine from all interface connections and request assistance from qualified service personnel. Otherwise, this could result in electric shock or fire. If the plug does - Dell B1163 | Dell Users Guide - Page 13
the power supply, remove the power cord from the electrical outlet. 6 Installation / Moving Warning Do not place the machine in an area with dust, to your health. Place the machine in a wellventilated space or open a window to circulate the air periodically. Do not place the machine on an unstable - Dell B1163 | Dell Users Guide - Page 14
machine by yourself. It can damage the machine. Call a certified technician when the machine needs repairing. To clean and operate the machine, strictly follow the user's guide provided with the machine. Otherwise, you could damage the machine. 1. Introduction 14 - Dell B1163 | Dell Users Guide - Page 15
due to the use of recycled supplies, a service fee will be charged. For supplies that contain toner dust (toner cartridge, waste toner bottle, imaging unit, etc.) follow the instructions below. • When disposing of the supplies, follow the instructions for disposal. Refer to the reseller for disposal - Dell B1163 | Dell Users Guide - Page 16
9 Accessories Power cord Software CDa a. The software CD contains the print drivers, user's guide, and software applications. b. Miscellaneous accessories included with your machine may vary by country of purchase and specific model. Quick installation guide Misc. accessoriesb 1. Introduction - Dell B1163 | Dell Users Guide - Page 17
on model or country (see "Features by models" on page 7). 4 Tray 10 Inner cover 5 Tray handle 11 Toner cartridge 6 Output support a. Close the scanner lid before opening the scan unit. b. Be careful not to pinch your fingers. 1 8 9 7 6 5 4 1 Scanner lid 2 Control panel 3 Handle 2 11 10 - Dell B1163 | Dell Users Guide - Page 18
Machine overview 11 Rear view • This illustration may differ from your machine depending on your model. There are various types of machine. • Some features and optional goods may not be available depending on model or country (see "Features by models" on page 7). 1 USB 2.0 port 1 2 2 Power - Dell B1163 | Dell Users Guide - Page 19
LED Switches to Power save mode. Configures the wireless network connection easily without a computer (see "Using the WPS button" on page 111). Sends scanned data (see "Basic Scanning" on page 44). Allows you to copy both sides of an ID card like a driver's license on a single side of paper (see - Dell B1163 | Dell Users Guide - Page 20
LED" on page 69). Shows the status of the toner (see "Understanding the status LED" on page 69). Shows the number of pages you want to copy. a. B1163 only. b. B1163w only. 12 Adjusting the control panel Illustrations on this user's guide may differ from your machine depending on its options or - Dell B1163 | Dell Users Guide - Page 21
the machine ON 1 Connect the machine to the electricity supply first. Turn the switch on if the machine has a power switch. Illustrations on this user's guide may differ from your machine depending on its options or models. Check your machine type (see "Front view" on page 17). 2 Press (Power - Dell B1163 | Dell Users Guide - Page 22
the driver locally A locally connected machine is a machine directly attached to your computer using the cable. • If you are a Mac or Linux operating systems user, refer to the "Installation for Mac" on page 98 or "Installation for Linux" on page 100. • The installation window in this User's Guide - Dell B1163 | Dell Users Guide - Page 23
Installing the driver locally (B1163w) 4 Choose USB. (B1163w only) 5 Follow the instructions on the installation window. 1. Introduction 23 - Dell B1163 | Dell Users Guide - Page 24
From the Windows 8 Start Screen • If you install the driver using the supplied software CD, V4 driver is not installed. If you want to use the V4 driver in the Desktop screen, you can download from the Dell website (www.dell.com/support). • If you want to install Dell's printer management tools - Dell B1163 | Dell Users Guide - Page 25
drive and install the driver again (see "Installing the driver locally" on page 22). From the Windows 8 Start Screen 1 Make sure that the machine is connected to your computer and powered on. 2 Click on the Uninstall Dell Printer Software tile in the Start screen. 3 Follow the instructions in the - Dell B1163 | Dell Users Guide - Page 26
2. Basic Setup This chapter provides information about the the basic setup options. • Media and tray 27 • Basic printing 37 • Basic copying 42 • Basic scanning 44 - Dell B1163 | Dell Users Guide - Page 27
meet these specifications may cause problems or require repairs. Such repairs are not covered by Dell's warranty or service agreements. • Make sure not printer may lead to overheating of the unit and, in rare cases may cause a fire. 2 1 Paper width guide 2 Tray Illustrations on this user's guide - Dell B1163 | Dell Users Guide - Page 28
tray 2 Loading paper in the tray 2 Flex or fan the edge of the paper stack to separate the pages before loading papers. Illustrations on this user's guide may differ from your machine depending on its options or models. Check your machine type (see "Front view" on page 17). 1 Open the tray and - Dell B1163 | Dell Users Guide - Page 29
paper width guide and slide it to the edge of the paper stack without causing it to bend. The settings made from the machine driver override the a label, set the paper type to Label. d Select Auto Select (or Manual Feeder) in paper source, then press OK. e Start printing in application. 5 - Dell B1163 | Dell Users Guide - Page 30
on using the manual feeding in tray • If you select Paper > Source > Manual Feeder from your printer driver, you need proper media type from the Printing preferences window > Paper tab > Paper Type (see " on page 74). • Illustrations on this user's guide may differ from your machine depending on its - Dell B1163 | Dell Users Guide - Page 31
Archive a. The available paper types for manual feeding in the tray. (●: Supported, Blank: Not supported) Traya Envelope Printing successfully on envelopes • Do not use envelopes with clasps, snaps, windows, coated lining, self- adhesive seals, or other synthetic materials. 2. Basic Setup 31 - Dell B1163 | Dell Users Guide - Page 32
extends all the way to the corner of the envelope. Labels To avoid damaging the machine, use only labels designed for use in laser printers. 1 Acceptable 2 Unacceptable • Envelopes with a peel-off adhesive strip or with more than one flap that folds over to seal must use adhesives compatible - Dell B1163 | Dell Users Guide - Page 33
paper, the printed side should be facing up with an uncurled edge at the front. If you experience problems with paper feeding, turn the paper around. Note that print quality is not guaranteed. • In the software application, set the margins to at least 6.4 mm (0.25 inches) away from the edges of the - Dell B1163 | Dell Users Guide - Page 34
. The printed pages stack on the output support, and the output support will help the printed pages to align. The printer sends output to the output tray by default documents with other unusual characteristics. Illustrations on this user's guide may differ from your machine depending on its options - Dell B1163 | Dell Users Guide - Page 35
Media and tray 7 Loading originals You can use the scanner glass to load an original for copying and scanning. 1 Lift and open the scanner lid. Illustrations on this user's guide may differ from your machine depending on its options or models. Check your machine type (see "Front view" on page 17 - Dell B1163 | Dell Users Guide - Page 36
face down on the scanner glass. Align it with the registration guide at the top left corner of the glass. • Be scanner while copying or scanning. It is harmful to eyes. 3 Close the scanner lid. • Leaving the scanner lid open while copying may affect copy quality and toner consumption. • Dust - Dell B1163 | Dell Users Guide - Page 37
" on page 139). 3 Select your machine from the Find Printer list. 8 Printing • If you are a Mac or Linux operating systems user, refer to the Advanced Guide (see "Mac printing" on page 147 or "Linux printing" on page 149). • For Windows 8 user, see "Basic printing" on page 37. The following - Dell B1163 | Dell Users Guide - Page 38
(Stop/Clear) on the 10 Opening printing preferences • The Printing Preferences window that appears in this user's guide may differ depending on the machine in use. • When you select Print from the file menu. The Print window appears. 3 Select your machine from the Find Printer. 2. Basic Setup 38 - Dell B1163 | Dell Users Guide - Page 39
as needed on each tab. 2 Enter a name for the item in the Presets input box. You can check the machine's current status pressing the Printer Status button (see "Using Dell Printer Status" on page 166). 3 Click (Add). When you save Presets, all current driver settings are saved. 2. Basic Setup 39 - Dell B1163 | Dell Users Guide - Page 40
also restore the printer driver's default settings by selecting Default Preset from the Presets drop-down list. 11 Using help Click the option you want to know on the Printing Preferences window and press F1 on your keyboard. 12 Eco printing The Eco function cuts toner - Dell B1163 | Dell Users Guide - Page 41
this machine. • The actual amount displayed is only an estimate as the actual amount may differ depending on the operating system used, computing performance, application software, connection method, media type [thickness], media size, job complexity, etc. 2. Basic Setup 41 - Dell B1163 | Dell Users Guide - Page 42
Basic copying 13 Basic copy 14 ID card copying 1 Select (copy) on the control panel. 2 Place a single document face down on the document glass (see "Loading originals" on page 35). 3 If you want to customize the copy settings including Reduce/Enlarge, Darkness, Contrast, Original Type, and - Dell B1163 | Dell Users Guide - Page 43
Basic copying 3 Place Front Side and Press [Start] appears on the display. 4 Press (Start). Your machine begins scanning the front side and shows Place Back Side and Press [Start]. 5 Turn the original over and place it on the scanner glass where arrows indicate - Dell B1163 | Dell Users Guide - Page 44
profile to a different path. • To manage profiles in Dell Printer Manager > mode > Scan to PC Settings. Switch to advanced 4 Select the option you want and press Save. 5 Scanning begins. Scanned image is saved in computer's C:\Users\users name\My Documents. The saved folder may differ, depending - Dell B1163 | Dell Users Guide - Page 45
• Ordering supplies and accessories 46 • Available supplies 47 • Available maintenance parts 48 • Installing accessories 49 • Storing the toner cartridge 50 • Redistributing toner 52 • Replacing the toner cartridge 54 • Cleaning the machine 56 • Tips for moving & storing your machine - Dell B1163 | Dell Users Guide - Page 46
from country to country. Contact your sales representatives to obtain the list of available supplies, and maintenance parts. To order Dell-authorized supplies, accessories, and maintenance parts, contact your local Dell dealer or the retailer where you purchased your machine. You can also visit www - Dell B1163 | Dell Users Guide - Page 47
and other supplies according to the specific country conditions. Dell does not recommend using non-genuine Dell toner cartridge such as refilled or remanufactured toner. Dell cannot guarantee non-genuine Dell toner cartridge's quality. Service or repair required as a result of using non-genuine - Dell B1163 | Dell Users Guide - Page 48
maintenance parts can be performed only by an authorized service provider, dealer, or the retailer where you bought specific intervals to avoid print quality and paper feed problems resulting from worn parts, see table below. The software, connecting method, media, media size and job complexity. - Dell B1163 | Dell Users Guide - Page 49
the optional devices. If you cannot use the optional devices you installed in this driver, you can set the optional devices in Device Settings to use. 1 Click the Windows Start menu. • For Windows XP/2003, select Printers and Faxes. • For Windows 2008/Vista, select Control Panel > Hardware and Sound - Dell B1163 | Dell Users Guide - Page 50
cartridge is removed from the printer, follow the instructions below to store the toner cartridge properly. • Store the cartridge inside the protective bag from the original package. • Store lying flat (not standing on end) with the same side facing up as if it were installed in the machine. • Do - Dell B1163 | Dell Users Guide - Page 51
cartridge life Estimated cartridge life (the life of the toner cartridge yield) depends on the amount of toner that print jobs require. The actual print yield may print a lot of graphics, the consumption of the toner is higher and you may need to change the cartridge more often. 3. Maintenance 51 - Dell B1163 | Dell Users Guide - Page 52
toner. Illustrations on this user's guide may differ from your machine depending on its options or models. Check your machine type (see "Front view" on page 17). • To prevent damage to the toner toner toner cartridge package. They might scratch the drum of the cartridge. • If toner - Dell B1163 | Dell Users Guide - Page 53
Redistributing toner 2 1 3. Maintenance 53 - Dell B1163 | Dell Users Guide - Page 54
user's guide may differ from your machine depending on its options or models. Check your machine type (see "Front view" on page 17). • To prevent damage to the toner water sets toner into fabric. • When opening a scan unit, hold the document feeder and scan unit together. When a toner cartridge has - Dell B1163 | Dell Users Guide - Page 55
IReplacing the toner cartridge ~''' ~''' 5-6 ~''' :. ® ~''' . I ~ 3. Maintenance 55 - Dell B1163 | Dell Users Guide - Page 56
Cleaning the machine If printing quality problems occur or if you use your machine in a machine or the surrounding area is contaminated with toner, we recommend you use a cloth or tissue dampened with water to clean it. If you use a vacuum cleaner, toner blows in the air and might be harmful to - Dell B1163 | Dell Users Guide - Page 57
problems, such as toner specks or smearing. Cleaning the inside of the machine clears and reduces these problems. • To prevent damage to the toner power switch off before cleaning the machine. • Illustrations on this user's guide may differ from your machine depending on its options or models. Check - Dell B1163 | Dell Users Guide - Page 58
Cleaning the machine 2 1 3. Maintenance 58 - Dell B1163 | Dell Users Guide - Page 59
Wait for the machine to cool down. If your machine has a power switch, turn the power switch off before cleaning the machine. • Illustrations on this user's guide may differ from your machine depending on its options or models. Check your machine type (see "Front view" on page 17). 3. Maintenance 59 - Dell B1163 | Dell Users Guide - Page 60
clean the scan unit at the start of each day and during the day as needed. • Turn the machine off and unplug the power cord. Wait for the machine to cool down. If your machine has a power switch, turn the power switch off before cleaning the machine. • Illustrations on this user's guide may - Dell B1163 | Dell Users Guide - Page 61
Cleaning the machine 3 Wipe the scanner glass until it is clean and dry. 3 1 2 1 Scanner lid 2 Scanner glass 3 White sponge sheet 4 Close the scanner lid. 3. Maintenance 61 - Dell B1163 | Dell Users Guide - Page 62
& storing your machine • When moving the machine, do not tilt or turn it upside down. Otherwise, the inside of the machine may be contaminated by toner, which can cause damage to the machine or reduce print quality. • When moving the machine, make sure at least two people are holding the machine - Dell B1163 | Dell Users Guide - Page 63
on the display screen first to solve the error.If you cannot find a solution to your problem in this chapter, refer to the Troubleshooting chapter in the Advanced Guide (see "Troubleshooting" on page 171).If you cannot find a solution in the User's Guide or the problem persists, call for service. - Dell B1163 | Dell Users Guide - Page 64
can be avoided. To avoid paper jams, refer to the following guidelines: • Ensure that the adjustable guides are positioned correctly (see "Tray overview" on page 27). • Do not remove paper from the tray only recommended print media (see "Print media specifications" on page 74). 4. Troubleshooting 64 - Dell B1163 | Dell Users Guide - Page 65
Clearing paper jams To avoid tearing the paper, pull the jammed paper out slowly and gently. 1 In tray Illustrations on this user's guide may differ from your machine depending on its options or models. Check your machine type (see "Front view" on page 17). 4. Troubleshooting 65 - Dell B1163 | Dell Users Guide - Page 66
Clearing paper jams 2 Inside the machine • The fuser area is hot. Take care when removing paper from the machine. • Illustrations on this user's guide may differ from your machine depending on its options or models. Check your machine type (see "Front view" on page 17). 4. Troubleshooting 66 - Dell B1163 | Dell Users Guide - Page 67
Clearing paper jams 2 1 4. Troubleshooting 67 - Dell B1163 | Dell Users Guide - Page 68
Clearing paper jams If you do not see the paper in this area, stop and go to next step: 4. Troubleshooting 68 - Dell B1163 | Dell Users Guide - Page 69
at the error message and its instructions from the troubleshooting part. • You also can resolve the error with the guideline from the computers's Dell Printing Status (see "Using Dell Printer Status" on page 166 ). • If the problem persists, call a service representative. LED Status Off Green - Dell B1163 | Dell Users Guide - Page 70
image area, printing interval, graphics, media and media size. Some amount of toner may remain in the cartridge even when red LED is on and the printer stops printing. b. Some LEDs may not be available depending on model or country (see "Control panel overview" on page 19). 4. Troubleshooting 70 - Dell B1163 | Dell Users Guide - Page 71
5. Appendix This chapter provides product specifications and information concerning applicable regulations. • Specifications 72 • Regulatory information 81 • Copyright 94 - Dell B1163 | Dell Users Guide - Page 72
listed below are subject to change without notice. See www.dell.com for possible changes in information. Dimension Weight Noise mode Print mode Copy mode Scan mode Operation Storage (packed) Operation Storage (packed) 110 volt models 220 volt models B1163/B1163w B1163/B1163w Less than 27 dB (A) - Dell B1163 | Dell Users Guide - Page 73
Ready mode Less than 75 W Power save modec Less than 3 W Power off moded Less than 0.5 W Wireless Module SPW-B4319S a. Sound Pressure Level, ISO 7779. Configuration tested: basic machine installation, A4 paper, simplex printing. b. See the rating label on the machine for the correct voltage - Dell B1163 | Dell Users Guide - Page 74
mm (3.87 x 7.5 inches) 105 x 241 mm (4.12 x 9.5 inches) 110 x 220 mm (4.33 x 8.66 inches) 162 x 229 mm (6.38 x 9.02 inches) Print media weight/Capacitya Tray Manual feeding in trayb 71 to 85 g/m2 (19 to 23 lbs bond) 71 to 85 g/m2 (19 to 23 lbs bond) • 150 sheets of 80 - Dell B1163 | Dell Users Guide - Page 75
paper section Refer to the Plain paper section Refer to the Plain paper section Refer to the Plain paper section Print media weight/Capacitya Tray Manual feeding in trayb 86 to 120 g/m2 (23 to 32 lbs bond) • 50 sheets of 120 g/m2 (32 lbs bond) 86 to 120 g/m2 (23 - Dell B1163 | Dell Users Guide - Page 76
to 163 g/m2 (16 to 43 lbs bond) a. Maximum capacity may differ depending on media weight, thickness, and environmental conditions. b. 1 sheet for manual feeding. c. The smoothness of the labels used in this machine is 100 to 250 (sheffield). This means the numeric level of smoothness. 5. Appendix - Dell B1163 | Dell Users Guide - Page 77
Windows® Operating system Windows® 2000 Windows® XP Windows Server® 2003 Windows Server® 2008 Windows Vista® Windows® 7 Windows Server® 2008 R2 Windows IV 1 GHz 32-bit or 64-bit processor or higher 1 GB (2 GB) • Support for DirectX® 9 graphics with 128 MB memory (to enable the Aero theme). • DVD - Dell B1163 | Dell Users Guide - Page 78
requirement for all Windows operating systems. • Users who have administrator rights can install the software. • Windows Terminal Services is compatible with your machine. • For Windows 2000, Services Pack 4 or higher is required. Mac Operating system Mac OS X 10.5 Mac OS X 10.6 Mac OS X 10.7 ~ 10 - Dell B1163 | Dell Users Guide - Page 79
Items Operating system CPU RAM Free HDD space Requirements Redhat® Enterprise Linux WS 4, 5, 6(32/64 bit) Fedora 5 ~ 15 10, 8.04, 8.10, 9.04, 9.10, 10.04, 10.10, 11.04 (32/64 bit) SuSE Linux Enterprise Desktop 10, 11 (32/64 bit) Debian 4.0, 5.0, 6.0 (32/64 bit) Pentium IV 2.4GHz (Intel Core™2) 512 - Dell B1163 | Dell Users Guide - Page 80
shows the network environments supported by the machine. Items Network interface Network operating system Network protocols Wireless security Specifications • 802.11b/g/n Wireless LAN • Windows 2000/Server 2003 /Server 2008/XP/Vista/7/Server 2008 R2/8 • Various Linux OS • Mac OS X 10.5 ~10.8 • TCP - Dell B1163 | Dell Users Guide - Page 81
considered to be hazardous. The laser system and printer are designed so there is never any human access to laser radiation above a Class I level during normal operation, user maintenance or prescribed service condition. Warning Never operate or service the printer with the protective cover removed - Dell B1163 | Dell Users Guide - Page 82
heavier than air, keep the product in a place with good ventilation. 7 Mercury Safety Contains Mercury, Dispose According to Local, State or Federal Laws.(U.S.A. only) This printer contains advanced energy conservation technology that reduces power consumption when it is not in active use. When the - Dell B1163 | Dell Users Guide - Page 83
disposal, please separate these items from other s of waste and recycle them responsibly to promote the sustainable reuse of material resources. Household users should contact either the retailer where they purchased this product, or their local government office, for details of where and how they - Dell B1163 | Dell Users Guide - Page 84
go to our website: www.dell.com/recyclingdirect Or call, ( Radio frequency emissions FCC information to the user This device complies with Part 15 of installation. This equipment generates, uses and can radiate radio frequency energy and, if not installed and used in accordance with the instructions - Dell B1163 | Dell Users Guide - Page 85
by the manufacturer responsible for compliance could void the user's authority to operate the equipment. 15 United States (8 inches) from the body when wireless devices are on. The power output of the wireless device (or devices), which may be embedded in your printer, is well below the RF exposure - Dell B1163 | Dell Users Guide - Page 86
Regulatory information Wireless devices are not user serviceable. Do not modify them in any way. Modification to a wireless device will void the authorization to use it. Contact manufacturer for service. 16 Russia only FCC Statement for Wireless LAN use: While installing and operating this - Dell B1163 | Dell Users Guide - Page 87
load placed on the telephone line, and is useful for determining whether you have "overloaded" the line. Installing several s of equipment on the same telephone line may result in problems making and receiving telephone calls, especially ringing when your line is called. The sum of all Ringer - Dell B1163 | Dell Users Guide - Page 88
void the user's authority to service dispatcher of your intentions. The dispatcher will give you further instructions your machine, you may experience transmission and reception problems with all the equipment. It is recommended that surges, we recommend that you install surge protectors for both the - Dell B1163 | Dell Users Guide - Page 89
have the following color code: • Green and Yellow B1163 Series] is in compliance with the essential requirements and other relevant provisions of R&TTE Directive 1999/5/EC. The declaration of conformity may be consulted at www.dell.com, go to Support > Download center and enter your printer (MFP - Dell B1163 | Dell Users Guide - Page 90
event of problems, you should contact the Euro QA Lab of Dell Inc. in the first instance. The product has been tested against TBR21. To assist in the the system label. The power output of the wireless device or devices that may be embedded in you printer is well below the RF exposure limits as set - Dell B1163 | Dell Users Guide - Page 91
device in, is not listed, contact your local Radio Approval agency for requirements. Wireless devices are closely regulated and use may not be allowed. The power output of the wireless device or devices that may be embedded in your printer is well below the RF exposure limits as known at this time - Dell B1163 | Dell Users Guide - Page 92
are in place and the system is fully assembled. Wireless devices are not user serviceable. Do not modify them in any way. Modification to a wireless device will void the authorization to use it. Contact manufacturer for service. Only use drivers approved for the country in which the device will be - Dell B1163 | Dell Users Guide - Page 93
Regulatory information 26 China only 5. Appendix 93 - Dell B1163 | Dell Users Guide - Page 94
Dell, the Dell logo, and Dell Toner Management System are trademarks of Dell Inc.; Microsoft, Windows, Windows Vista, Windows Server , Windows 7, and Windows touch, TrueType, Mac and Mac OS are trademarks of Apple Inc., registered in the U.S and other countries. AirPrint and the AirPrint logo are - Dell B1163 | Dell Users Guide - Page 95
User's Guide Dell B1163/B1163w AADDVVAANNCCEEDD This guide provides information about installation, advanced configuration, operation and troubleshooting on various OS environments. Some features may not be available depending on models or countries. BASIC This guide provides information - Dell B1163 | Dell Users Guide - Page 96
Web Service 161 Using Dell Printer Manager 163 Using Dell Printer Status 166 Using the Linux Unified Driver Configurator 168 5. Troubleshooting Paper feeding problems 172 Power and cable connecting problems 173 Printing problems 174 Printing quality problems 178 Copying problems 186 - Dell B1163 | Dell Users Guide - Page 97
computer using the cable. • Installation for Mac 98 • Reinstallation for Mac 99 • Installation for Linux 100 • Reinstallation for Linux 101 • If you are a Windows OS user, refer to the Basic Guide for installing the machine's driver (see "Installing the driver locally" on page 22). • Only - Dell B1163 | Dell Users Guide - Page 98
Installation for Mac 1 Make sure that the machine is connected to your computer and powered on. 2 Insert the supplied software CD into your CD/DVD drive. 10 Select USB Connected Printer on the Printer Connection Type and click Continue. 11 Click Add Printer button to select your printer and add - Dell B1163 | Dell Users Guide - Page 99
Reinstallation for Mac If the printer driver does not work properly, uninstall the driver and reinstall it. 1 Open the Applications folder > Dell > Printer Software Uninstaller. 2 To uninstall printer software, click Continue. 3 Check the program you want to delete and click Uninstall. 4 Enter the - Dell B1163 | Dell Users Guide - Page 100
You need to download Linux software packages from the Dell website to install the printer software (http://www.dell.com/support). 1 Installing the Unified Linux Driver The installation program added the Unified Driver Configurator desktop icon and the Unified Driver group to the system menu for - Dell B1163 | Dell Users Guide - Page 101
the printer driver. If you are not a super user, ask your system administrator. 3 Open Terminal program. When the Terminal screen appears, type in the following. [root@localhost root]#cd /opt/DELL/mfp/uninstall/[root@localhost uninstall]#./uninstall.sh 4 Click Next. 5 Click Finish. 1. Software - Dell B1163 | Dell Users Guide - Page 102
Machine This chapter gives you step-by-step instructions for setting up a network connected machine and software. • Useful network programs 103 • AirPrint 104 • Google Cloud Print™ 106 • Wireless network setup 109 Supported optional devices and features may differ according to - Dell B1163 | Dell Users Guide - Page 103
Useful network programs There are several programs available to setup the network settings easily in a network environment. For the network administrator especially, managing several machines on the network is possible. • Before using the programs below, set the IP address first. • Some features - Dell B1163 | Dell Users Guide - Page 104
AirPrint B1163w only AirPrint allows you to wirelessly print directly from an iPhone, iPad, or iPod touch running iOS 4.2 or later. 1 Setting up AirPrint Bonjour(mDNS) and IPP protocols are required on your machine to use the AirPrint feature. You can enable the AirPrint Web Service window opens, - Dell B1163 | Dell Users Guide - Page 105
2 Printing via AirPrint For example, the iPad manual provides these instructions: 1 Open your email, photo, web page, or document you want to print. 2 Touch the action icon( ). 3 Select your printer driver name and option menu to set up. 4 Touch Print button. Print it out. Cancelling print - Dell B1163 | Dell Users Guide - Page 106
to install the printer driver on the mobile device. Refer to the Google website (http://support.google.com/cloudprint) for more information about Google Cloud Print™. 3 Registering your Google account to the printer • Make sure the printer machine is turned on and connected to a wired or wireless - Dell B1163 | Dell Users Guide - Page 107
device you are using. You can see the application list that supports Google Cloud Print™ service. Make sure the printer is turned on and connected to a wired or wireless network that has access to the Internet. To share your printer with your freinds, please refer to the following web site - Dell B1163 | Dell Users Guide - Page 108
Google Cloud Print™ 2 Access the Google Docs™ application from your mobile device and tap on the icon to select document. 3 Tap the option button of the document that you want to print. 4 Tap the send button. 5 Tap the Cloud Print button. 6 Set the printing options if you want. 7 Tap Click here - Dell B1163 | Dell Users Guide - Page 109
network setup • Make sure your machine supports wireless networking. Wireless networking may not be available depending on the model (see "Features by models" on page 7). 5 Getting started Wireless network name and network password Wireless networks require higher security, so when an access - Dell B1163 | Dell Users Guide - Page 110
"Using the WPS button" on page 111. Windows User, see "Ad hoc via USB cable" on page 128. Mac User, see "Ad hoc via USB cable" on page 128. • If problems occur during wireless set up or driver installation, refer to the troubleshooting chapter (see "Troubleshooting" on page 133). • It is strongly - Dell B1163 | Dell Users Guide - Page 111
WPS (PBC) button or entering the PIN from the computer to connect to the access point (or wireless router) varies depending on the access point (or wireless router) you are using. Refer to the user's guide of the access point (or wireless router) you are using. • When using the WPS button to set the - Dell B1163 | Dell Users Guide - Page 112
on the display. 3 Insert the supplied CD into the CD/DVD drive and proceed to install the software following the directions on the screen. When the "Connect Printer" screen appears, select the Network (Ethernet/Wireless) connection. Connecting in PIN mode 1 Press and hold the (WPS) button on the - Dell B1163 | Dell Users Guide - Page 113
on. 3 Insert the supplied CD into the CD/DVD drive and proceed to install the software following the directions on the screen. When the "Connect Printer" screen appears, select the Network (Ethernet/Wireless) connection. Connecting in PIN mode 1 The network configuration report, including PIN, must - Dell B1163 | Dell Users Guide - Page 114
on the control panel for more than two seconds. • When the Wi-Fi network is in idle mode: The machine is immediately disconnected from the wireless network and the WPS LED turns off. • When the Wi-Fi network is being used: While the machine waits until the current job is finished - Dell B1163 | Dell Users Guide - Page 115
network setup 8 Setup using Windows Dell Printer Easy Wi-Fi Install Before Using Dell Printer Easy Wi-Fi Install, please ensure that OS of your computer should be Windows 7 and above. • Items to prepare - Access point - Wireless network-connected computer - Software CD that was provided with - Dell B1163 | Dell Users Guide - Page 116
Wireless network setup 4 Click New Printer. 5 Select Wireless and click Next. 2. Using a Network-Connected Machine 116 - Dell B1163 | Dell Users Guide - Page 117
Wireless network setup 6 Setup searches for printers. 7 Set your printer name and click Next. If the search has failed, a Connecting the Device window will be appeared. (see "Click Next." on page 121) 2. Using a Network-Connected Machine 117 - Dell B1163 | Dell Users Guide - Page 118
Wireless network setup 8 Setup is installing printer software. 9 After the installation is finished, a window asking you to print a test page appears. If you want to print a test page, click Print a test page. Otherwise, just click Next and go to - Dell B1163 | Dell Users Guide - Page 119
Access point via USB cable in Windows If you can not use Dell Printer Easy Wi-Fi Install, you may still connect the machine wirelessly to your computer using USB cable by following steps below. • Items to prepare - Access point - Network-connected computer - Software CD that was provided with your - Dell B1163 | Dell Users Guide - Page 120
Wireless network setup 4 Click New Printer . 5 Choose Wireless. 2. Using a Network-Connected Machine 120 - Dell B1163 | Dell Users Guide - Page 121
connected between the computer and machine, and follow the instructions on the window. If you cannot find the network name you want to choose, or if you want to set the wireless configuration manually, click Advanced Setting. • Enter the wireless Network Name: Enter the SSID of access point you - Dell B1163 | Dell Users Guide - Page 122
click Next. WPA authorizes and identifies users based on a secret key that changes automatically at regular intervals. WPA also uses TKIP (Temporal Key Integrity Protocol) and AES (Advanced Encryption Standard) for data encryption. 9 The window shows the wireless network settings and checks if the - Dell B1163 | Dell Users Guide - Page 123
- Software CD that was provided with your machine - The machine installed with a wireless network interface - USB cable If any of the following conditions occur, you have to setup Wi-Fi installation using a USB cable. - OS of your computer is Windows Vista or earlier. - Your PC does not support - Dell B1163 | Dell Users Guide - Page 124
click OK. 4 Select New Printer. 5 Select Wireless. 6 The software searches the wireless network. If the software has failed to search the network, check if the USB cable is connected properly between the computer and machine, and follow the instruction in the window. 2. Using a Network-Connected - Dell B1163 | Dell Users Guide - Page 125
Dell default ad hoc setting, select the last wireless network on the list, Network Name(SSID) is Dell_device and Signal is Printer Self Network. Then, click Next. If you want to use other ad hoc settings, select another wireless is shown in the Wireless Network Setting Confirm window. If it shows - Dell B1163 | Dell Users Guide - Page 126
Static is shown in the Wireless Network Setting Confirm window. If it shows DHCP if your printer supports this feature. • You can start to build Wi-Fi Direct by using Dell Printer Manager (see when the Confirm Printer Connection window appears. 12 Select the components to be installed. Click Next. - Dell B1163 | Dell Users Guide - Page 127
If you click Customize, you can choose individual components to install. 9 Enter the password and click OK. 10 Select Configuration of Wireless network on the Printer Connection Type and click Continue. 11 After searching, the window shows the wireless network devices. Select the name (SSID) of the - Dell B1163 | Dell Users Guide - Page 128
wireless network security window appears when the access point has security enabled. • You can start to build Wi-Fi Direct by using Dell Printer Software CD that was provided with your machine • A machine installed with a wireless network interface • USB cable Creating the ad hoc network in Mac - Dell B1163 | Dell Users Guide - Page 129
install. 9 Enter the password and click OK. 10 Select Wireless connection on the Printer Connection Type and click Continue. 11 After searching the wireless networks, a list of wireless select the appropriate WEP Key Index. The wireless network security window appears when the ad hoc network has - Dell B1163 | Dell Users Guide - Page 130
to the network configuration. 15 Wireless network set up is completed. After installation is finished, click Quit. After completing the wireless network connection, you need to install a machine driver to print from an application (see "Installation for Mac" on page 98). 2. Using a Network - Dell B1163 | Dell Users Guide - Page 131
• After the driver installation is complete, open Dell Printer Manager and make changes fot the Wi-Fi Direct setting. Dell Printer Manager is available for Windows and Mac OS users only. • You cannot connect to the internet through the mobile device in use WiFi Direct. • The supported protocol list - Dell B1163 | Dell Users Guide - Page 132
a new driver or configuring network settings isn't necessary - just simply install the Dell MobilePrint application, and it will automatically detect compatible Dell printers. Besides printing photos, web pages, and PDFs, scanning is also supported. If you have Dell multfunction printer, scan any - Dell B1163 | Dell Users Guide - Page 133
14 Supported devices • iOS 4.0 or higher: iPod Touch, iPhone, iPad • Android 2.1 or higher: Galaxy S, Galaxy S2, Galaxy Tab, and Android mobile devices • Windows Phone 7 or higher: Dell Focus, Omnia7, and OmniaW, and Windows mobile devices Problems during setup or driver installation Printers Not - Dell B1163 | Dell Users Guide - Page 134
the computer's subnet mask.) ▪ Gateway: 169.254.133.1 Other problems If problems occur while using the machine on a network, check the following wireless router), refer to its own user's guide. • Your computer, access point (or wireless router), or machine may not be turned on. • Check the wireless - Dell B1163 | Dell Users Guide - Page 135
to type in a user's information before connecting to the access point (or wireless router). • This machine only supports IEEE 802.11 b/g/n and Wi-Fi. Other wireless communication types (e.g., Bluetooth) are not supported. • When using the ad hoc mode, in operating systems such as Windows Vista, you - Dell B1163 | Dell Users Guide - Page 136
3. Special Features This chapter explains special copying, scanning and printing features. • Altitude adjustment 137 • Printing features 138 • Scan features 151 • The procedures in this chapter are mainly based on Windows 7. - Dell B1163 | Dell Users Guide - Page 137
of the machine above sea level. The following information will guide you on how to set your machine for the best print 1 4 Normal You can set the altitude value from Device Settings in Dell Printer Manager program. • For Windows and Mac users, see "Device Settings" on page 165. • You can also set - Dell B1163 | Dell Users Guide - Page 138
default print settings 1 Click the Windows Start menu. 2 Select Control Panel > Devices and Printers. 3 Right-click on your machine. 4 Select Printing preferences. If Printing preferences has a ▶, you can select other printer drivers connected to the selected printer. If you want to change - Dell B1163 | Dell Users Guide - Page 139
printer driver can be installed only on Windows Vista OS or higher. • Install optional memory when an XPS job does not print because the printer is out of memory. • For models that provide XPS driver on the software CD: - You can install the XPS printer driver Users. The saved folder may differ, - Dell B1163 | Dell Users Guide - Page 140
using your machine. To take advantage of the printer features provided by your printer driver, click Properties or Preferences in the application's Print window to change the print settings. The machine name, that appears in the printer properties window may differ depending on the machine in use - Dell B1163 | Dell Users Guide - Page 141
with Letter, Legal, A4, US Folio or Oficio sized paper • If your machine does not have a duplex unit, you should complete the printing job manually. The machine prints every other page of the document first. After that, a message appears on your computer. • Skip Blank Pages feature does not work - Dell B1163 | Dell Users Guide - Page 142
of the machine. This option is available only when you use the PCL/XPS printer driver. • None: Disables this feature. • Long Edge: This option is the printing. This option is not available when you use Double-sided Printing (Manual). Changes the size of a document to appear larger or smaller on the - Dell B1163 | Dell Users Guide - Page 143
Watermark Message box. You can enter up to 256 characters. The message displays in the preview window. Watermark (Editing a watermark) a To change the print settings from your software application, access Printing Preferences. b Click the Advanced tab, select Edit from the Watermark drop-down list - Dell B1163 | Dell Users Guide - Page 144
This option is available only when you use the PCL/SPL printer driver (see "Software" on page 7). An overlay is text and/or images from the Text drop-down list. Edit Overlay window appears. c In the Edit Overlay window, click Create. d In the Save As window, type a name up to eight characters in - Dell B1163 | Dell Users Guide - Page 145
source, you can also load the file when you access the Open window. After you select the file, click Open. The file appears in the Confirm Page Overlay When Printing box. If this box is checked, a message window appears each time you submit a document for printing, asking you to confirm printing - Dell B1163 | Dell Users Guide - Page 146
if you have installed the optional memory data. If you select this setting, the printer spools the document into the mass storage to print the document at a specified time. • User ID: This option is used when you need to the mass storage device (HDD) is installed. The mass storage device (HDD) is - Dell B1163 | Dell Users Guide - Page 147
differ depending on the machine in use. Except for the name, the composition of the printer properties window is similar to the following. Printing a document When you print with a Mac, you need to check the printer driver settings in each application you use. Follow the steps below to print from - Dell B1163 | Dell Users Guide - Page 148
supported (see "Variety feature" on page 8). Click the question mark on the bottom-left corner of the window and click on the topic you want to know about. A pop-up window appears with information about that option's feature, which is provided from the driver 1 From your Mac application, select - Dell B1163 | Dell Users Guide - Page 149
Linux printing Some features may not be available depending on models or options. It means that the features are not supported. 7 Change other printing options in each tab, if necessary. 8 Click Print. Automatic/manual Printer Properties Using the Printer Properties window provided by the Printers - Dell B1163 | Dell Users Guide - Page 150
features 1 Open the Unified Driver Configurator. If necessary, switch to Printers configuration. 2 Select your machine on the available printers list and click Properties. 3 The Printer Properties window appears. The following five tabs display at the top of the window: • General: Allows you to - Dell B1163 | Dell Users Guide - Page 151
Basic Guide (see "Basic scanning" on scan images or documents. - See "Scanning with Dell Scan Assistant" on page 153. • WIA: WIA stands for Windows Images Acquisition. To use this feature, your computer must be connected directly with the machine via an USB cable (see "Scanning using the WIA driver - Dell B1163 | Dell Users Guide - Page 152
by models" on page 7). You can scan and import documents at the image editing software such as Adobe Photoshop, if the software is TWAIN-compliant. Follow the steps below to scan with TWAIN-compliant software: 1 Open Dell Printer Manager (see "Using Dell Printer Manager" on page 163). 2 Select the - Dell B1163 | Dell Users Guide - Page 153
. 5 New Scan application appears. • This feature may not be available depending on model or optional goods (see "Features by models" on page 7). • For Windows, you need to install the printer software from the supplied CD/DVD. For Mac, open the Applications folder > Dell folder > DellScan Assistant - Dell B1163 | Dell Users Guide - Page 154
Scan and save your scanned image. 5 Set the scan options. 6 Click Scan. If scanning does not operate in Image Capture, update Mac OS to the latest version. 11 Mac scanning Scanning from network connected machine Scanning from USB connected machine Network or wireless If the problem continues, - Dell B1163 | Dell Users Guide - Page 155
's help. • You can also scan using TWAIN-compliant software, such as Adobe Photoshop. 4 Select the scanner on the list. 12 Linux scanning Scanning 1 Make sure that the machine is connected to your computer and powered on. 2 Double-click the Unified Driver Configurator on your desktop. 3 Click - Dell B1163 | Dell Users Guide - Page 156
with menu commands and tools to edit your scanned image. 9 Drag the pointer to set the image area to be scanned in the Preview Pane. 10 Select the option you want. 11 Scan and save your scanned image. For later use, you can save as your scan settings and add it to the Job Type - Dell B1163 | Dell Users Guide - Page 157
full use of your machine. • Accessing management tools 158 • Using Firmware update utility 159 • Using Dell Supplies Ordering Utility 160 • Using Embedded Web Service 161 • Using Dell Printer Manager 163 • Using Dell Printer Status 166 • Using the Linux Unified Driver Configurator 168 - Dell B1163 | Dell Users Guide - Page 158
menu, select Programs or All Programs. • For Windows 8, from the Charms, select Search > Apps. 3 Find Dell Printers. 4 Under Dell Printers, you can see installed management tools. 5 Click the management tool you want to use. • After installing the driver, for some management tools, you can access - Dell B1163 | Dell Users Guide - Page 159
machine by upgrading firmware. 1 From the Start menu, select Programs or All Programs > Dell Printers > your printer driver name > Firmware Update Utility. 2 Download the latest firmware. Click http://www.dell.com/support. 3 If your printer is connected with an USB cable, click USB Connected - Dell B1163 | Dell Users Guide - Page 160
from Dell: Availabe for Windows or Mac OS users only. 2 The Dell Supplies Ordering Utility window opens. 1 Double-click the Dell Supplies Ordering Utility icon on your desktop. OR From the Start menu, select Programs or All Programs > Dell Printers > your printer driver name > Dell Supplies - Dell B1163 | Dell Users Guide - Page 161
• Internet Explorer 6.0 or higher is the minimum requirement for Embedded Web Service. • Embedded Web Service explanation in this user's guide may differ from your machine depending on its options or models. • Network model only (see "Software" on page 7). 1 Click Login on the upper right of the - Dell B1163 | Dell Users Guide - Page 162
Using Embedded Web Service • Usage Counters: Shows sending emails. You can also connect to Dell website or download drivers by selecting the Link menu. • Firmware Upgrade filtering. • User Access Control: Classifies users into several groups according to each user's role. Each user's authorization, - Dell B1163 | Dell Users Guide - Page 163
Using Dell Printer Manager • Available for Windows and Mac OS users only (see "Software" on page 7). • For Windows, Internet Explorer 6.0 or higher is the minimum requirement for Dell Printer Manager. The screenshot may differ depending on operating system you are using. Dell Printer Manager is - Dell B1163 | Dell Users Guide - Page 164
Using Dell Printer Manager Printer information 2 This area gives you general information about your machine. You can check information, such as the machine's model name, IP address (or Port name), and machine status. You can view the online User's Guide. Application information Includes links - Dell B1163 | Dell Users Guide - Page 165
Using Dell Printer Manager 4 Advanced settings user interface overview The advanced user interface is intended to be device and toner related alerts. Device Settings You can configure various machine settings such as machine setup, paper, layout, emulation, network, and print information. Scan to - Dell B1163 | Dell Users Guide - Page 166
from the Dell Printer Status. Dell Printer Status is installed automatically when you install the machine software. You can also launch Dell Printer Status manually. Go to the Printing Preferences, click the Basic tab > Printer Status button. These icons appear on the Windows task bar: Toner Level - Dell B1163 | Dell Users Guide - Page 167
Using Dell Printer Status 2 Option Order Supplies 3 4 User's Guide 5 Close You can set printing job alert related settings. You can order replacement toner cartridge(s) from online. You can view the online User's Guide. Close the window. 4. Useful Management Tools 167 - Dell B1163 | Dell Users Guide - Page 168
on the desktop. You can also click the Startup Menu icon and select DELL Unified Driver > Unified Driver Configurator. 2 Click each button on the left to switch to the corresponding configuration window. 1 Printer Configuration 2 Port Configuration To use the on screen help, the Help or button - Dell B1163 | Dell Users Guide - Page 169
Using the Linux Unified Driver Configurator 7 Printers configuration Printers configuration has the two tabs: Printers and Classes. 1 Switches to Printers configuration. 2 Shows all of the installed machines. 3 Shows the status, model name, and URI of your machine. Printers tab View the current - Dell B1163 | Dell Users Guide - Page 170
Using the Linux Unified Driver Configurator Classes tab The Classes tab shows a list of available machine classes. 8 Ports configuration In this window, you can view the list of available ports, check the status of each port and release a port that is stalled in a busy state when its - Dell B1163 | Dell Users Guide - Page 171
5. Troubleshooting This chapter gives helpful information for what to do if you encounter an error. • Paper feeding problems 172 • Power and cable connecting problems 173 • Printing problems 174 • Printing quality problems 178 • Copying problems 186 • Scanning problems 187 • Operating - Dell B1163 | Dell Users Guide - Page 172
Paper feeding problems Condition Paper jams Remove excess paper from the tray. If you are printing on special materials, use the manual feeding in tray. • An incorrect type of paper is being used. Use only paper that the paper guides are against both sides of the envelopes. 5. Troubleshooting 172 - Dell B1163 | Dell Users Guide - Page 173
Power and cable connecting problems Condition The machine is not receiving power, or the connection cable between the computer and the machine is not If the machine has a press it. • Disconnect the machine's cable and reconnect it. (Power/Wakeup) button on the control, 5. Troubleshooting 173 - Dell B1163 | Dell Users Guide - Page 174
problems in Windows. installed. Install the toner cartridge (see "Replacing the toner cartridge" on page 54). • Make sure the protect cover and sheets are removed from the toner cartridge (see "Replacing the toner cartridge" on page 54). If a system error occurs, contact your service Windows printer - Dell B1163 | Dell Users Guide - Page 175
Printing problems Condition Possible cause Suggested solutions The machine does not print. The machine may be configured incorrectly. The printer driver may be incorrectly installed. Check the Printing Preferences to ensure that all of the print settings are correct. Uninstall and reinstall - Dell B1163 | Dell Users Guide - Page 176
solutions The wrong printer driver was selected. Check the application's printer selection menu to ensure that your machine is selected. The software application is malfunctioning. Try printing a job from another application. The operating system is malfunctioning. Exit Windows and reboot the - Dell B1163 | Dell Users Guide - Page 177
problems does not match. is curled. Change the printer option and try again. Go to Printing the device in the Devices and Printers. Check the Printer properties. Click the Ports tab > Devices and Printers > Right- Printers. click on your printer icon and select Printer properties) The error - Dell B1163 | Dell Users Guide - Page 178
on page 56). If these steps do not correct the problem, contact a service representative. The top half of the paper is printed lighter than the rest of the paper The toner might not adhere properly to this type of paper. • Change the printer option and try again. Go to Printing Preferences, click - Dell B1163 | Dell Users Guide - Page 179
to reject toner. Try a different kind or brand of paper. • Change the printer option and try again. Go to Printing Preferences, click the Paper tab, and set type to Thick (see "Opening printing preferences" on page 38). If these steps do not correct the problem, contact a service representative. If - Dell B1163 | Dell Users Guide - Page 180
redistribute the toner (see "Redistributing toner" on page 52). • Clean the inside of the machine (see "Cleaning the machine" on page 56). • Check the paper type and quality. • Remove the toner cartridge and install a new one (see "Replacing the toner cartridge" on page 54). 5. Troubleshooting 180 - Dell B1163 | Dell Users Guide - Page 181
toner cartridge and, install a new one (see "Replacing the toner cartridge" on page 54). • Parts of the machine may have toner on them. If the defects occur on the back of the page, the problem will likely correct itself after a few more pages. • The fusing assembly may be damaged. Contact a service - Dell B1163 | Dell Users Guide - Page 182
Printing quality problems Condition Misformed characters Suggested solutions • the paper is loaded properly. • Check the paper type and quality. • Ensure that the guides are not too tight or too loose against the paper stack. • Ensure that the paper paper 180° in the tray. 5. Troubleshooting 182 - Dell B1163 | Dell Users Guide - Page 183
not be installed properly. Remove the cartridge and reinsert it. • The toner cartridge may be defective. Remove the toner cartridge and install a new one (see "Replacing the toner cartridge" on page 54). • The machine may require repairing. Contact a service representative. 5. Troubleshooting 183 - Dell B1163 | Dell Users Guide - Page 184
. Remove the cartridge and reinsert it. • The toner cartridge may be defective. Remove the toner cartridge and install a new one (see "Replacing the toner cartridge" on page 54). If the problem persists, the machine may require repairing. Contact a service representative. 5. Troubleshooting 184 - Dell B1163 | Dell Users Guide - Page 185
machine is probably being used at an altitude of 1,000 m (3,281 ft) or above.The high altitude may affect the print quality, such as loose toner or light imaging. Change the altitude setting for your machine (see "Altitude adjustment" on page 137). 5. Troubleshooting 185 - Dell B1163 | Dell Users Guide - Page 186
guide. • The transfer roller may be dirty. Clean the inside of your machine (see "Cleaning the machine" on page 56). Blank copies print out. Ensure that the original is face down on the scanner glass or face up in the document feeder. If these steps do not correct the problem, contact a service - Dell B1163 | Dell Users Guide - Page 187
amount of memory required to analyze and reproduce the scanned image. Set your computer to the ECP printer mode through BIOS setting. It will help to increase the speed. For details about how to set BIOS, refer to your computer user's guide. Message appears on your computer screen: • There may be - Dell B1163 | Dell Users Guide - Page 188
Operating system problems 1 Common Windows problems Condition Suggested solutions "File in Use" message appears Exit all software applications. Remove all software from the startup group, then restart Windows. Reinstall the printer driver. during installation. "General Protection Fault", " - Dell B1163 | Dell Users Guide - Page 189
in Mac with Acrobat Reader 6.0 or higher, colors print incorrectly. Make sure that the resolution setting in your machine driver matches the one in Acrobat Reader. Refer to the Mac User's Guide that came with your computer for further information on Mac error messages. 5. Troubleshooting 189 - Dell B1163 | Dell Users Guide - Page 190
Operating system problems 3 Common Linux problems Condition Suggested solutions The machine does not print. • Check if the printer driver is installed in your system. Open Unified Driver Configurator and switch to the Printers tab in the Printers configuration window to look at the list of - Dell B1163 | Dell Users Guide - Page 191
is installed in your system. Open Unified Linux Driver configurator, switch to Scanners configuration, then press Drivers. Make sure that driver with a name corresponding to your machine's name is listed in the window. • Ensure the port is not busy. Since functional components of machine (printer - Dell B1163 | Dell Users Guide - Page 192
specific and may occur when several printer languages are used. Problem Possible cause Solution The PostScript file cannot be printed The PostScript driver may not be installed correctly. • Install the PostScript driver (see "Software Installation" on page 97). • Print a configuration page - Dell B1163 | Dell Users Guide - Page 193
user's guide. 802.11 802.11 is a set of standards for wireless scan some amount of the paper at once. AppleTalk AppleTalk is a proprietary suite of protocols developed by Apple, Inc for computer networking. It was included in the original Mac by the Microsoft Windows graphics subsystem (GDI), and - Dell B1163 | Dell Users Guide - Page 194
a hardware which enables the scan job. CCD Locking mechanism the printing term used for a toner usage measurement on printing. For and at the same time, a toner usage will be as much as scanning unit that will automatically feed and turn over an original sheet of paper so that the machine can scan - Dell B1163 | Dell Users Guide - Page 195
is a telephone company service which enables a user to use a single telephone line to answer several different telephone numbers. Duplex A mechanism that will automatically turn over a sheet of paper so that the machine can print (or scan) on both sides of the paper. A printer - Dell B1163 | Dell Users Guide - Page 196
(MAC)/data a card installed inside the service on your machine. FTP A File Transfer Protocol (FTP) is a commonly used protocol for exchanging files over any network that supports the TCP/IP protocol (such as the Internet or an intranet). Fuser Unit The part of a laser printer that fuses the toner - Dell B1163 | Dell Users Guide - Page 197
the parallel cable that attaches to the peripheral (for example, a printer). Intranet A private network that uses Internet Protocols, network connectivity, its employees. Sometimes the term refers only to the most visible service, the internal website. IP address An Internet Protocol (IP) address - Dell B1163 | Dell Users Guide - Page 198
can be used locally or over the Internet to hundreds of printers, and also supports access control, authentication, and encryption, making it a much more the Novell NetWare operating systems. IPX and SPX both provide connection services similar to TCP/IP, with the IPX protocol having similarities to - Dell B1163 | Dell Users Guide - Page 199
as an aid for routers trying to locate machines on large networks. MFP Multi Function Peripheral (MFP) is an office machine that includes the following functionality in one physical body, so as to have a printer, a copier, a fax, a scanner and etc. MH Modified Huffman (MH) is a compression method - Dell B1163 | Dell Users Guide - Page 200
to run various services on a PC, and the network protocols were based on the archetypal Xerox XNS stack. Today NetWare supports TCP/IP as well is a mechanism that makes a virtual image for print using a laser beam emitted from a laser printer, and it is usually green or rust colored and has a - Dell B1163 | Dell Users Guide - Page 201
printer works, meaning the number of pages a printer can produce in one minute. PRN file An interface for a device driver, this allows software to interact with the device driver Remote Authentication Dial In User Service (RADIUS) is a protocol for remote user authentication and accounting. RADIUS - Dell B1163 | Dell Users Guide - Page 202
email message to the server. SSID Service Set Identifier (SSID) is a name of a wireless local area network (WLAN). All wireless devices in a WLAN use the Toner Cartridge A kind of bottle or container used in a machine like a printer which contains toner. Toner is a powder used in laser printers and - Dell B1163 | Dell Users Guide - Page 203
Glossary TWAIN An industry standard for scanners and software. By using a TWAIN-compliant scanner with a TWAIN-compliant program, a scan can be initiated from within the program. It is an image capture API for Microsoft Windows and Apple Mac operating systems. UNC Path Uniform Naming Convention ( - Dell B1163 | Dell Users Guide - Page 204
users. A shared key, or password, is configured in the wireless access point (WAP) and any wireless laptop or desktop devices. WPA-PSK generates a unique key for each session between a wireless a wireless home network. If your wireless access point supports WPS, you can configure the wireless network - Dell B1163 | Dell Users Guide - Page 205
paper tips for avoiding paper jams 64 40 L 161 Linux common Linux problems 190 driver installation for USB cable connected 39 100, 101 5 printer properties 149 74 scanning 155 159 unifled driver configurator 168 17 linux scanning 155 loading paper in the tray1 28 10 special - Dell B1163 | Dell Users Guide - Page 206
special media N network installing environment wireless network setup n-up printing Macintosh O output support overlay printing create delete print P placing a machine adjusting the altitude postScript driver 30 30 30 80, 103 109 147 34 144 145 145 137 troubleshooting 192 preparing originals - Dell B1163 | Dell Users Guide - Page 207
life handling instructions non-Dell and refilled redistributing toner storing tray 51 50 50 52, 54 50 adjusting the width and length 27 changing the tray size 27 manual feeding 30 U understanding the status LED 69 Unix system requirements 79 USB cable driver installation 22, 25
-
 1
1 -
 2
2 -
 3
3 -
 4
4 -
 5
5 -
 6
6 -
 7
7 -
8
-
9
-
10
-
11
-
12
-
13
-
14
-
15
-
16
-
17
-
18
-
19
-
20
-
21
-
22
-
23
-
24
-
25
-
26
-
27
-
28
-
29
-
30
-
31
-
32
-
33
-
34
-
35
-
36
-
37
-
38
-
39
-
40
-
41
-
42
-
43
-
44
-
45
-
46
-
47
-
48
-
49
-
50
-
51
-
52
-
53
-
54
-
55
-
56
-
57
-
58
-
59
-
60
-
61
-
62
-
63
-
64
-
65
-
66
-
67
-
68
-
69
-
70
-
71
-
72
-
73
-
74
-
75
-
76
-
77
-
78
-
79
-
80
-
81
-
82
-
83
-
84
-
85
-
86
-
87
-
88
-
89
-
90
-
91
-
92
-
93
-
94
-
95
-
96
-
97
-
98
-
99
-
100
-
101
-
102
-
103
-
104
-
105
-
106
-
107
-
108
-
109
-
110
-
111
-
112
-
113
-
114
-
115
-
116
-
117
-
118
-
119
-
120
-
121
-
122
-
123
-
124
-
125
-
126
-
127
-
128
-
129
-
130
-
131
-
132
-
133
-
134
-
135
-
136
-
137
-
138
-
139
-
140
-
141
-
142
-
143
-
144
-
145
-
146
-
147
-
148
-
149
-
150
-
151
-
152
-
153
-
154
-
155
-
156
-
157
-
158
-
159
-
160
-
161
-
162
-
163
-
164
-
165
-
166
-
167
-
168
-
169
-
170
-
171
-
172
-
173
-
174
-
175
-
176
-
177
-
178
-
179
-
180
-
181
-
182
-
183
-
184
-
185
-
186
-
187
-
188
-
189
-
190
-
191
-
192
-
193
-
194
-
195
-
196
-
197
-
198
-
199
-
200
-
201
-
202
-
203
-
204
-
205
-
206
-
207
 |
 |

BASIC
Dell B1163/B1163w
User’s Guide
BASIC
User’s Guide
This guide provides information concerning installation, basic operation and
troubleshooting on windows.
ADVANCED
This guide provides information about installation, advanced configuration, operation and
troubleshooting on various OS environments.
Some features may not be available depending on models or countries.