Dell B1163 Dell Users Guide - Page 113
WPS PBC, Cancel, Stop/Clear, WPS button on the control panel for more than
 |
View all Dell B1163 manuals
Add to My Manuals
Save this manual to your list of manuals |
Page 113 highlights
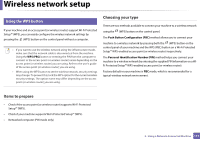
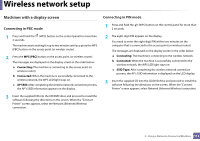
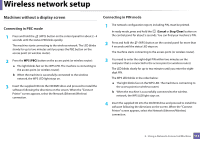
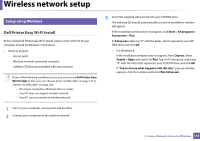
Wireless network setup Machines without a display screen Connecting in PBC mode 1 Press and hold the (WPS) button on the control panel for about 2 - 4 seconds until the status LED blinks quickly. The machine starts connecting to the wireless network. The LED blinks slowly for up to two minutes until you press the PBC button on the access point (or wireless router). 2 Press the WPS (PBC) button on the access point (or wireless router). a The light blinks fast on the WPS LED. The machine is connecting to the access point (or wireless router). b When the machine is successfully connected to the wireless network, the WPS LED light stays on. 3 Insert the supplied CD into the CD/DVD drive and proceed to install the software following the directions on the screen. When the "Connect Printer" screen appears, select the Network (Ethernet/Wireless) connection. Connecting in PIN mode 1 The network configuration report, including PIN, must be printed. In ready mode, press and hold the (Cancel or Stop/Clear) button on the control panel for about 5 seconds. You can find your machine's PIN. 2 Press and hold the (WPS) button on the control panel for more than 4 seconds until the status LED stays on. The machine starts connecting to the access point (or wireless router). 3 You need to enter the eight-digit PIN within two minutes on the computer that is connected to the access point (or wireless router). The LED blinks slowly for up to two minutes until you enter the eightdigit PIN. The WPS LED blinks in the order below: a The light blinks fast on the WPS LED. The machine is connecting to the access point (or wireless router). b When the machine is successfully connected to the wireless network, the WPS LED light stays on. 4 Insert the supplied CD into the CD/DVD drive and proceed to install the software following the directions on the screen. When the "Connect Printer" screen appears, select the Network (Ethernet/Wireless) connection. 2. Using a Network-Connected Machine 113
-
 1
1 -
2
-
3
-
4
-
5
-
6
-
7
-
8
-
9
-
10
-
11
-
12
-
13
-
14
-
15
-
16
-
17
-
18
-
19
-
20
-
21
-
22
-
23
-
24
-
25
-
26
-
27
-
28
-
29
-
30
-
31
-
32
-
33
-
34
-
35
-
36
-
37
-
38
-
39
-
40
-
41
-
42
-
43
-
44
-
45
-
46
-
47
-
48
-
49
-
50
-
51
-
52
-
53
-
54
-
55
-
56
-
57
-
58
-
59
-
60
-
61
-
62
-
63
-
64
-
65
-
66
-
67
-
68
-
69
-
70
-
71
-
72
-
73
-
74
-
75
-
76
-
77
-
78
-
79
-
80
-
81
-
82
-
83
-
84
-
85
-
86
-
87
-
88
-
89
-
90
-
91
-
92
-
93
-
94
-
95
-
96
-
97
-
98
-
99
-
100
-
101
-
102
-
103
-
104
-
105
-
106
-
107
-
 108
108 -
 109
109 -
 110
110 -
 111
111 -
 112
112 -
 113
113 -
 114
114 -
 115
115 -
 116
116 -
 117
117 -
 118
118 -
119
-
120
-
121
-
122
-
123
-
124
-
125
-
126
-
127
-
128
-
129
-
130
-
131
-
132
-
133
-
134
-
135
-
136
-
137
-
138
-
139
-
140
-
141
-
142
-
143
-
144
-
145
-
146
-
147
-
148
-
149
-
150
-
151
-
152
-
153
-
154
-
155
-
156
-
157
-
158
-
159
-
160
-
161
-
162
-
163
-
164
-
165
-
166
-
167
-
168
-
169
-
170
-
171
-
172
-
173
-
174
-
175
-
176
-
177
-
178
-
179
-
180
-
181
-
182
-
183
-
184
-
185
-
186
-
187
-
188
-
189
-
190
-
191
-
192
-
193
-
194
-
195
-
196
-
197
-
198
-
199
-
200
-
201
-
202
-
203
-
204
-
205
-
206
-
207
 |
 |
