Dell B1163 Dell Users Guide - Page 128
Ad hoc via USB cable, Items to prepare, Creating the ad hoc network in Mac
 |
View all Dell B1163 manuals
Add to My Manuals
Save this manual to your list of manuals |
Page 128 highlights
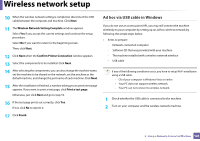
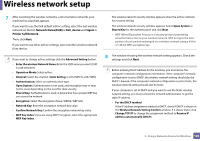
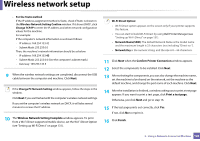
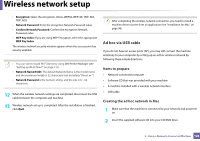
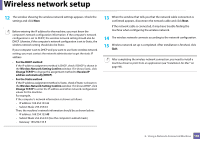
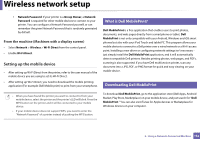
Wireless network setup • Encryption: Select the encryption. (None, WEP64, WEP128, TKIP, AES, TKIP, AES) • Network Password: Enter the encryption Network Password value. • Confirm Network Password: Confirm the encryption Network Password value. • WEP Key Index: If you are using WEP Encryption, select the appropriate WEP Key Index. The wireless network security window appears when the access point has security enabled. • You can start to build Wi-Fi Direct by using Dell Printer Manager (see "Setting up Wi-Fi Direct" on page 131). • Network Name(SSID): The default Network Name is the model name and the maximum length is 22 characters (not including "Direct-xx-"). • Network Password is the numeric string, and the size is 8 ~ 64 characters. 12 When the wireless network settings are completed, disconnect the USB cable between the computer and machine. 13 Wireless network set up is completed. After the installation is finished, click Quit. After completing the wireless network connection, you need to install a machine driver to print from an application (see "Installation for Mac" on page 98). Ad hoc via USB cable If you do not have an access point (AP), you may still connect the machine wirelessly to your computer by setting up an ad hoc wireless network by following these simple directions. Items to prepare • Network-connected computer • Software CD that was provided with your machine • A machine installed with a wireless network interface • USB cable Creating the ad hoc network in Mac 1 Make sure that the machine is connected to your network and powered on. 2 Insert the supplied software CD into your CD/DVD drive. 2. Using a Network-Connected Machine 128
-
 1
1 -
2
-
3
-
4
-
5
-
6
-
7
-
8
-
9
-
10
-
11
-
12
-
13
-
14
-
15
-
16
-
17
-
18
-
19
-
20
-
21
-
22
-
23
-
24
-
25
-
26
-
27
-
28
-
29
-
30
-
31
-
32
-
33
-
34
-
35
-
36
-
37
-
38
-
39
-
40
-
41
-
42
-
43
-
44
-
45
-
46
-
47
-
48
-
49
-
50
-
51
-
52
-
53
-
54
-
55
-
56
-
57
-
58
-
59
-
60
-
61
-
62
-
63
-
64
-
65
-
66
-
67
-
68
-
69
-
70
-
71
-
72
-
73
-
74
-
75
-
76
-
77
-
78
-
79
-
80
-
81
-
82
-
83
-
84
-
85
-
86
-
87
-
88
-
89
-
90
-
91
-
92
-
93
-
94
-
95
-
96
-
97
-
98
-
99
-
100
-
101
-
102
-
103
-
104
-
105
-
106
-
107
-
108
-
109
-
110
-
111
-
112
-
113
-
114
-
115
-
116
-
117
-
118
-
119
-
120
-
121
-
122
-
 123
123 -
 124
124 -
 125
125 -
 126
126 -
 127
127 -
 128
128 -
 129
129 -
 130
130 -
 131
131 -
 132
132 -
 133
133 -
134
-
135
-
136
-
137
-
138
-
139
-
140
-
141
-
142
-
143
-
144
-
145
-
146
-
147
-
148
-
149
-
150
-
151
-
152
-
153
-
154
-
155
-
156
-
157
-
158
-
159
-
160
-
161
-
162
-
163
-
164
-
165
-
166
-
167
-
168
-
169
-
170
-
171
-
172
-
173
-
174
-
175
-
176
-
177
-
178
-
179
-
180
-
181
-
182
-
183
-
184
-
185
-
186
-
187
-
188
-
189
-
190
-
191
-
192
-
193
-
194
-
195
-
196
-
197
-
198
-
199
-
200
-
201
-
202
-
203
-
204
-
205
-
206
-
207
 |
 |