Dell Brocade 6520 Brocade 6520 Hardware Referencce Manual - Page 42
Replacing a power supply, a finger on the locking tab.
 |
View all Dell Brocade 6520 manuals
Add to My Manuals
Save this manual to your list of manuals |
Page 42 highlights
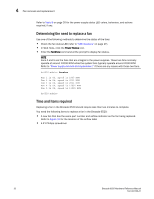
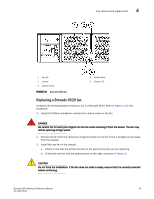
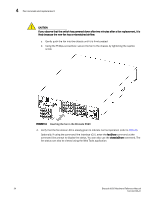
4 Power supply removal and replacement Replacing a power supply Complete the following steps to replace a power supply in a Brocade 6520. Refer to Figure 9 for this procedure. 1. To leave the Brocade 6520 in service while replacing a power supply, verify that the other power supply (the one not being replaced) has been powered on for at least four seconds and has a steady green status LED. 2. Unplug the power cord from the power supply that is being replaced. 3. Push the locking tab to the left and hold it there while using the handle on the power supply to pull it straight out and away from the chassis. Pull the power supply out slowly to avoid catching a finger on the locking tab. 4. Slide the new power supply into the chassis until the locking tab engages. CAUTION Do not force the installation. If the power supply does not slide in easily, ensure that the power supply is correctly oriented before continuing. CAUTION If you observe that the switch has powered down after two minutes after a power supply replacement, it is likely because the new power supply has a mismatched airflow. 5. Plug the power cord into the power supply to power on the unit. If the power circuit was on before the replacement, the power supply will immediately attempt to power up. 30 Brocade 6520 Hardware Reference Manual 53-1002705-01
-
 1
1 -
2
-
3
-
4
-
5
-
6
-
7
-
8
-
9
-
10
-
11
-
12
-
13
-
14
-
15
-
16
-
17
-
18
-
19
-
20
-
21
-
22
-
23
-
24
-
25
-
26
-
27
-
28
-
29
-
30
-
31
-
32
-
33
-
34
-
35
-
36
-
 37
37 -
 38
38 -
 39
39 -
 40
40 -
 41
41 -
 42
42 -
 43
43 -
 44
44 -
 45
45 -
 46
46 -
 47
47 -
48
-
49
-
50
-
51
-
52
-
53
-
54
-
55
-
56
-
57
-
58
-
59
-
60
-
61
-
62
-
63
-
64
-
65
-
66
-
67
-
68
-
69
-
70
 |
 |