Dell Brocade 6520 Brocade 6520 Hardware Referencce Manual - Page 45
Replacing a Brocade 6520 fan,
 |
View all Dell Brocade 6520 manuals
Add to My Manuals
Save this manual to your list of manuals |
Page 45 highlights
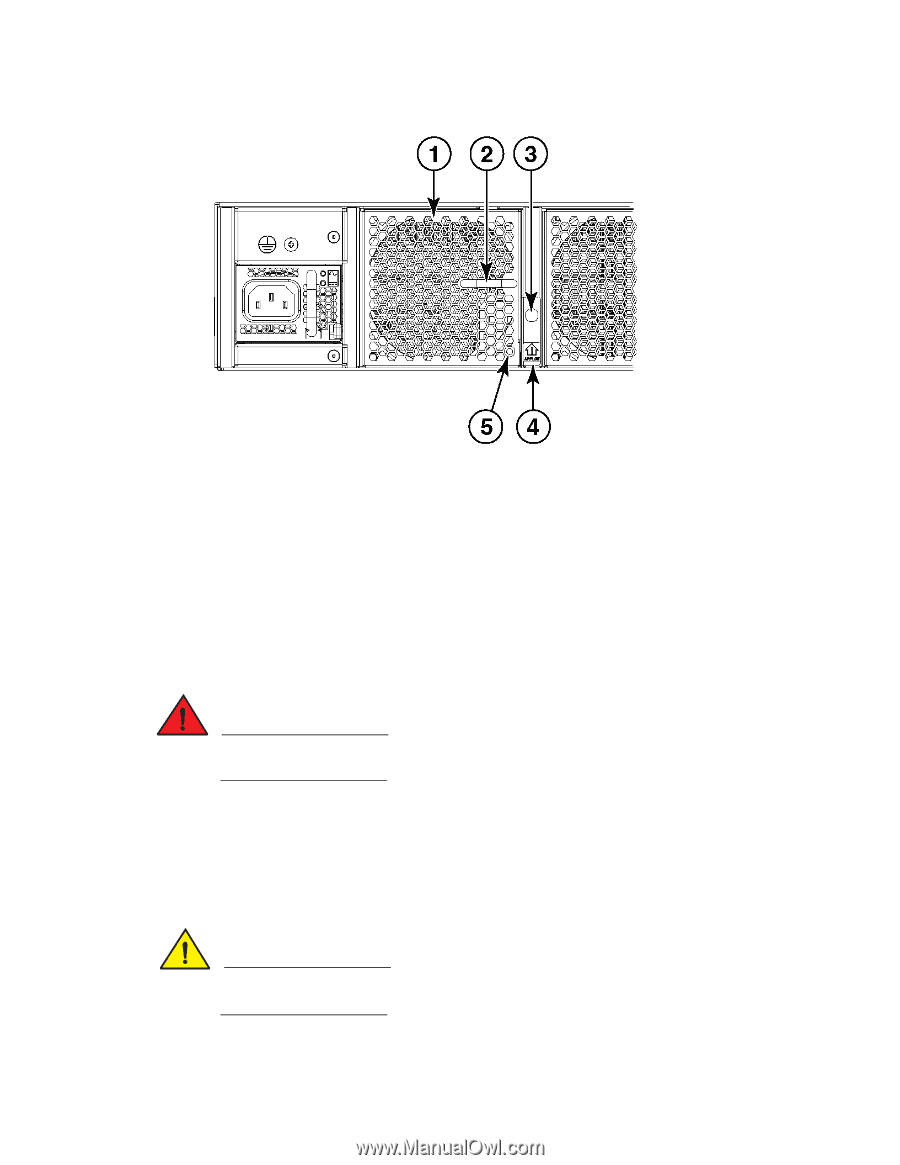
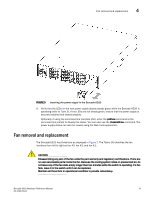
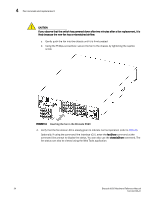
Fan removal and replacement 4 1 Fan #3 2 Handle 3 Captive screw FIGURE 10 Brocade 6520 fan 4 Airflow label 5 Status LED Replacing a Brocade 6520 fan Complete the following steps to replace a fan in a Brocade 6520. Refer to Figure 11 for this procedure. 1. Using the Phillips screwdriver, unscrew the captive screw on the fan. DANGER Be careful not to insert your fingers into the fan while removing it from the device. The fan may still be spinning at high speed. 2. Remove the fan from the chassis by using the handle on the fan to pull it straight out and away from the chassis. 3. Install the new fan in the chassis: a. Check to see that the airflow direction is the same as the fan you are replacing. b. Orient the new fan with the captive screw on the right, as shown in Figure 10. CAUTION Do not force the installation. If the fan does not slide in easily, ensure that it is correctly oriented before continuing. Brocade 6520 Hardware Reference Manual 33 53-1002705-01
-
 1
1 -
2
-
3
-
4
-
5
-
6
-
7
-
8
-
9
-
10
-
11
-
12
-
13
-
14
-
15
-
16
-
17
-
18
-
19
-
20
-
21
-
22
-
23
-
24
-
25
-
26
-
27
-
28
-
29
-
30
-
31
-
32
-
33
-
34
-
35
-
36
-
37
-
38
-
39
-
 40
40 -
 41
41 -
 42
42 -
 43
43 -
 44
44 -
 45
45 -
 46
46 -
 47
47 -
 48
48 -
 49
49 -
 50
50 -
51
-
52
-
53
-
54
-
55
-
56
-
57
-
58
-
59
-
60
-
61
-
62
-
63
-
64
-
65
-
66
-
67
-
68
-
69
-
70
 |
 |