Dell FC4500 Reference Guide - Page 59
Locate the slot where you want to install the new or replacement, disk module.
 |
View all Dell FC4500 manuals
Add to My Manuals
Save this manual to your list of manuals |
Page 59 highlights
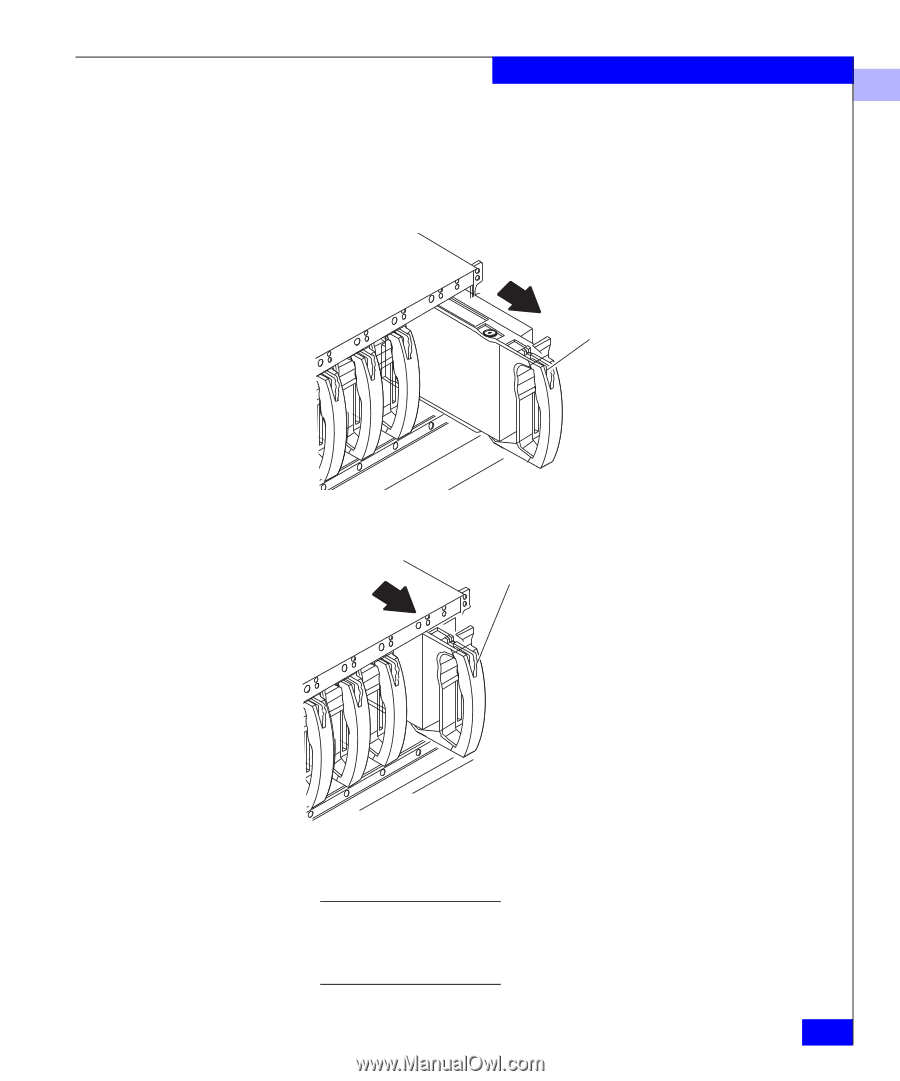
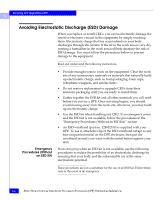
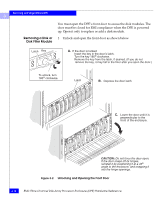
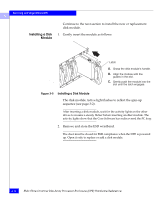
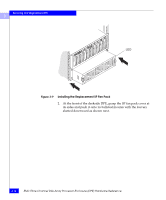
Servicing and Upgrading a DPE 3 2. Locate the slot where you want to install the new or replacement disk module. 3. Remove the disk or disk filler module from the slot as shown below. Latch A. Grasp the filler module handle so your thumb is on the latch. B. Push the latch, and pull the module from its slot. Figure 3-3 Removing a Disk Filler Module Latch A. Check the light. B. Grasp the disk module's handle so your thumb is on the latch. C. If the active light is on steadily, push the latch, and slowly pull the module about 3 cm (1 in) from its slot. Wait 30 seconds for the disk to stop spinning. Then remove the module. If the active light is off or mostly off, you do not need to wait for the disk to stop spinning. Push the latch, and slowly pull the module from its slot. Figure 3-4 Removing a Disk Module After removing a disk module, wait for the activity lights on the other disk modules to resume a steady flicker before removing another disk module. The activity lights show that the Core Software has rediscovered the FC loop. Replacing or Adding a Disk Module 3-11
-
 1
1 -
2
-
3
-
4
-
5
-
6
-
7
-
8
-
9
-
10
-
11
-
12
-
13
-
14
-
15
-
16
-
17
-
18
-
19
-
20
-
21
-
22
-
23
-
24
-
25
-
26
-
27
-
28
-
29
-
30
-
31
-
32
-
33
-
34
-
35
-
36
-
37
-
38
-
39
-
40
-
41
-
42
-
43
-
44
-
45
-
46
-
47
-
48
-
49
-
50
-
51
-
52
-
53
-
 54
54 -
 55
55 -
 56
56 -
 57
57 -
 58
58 -
 59
59 -
 60
60 -
 61
61 -
 62
62 -
 63
63 -
 64
64 -
65
-
66
-
67
-
68
-
69
-
70
-
71
-
72
-
73
-
74
-
75
-
76
-
77
-
78
-
79
-
80
-
81
-
82
-
83
-
84
-
85
-
86
-
87
-
88
-
89
-
90
-
91
-
92
-
93
-
94
-
95
-
96
-
97
-
98
-
99
-
100
-
101
-
102
-
103
-
104
-
105
-
106
-
107
-
108
-
109
-
110
 |
 |