Dell Latitude E6400 XFR Service Manual - Page 41
Keyboard - keyboard replacement
 |
View all Dell Latitude E6400 XFR manuals
Add to My Manuals
Save this manual to your list of manuals |
Page 41 highlights
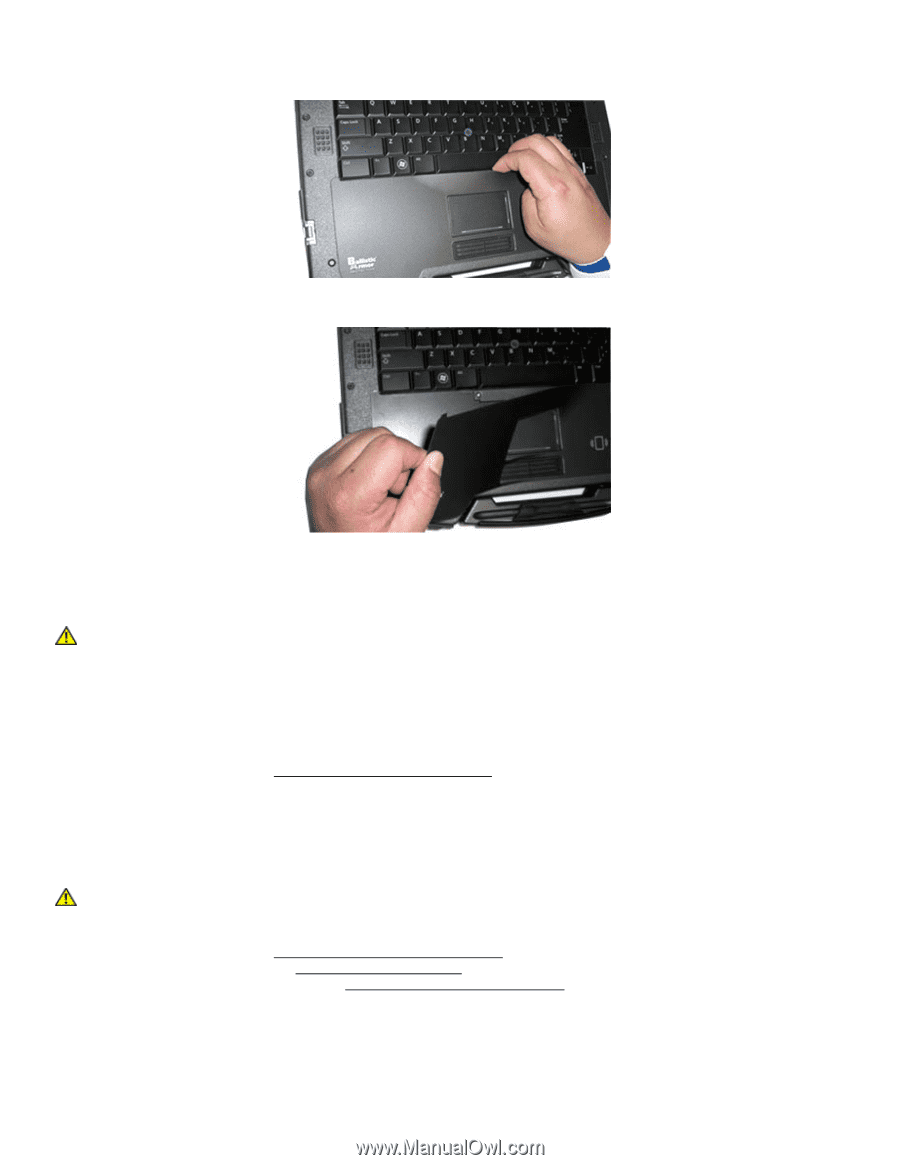
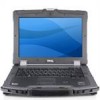
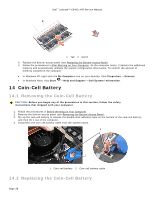
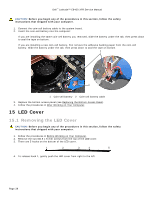
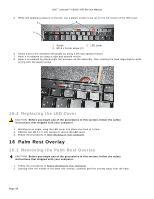
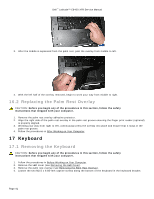
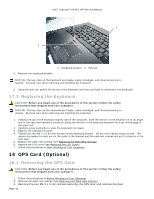
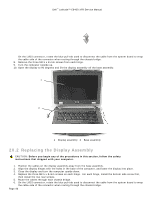
Dell™ Latitude™ E6400 XFR Service Manual 3. After the middle is separated from the palm rest, peel the overlay from middle to left. 4. With the left half of the overlay removed, begin to work your way from middle to right. 16.2 Replacing the Palm Rest Overlay CAUTION: Before you begin any of the procedures in this section, follow the safety instructions that shipped with your computer. 1. Remove the palm rest overlay adhesive protector. 2. Align the right side of the palm rest overlay in the palm rest groove ensuring the finger print reader (optional) is properly aligned. 3. Working your way from right to left, continuously press the overlay into place and ensure that it stays in the palm rest groove. 4. Follow the procedures in After Working on Your Computer. 17 Keyboard 17.1 Removing the Keyboard CAUTION: Before you begin any of the procedures in this section, follow the safety instructions that shipped with your computer. 1. Follow the procedures in Before Working on Your Computer. 2. Remove the LED cover (see Removing the LED Cover). 3. Remove the palm rest overlay (see Removing the Palm Rest Overlay). 4. Loosen the two M2.5 x 9.85-mm captive screws along the bottom of the keyboard in the keyboard bracket. Page 41
-
 1
1 -
2
-
3
-
4
-
5
-
6
-
7
-
8
-
9
-
10
-
11
-
12
-
13
-
14
-
15
-
16
-
17
-
18
-
19
-
20
-
21
-
22
-
23
-
24
-
25
-
26
-
27
-
28
-
29
-
30
-
31
-
32
-
33
-
34
-
35
-
 36
36 -
 37
37 -
 38
38 -
 39
39 -
 40
40 -
 41
41 -
 42
42 -
 43
43 -
 44
44 -
 45
45 -
 46
46 -
47
-
48
-
49
-
50
-
51
-
52
-
53
-
54
-
55
-
56
-
57
-
58
-
59
-
60
-
61
-
62
-
63
-
64
-
65
-
66
-
67
-
68
-
69
-
70
-
71
-
72
-
73
-
74
 |
 |