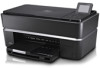
Dell P703w All In One Photo Printer Dell Photo P703w All-In-One Printer User's - Page 20
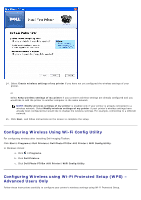
Arrow, Select, At your computer, Wi-Fi Config Utility, Drivers and Utilities
 |
View all Dell P703w All In One Photo Printer manuals
Add to My Manuals
Save this manual to your list of manuals |
Page 20 highlights
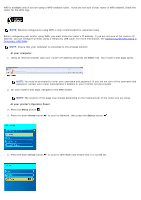
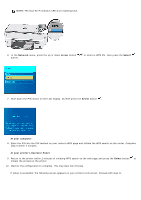
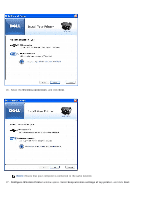
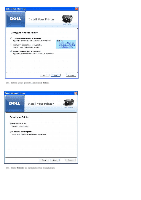
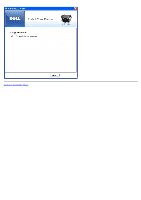
If setup is unsuccessful or times out, wait for a few minutes and repeat steps 5-10. NOTE: Your printer's internal wireless antenna is located on the right side of the printer close to the operator panel. Move the printer closer to the router with the printer's operator panel closer to the router for a better wireless signal. 11. Wait for the Wi-Fi LED on the printer to stop flashing and turn solid blue. This may take few minutes. 12. Press the up or down Arrow button to scroll to Status, then press the Select button . NOTE: Ensure that the printer shows the correct SSID and that it has been assigned an IP address (i.e. NOT 0.0.0.0). If the printer IP address has not been assigned restart the printer and re-check. If the IP address still is not assigned, repeat from step 5. At your computer: 13. Return to your computer and close the router's web page. Proceed from step 14 to install the printer drivers on your computer. 14. Insert the Drivers and Utilities CD if you have not already done so. NOTE: If you have already installed your printer on your computer, launch the installed Wi-Fi Config Utility program. Skip to step 16. NOTE: If you do not have your Drivers and Utilities CD, you can download the appropriate software from support.dell.com . 15. Follow the on-screen instructions until you reach the below screen. By default the USB connection option is selected.
-
 1
1 -
2
-
3
-
4
-
5
-
6
-
7
-
8
-
9
-
10
-
11
-
12
-
13
-
14
-
 15
15 -
 16
16 -
 17
17 -
 18
18 -
 19
19 -
 20
20 -
 21
21 -
 22
22 -
 23
23 -
 24
24 -
 25
25 -
26
-
27
-
28
-
29
-
30
-
31
-
32
-
33
-
34
-
35
-
36
-
37
-
38
-
39
-
40
-
41
-
42
-
43
-
44
-
45
-
46
-
47
-
48
-
49
-
50
-
51
-
52
-
53
-
54
-
55
-
56
-
57
-
58
-
59
-
60
-
61
-
62
-
63
-
64
-
65
-
66
-
67
-
68
-
69
-
70
-
71
-
72
-
73
-
74
-
75
-
76
-
77
-
78
-
79
-
80
-
81
-
82
-
83
-
84
-
85
-
86
-
87
-
88
-
89
-
90
-
91
-
92
-
93
-
94
-
95
-
96
-
97
-
98
-
99
-
100
-
101
-
102
-
103
-
104
-
105
 |
 |
