Dell P703w All In One Photo Printer Dell Photo P703w All-In-One Printer User's - Page 26
Maintenance: Dell Photo P703w All-In-One Printer User's Guide, Cleaning the Scanner Glass - cartridges
 |
View all Dell P703w All In One Photo Printer manuals
Add to My Manuals
Save this manual to your list of manuals |
Page 26 highlights
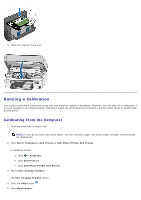
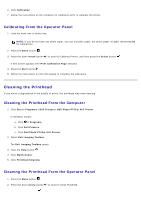
Back to Contents Page Maintenance Dell™ Photo P703w All-In-One Printer User's Guide Cleaning the Scanner Glass Cleaning the Scanner Lid Formatting a Memory Card Printing a Diagnostic Sheet Checking Ink Levels Replacing Ink Cartridges Running a Calibration Cleaning the Printhead Replacing the Printhead Disabling the Upgrade Upgrading the Firmware Dell™ ink cartridges are available through Dell. You can order more ink online at www.dell.com/supplies or by phone. It is recommended that you use Dell ink cartridges for your printer. Dell does not provide warranty coverage for problems caused by using accessories, parts, or components not supplied by Dell. Cleaning the Scanner Glass 1. Turn off the printer and unplug it from the wall outlet. 2. Lift the scanner lid. 3. Clean the glass with a soft cloth or sponge slightly moistened with a nonabrasive glass cleaner. NOTICE: Do not use abrasives, acetone, benzene, or carbon tetrachloride on the glass, since they can damage it. Do not place or spray liquid directly on the glass. The liquid might seep under the glass and damage the device. 4. Dry the glass with a lint free cloth. Cleaning the Scanner Lid 1. Turn off the printer and unplug it from the wall outlet. 2. Lift the scanner lid. 3. Clean the lid underside with a soft cloth or sponge slightly moistened with a mild soap and warm water. 4. Wipe the underside gently to loosen the debris. 5. Dry the underside with a chamois or soft cloth. NOTICE: Do not use paper-based wipes, as these might scratch the underside. 6. If further cleaning is needed, repeat the previous steps using isopropyl (rubbing) alcohol and wipe the underside thoroughly with a damp cloth to remove any residual alcohol.
-
 1
1 -
2
-
3
-
4
-
5
-
6
-
7
-
8
-
9
-
10
-
11
-
12
-
13
-
14
-
15
-
16
-
17
-
18
-
19
-
20
-
 21
21 -
 22
22 -
 23
23 -
 24
24 -
 25
25 -
 26
26 -
 27
27 -
 28
28 -
 29
29 -
 30
30 -
 31
31 -
32
-
33
-
34
-
35
-
36
-
37
-
38
-
39
-
40
-
41
-
42
-
43
-
44
-
45
-
46
-
47
-
48
-
49
-
50
-
51
-
52
-
53
-
54
-
55
-
56
-
57
-
58
-
59
-
60
-
61
-
62
-
63
-
64
-
65
-
66
-
67
-
68
-
69
-
70
-
71
-
72
-
73
-
74
-
75
-
76
-
77
-
78
-
79
-
80
-
81
-
82
-
83
-
84
-
85
-
86
-
87
-
88
-
89
-
90
-
91
-
92
-
93
-
94
-
95
-
96
-
97
-
98
-
99
-
100
-
101
-
102
-
103
-
104
-
105
 |
 |