Dell Vostro 2510 Service Manual - Page 37
Replacing the Keyboard
 |
View all Dell Vostro 2510 manuals
Add to My Manuals
Save this manual to your list of manuals |
Page 37 highlights
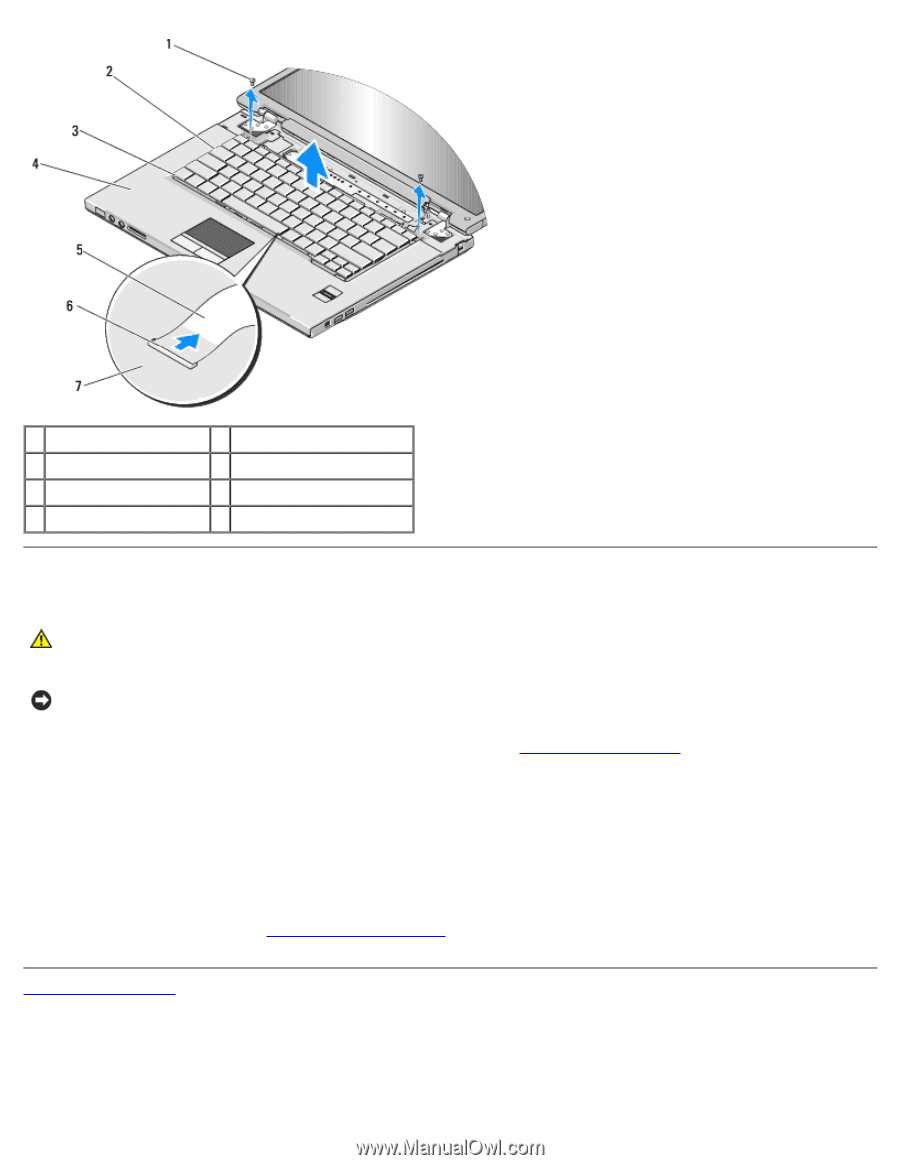
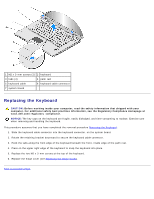
1 M2 x 3-mm screws (2) 2 keyboard 3 tabs (4) 4 palm rest 5 keyboard cable 6 keyboard cable connector 7 system board Replacing the Keyboard CAUTION: Before working inside your computer, read the safety information that shipped with your computer. For additional safety best practices information, see the Regulatory Compliance Homepage at www.dell.com/regulatory_compliance. NOTICE: The key caps on the keyboard are fragile, easily dislodged, and time-consuming to replace. Exercise care when removing and handling the keyboard. This procedure assumes that you have completed the removal procedure Removing the Keyboard. 1. Slide the keyboard cable connector into the keyboard connector. on the system board. 2. Rotate the retaining bracket downward to secure the keyboard cable connector. 3. Hook the tabs along the front edge of the keyboard beneath the front- inside edge of the palm rest. 4. Press on the upper right edge of the keyboard to snap the keyboard into place. 5. Replace the two M2 x 3-mm screws at the top of the keyboard. 6. Replace the hinge cover (see Replacing the Hinge Cover). Back to Contents Page
-
 1
1 -
2
-
3
-
4
-
5
-
6
-
7
-
8
-
9
-
10
-
11
-
12
-
13
-
14
-
15
-
16
-
17
-
18
-
19
-
20
-
21
-
22
-
23
-
24
-
25
-
26
-
27
-
28
-
29
-
30
-
31
-
 32
32 -
 33
33 -
 34
34 -
 35
35 -
 36
36 -
 37
37 -
 38
38 -
 39
39 -
 40
40 -
 41
41 -
 42
42 -
43
-
44
-
45
-
46
-
47
-
48
-
49
-
50
-
51
-
52
-
53
-
54
-
55
-
56
-
57
-
58
-
59
-
60
-
61
-
62
-
63
-
64
-
65
-
66
-
67
-
68
-
69
-
70
-
71
-
72
 |
 |