Dell W5300n Dell™ Workgroup Laser Printer W5300 User's Guide - Page 146

Accessing jam areas, Lower front door down when envelope feeder is installed
Page 146 highlights

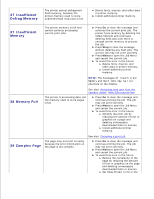
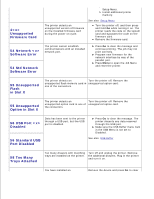
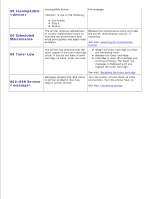
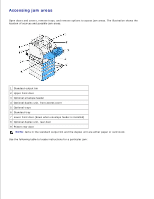
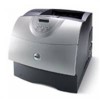
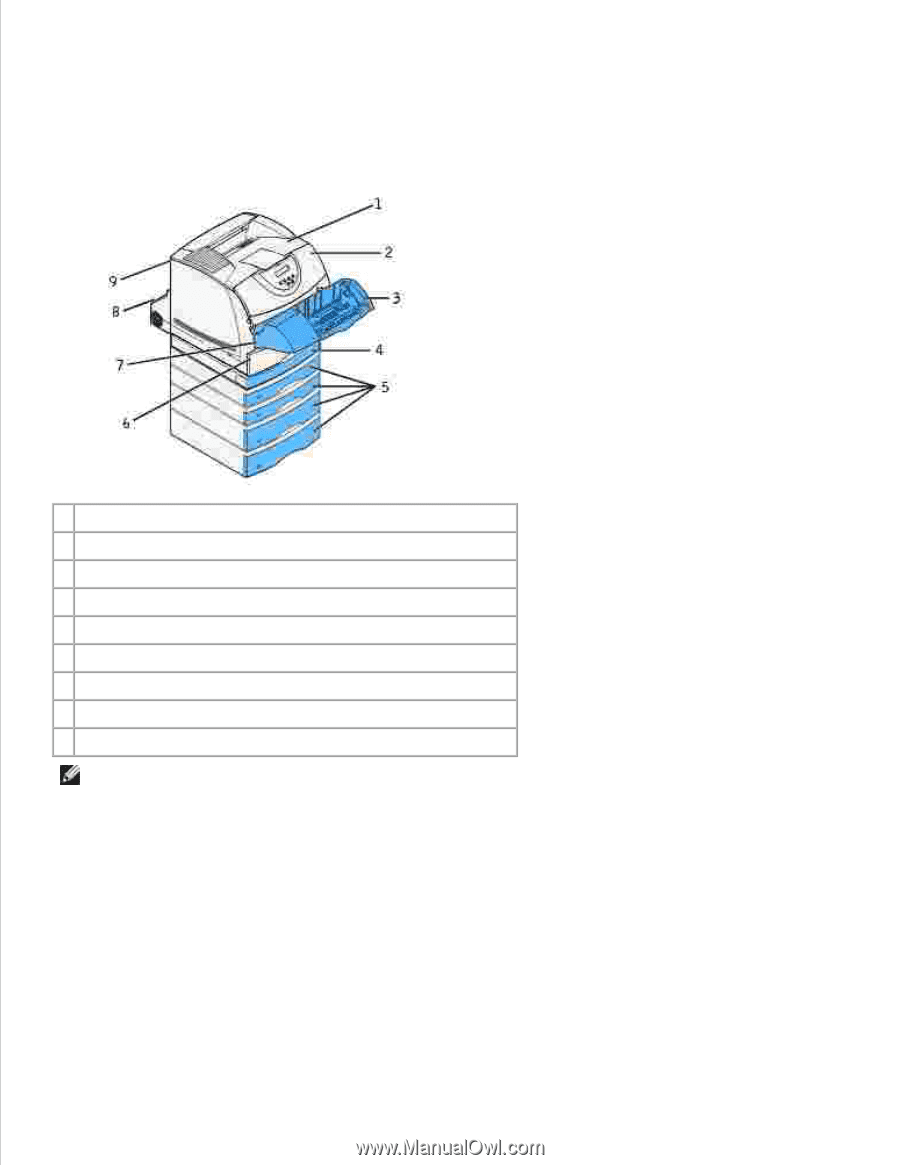
Accessing jam areas Open doors and covers, remove trays, and remove options to access jam areas. The illustration shows the location of sources and possible jam areas. 1 Standard output bin 2 Upper front door 3 Optional envelope feeder 4 Optional duplex unit, front access cover 5 Optional trays 6 Standard tray 7 Lower front door (down when envelope feeder is installed) 8 Optional duplex unit, rear door 9 Printer rear door NOTE: Jams in the standard output bin and the duplex unit are either paper or card stock. Use the following table to locate instructions for a particular jam:
  • 1
  • 2
  • 3
  • 4
  • 5
  • 6
  • 7
  • 8
  • 9
  • 10
  • 11
  • 12
  • 13
  • 14
  • 15
  • 16
  • 17
  • 18
  • 19
  • 20
  • 21
  • 22
  • 23
  • 24
  • 25
  • 26
  • 27
  • 28
  • 29
  • 30
  • 31
  • 32
  • 33
  • 34
  • 35
  • 36
  • 37
  • 38
  • 39
  • 40
  • 41
  • 42
  • 43
  • 44
  • 45
  • 46
  • 47
  • 48
  • 49
  • 50
  • 51
  • 52
  • 53
  • 54
  • 55
  • 56
  • 57
  • 58
  • 59
  • 60
  • 61
  • 62
  • 63
  • 64
  • 65
  • 66
  • 67
  • 68
  • 69
  • 70
  • 71
  • 72
  • 73
  • 74
  • 75
  • 76
  • 77
  • 78
  • 79
  • 80
  • 81
  • 82
  • 83
  • 84
  • 85
  • 86
  • 87
  • 88
  • 89
  • 90
  • 91
  • 92
  • 93
  • 94
  • 95
  • 96
  • 97
  • 98
  • 99
  • 100
  • 101
  • 102
  • 103
  • 104
  • 105
  • 106
  • 107
  • 108
  • 109
  • 110
  • 111
  • 112
  • 113
  • 114
  • 115
  • 116
  • 117
  • 118
  • 119
  • 120
  • 121
  • 122
  • 123
  • 124
  • 125
  • 126
  • 127
  • 128
  • 129
  • 130
  • 131
  • 132
  • 133
  • 134
  • 135
  • 136
  • 137
  • 138
  • 139
  • 140
  • 141
  • 142
  • 143
  • 144
  • 145
  • 146
  • 147
  • 148
  • 149
  • 150
  • 151
  • 152
  • 153
  • 154
  • 155
  • 156
  • 157
  • 158
  • 159
  • 160
  • 161
  • 162
  • 163
  • 164
  • 165
  • 166
  • 167
  • 168
  • 169
  • 170
  • 171
  • 172
  • 173
  • 174
  • 175
  • 176
  • 177
  • 178
  • 179
  • 180
  • 181
  • 182
  • 183
  • 184
  • 185
  • 186
  • 187
  • 188
  • 189
  • 190
  • 191
  • 192
  • 193
  • 194
  • 195
  • 196
  • 197
  • 198
  • 199
  • 200
  • 201
  • 202
  • 203
  • 204
  • 205
  • 206
  • 207
  • 208
  • 209
  • 210
  • 211
  • 212
  • 213
  • 214
  • 215
  • 216
  • 217
  • 218
  • 219
  • 220
  • 221
  • 222
  • 223
  • 224
  • 225
  • 226
  • 227
  • 228
  • 229
  • 230
  • 231
  • 232

Accessing jam areas
Open doors and covers, remove trays, and remove options to access jam areas. The illustration shows the
location of sources and possible jam areas.
1
Standard output bin
2
Upper front door
3
Optional envelope feeder
4
Optional duplex unit, front access cover
5
Optional trays
6
Standard tray
7
Lower front door (down when envelope feeder is installed)
8
Optional duplex unit, rear door
9
Printer rear door
NOTE:
Jams in the standard output bin and the duplex unit are either paper or card stock.
Use the following table to locate instructions for a particular jam: