Epson 410W User's Guide - Page 101
Using a Browser to Monitor the Projector
 |
UPC - 010343873407
View all Epson 410W manuals
Add to My Manuals
Save this manual to your list of manuals |
Page 101 highlights
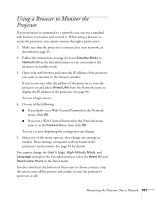
Using a Browser to Monitor the Projector If your projector is connected to a network, you can use a standard web browser to monitor and control it. When using a browser to access the projector, you cannot connect through a proxy server. 1. Make sure that the projector is connected to your network, as described on page 95. 2. Follow the instructions on page 62 to set Standby Mode to Network On in the Extended menu so you can monitor the projector in standby mode. 3. Open your web browser and enter the IP address of the projector you want to monitor in the browser window. If you're not sure what the address of the projector is, turn the projector on and select Wired LAN from the Network menu to display the IP address of the projector. See page 96. You see a login screen. 4. Do one of the following: ■ If you didn't set a Web Control Password in the Network menu, click OK. ■ If you set a Web Control Password in the Network menu, enter it in the Password box, then click OK. You see a screen displaying the settings you can change. 5. Select one of the menu options, then change any settings as needed. These settings correspond to those found in the projector's menu system. See page 54 for details. You cannot change the User's Logo, High Altitude Mode, and Language settings in the Extended menu or select the Reset All and Reset Lamp Hours in the Reset menu. Use the controls at the bottom of the screen to choose a source, stop the action, turn off the picture and sound, or turn the projector's power on or off. Monitoring the Projector Over a Network 101
-
 1
1 -
2
-
3
-
4
-
5
-
6
-
7
-
8
-
9
-
10
-
11
-
12
-
13
-
14
-
15
-
16
-
17
-
18
-
19
-
20
-
21
-
22
-
23
-
24
-
25
-
26
-
27
-
28
-
29
-
30
-
31
-
32
-
33
-
34
-
35
-
36
-
37
-
38
-
39
-
40
-
41
-
42
-
43
-
44
-
45
-
46
-
47
-
48
-
49
-
50
-
51
-
52
-
53
-
54
-
55
-
56
-
57
-
58
-
59
-
60
-
61
-
62
-
63
-
64
-
65
-
66
-
67
-
68
-
69
-
70
-
71
-
72
-
73
-
74
-
75
-
76
-
77
-
78
-
79
-
80
-
81
-
82
-
83
-
84
-
85
-
86
-
87
-
88
-
89
-
90
-
91
-
92
-
93
-
94
-
95
-
 96
96 -
 97
97 -
 98
98 -
 99
99 -
 100
100 -
 101
101 -
 102
102 -
 103
103 -
 104
104 -
 105
105 -
 106
106 -
107
-
108
-
109
-
110
-
111
-
112
-
113
-
114
-
115
-
116
-
117
-
118
 |
 |