Epson 410W User's Guide - Page 57
component, composite, and S-Video input only., For standard sRGB computer displays the default
 |
UPC - 010343873407
View all Epson 410W manuals
Add to My Manuals
Save this manual to your list of manuals |
Page 57 highlights
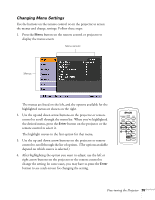
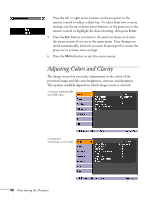
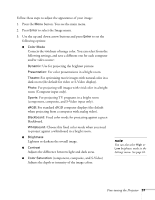
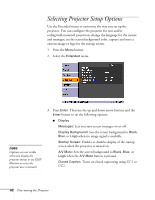
Follow these steps to adjust the appearance of your image: 1. Press the Menu button. You see the main menu. 2. Press Enter to select the Image menu. 3. Use the up and down arrow buttons and press Enter to set the following options: ■ Color Mode Corrects the vividness of image color. You can select from the following settings, and save a different one for each computer and/or video source: Dynamic: Use for projecting the brightest picture. Presentation: For color presentations in a bright room. Theatre: For optimizing movie images with natural color in a dark room (the default for video or S-Video display). Photo: For projecting still images with vivid color in a bright room (Computer input only). Sports: For projecting TV programs in a bright room (component, composite, and S-Video input only). sRGB: For standard sRGB computer displays (the default when projecting from a computer with analog video). Blackboard: Fixed color mode for projecting against a green blackboard. Whiteboard: Choose this fixed color mode when you need to project against a whiteboard in a bright room. ■ Brightness Lightens or darkens the overall image. ■ Contrast Adjusts the difference between light and dark areas. ■ Color Saturation (component, composite, and S-Video) Adjusts the depth or intensity of the image colors. note You can also select High or Low brightness mode in the Settings menu. See page 61. Fine-tuning the Projector 57
-
 1
1 -
2
-
3
-
4
-
5
-
6
-
7
-
8
-
9
-
10
-
11
-
12
-
13
-
14
-
15
-
16
-
17
-
18
-
19
-
20
-
21
-
22
-
23
-
24
-
25
-
26
-
27
-
28
-
29
-
30
-
31
-
32
-
33
-
34
-
35
-
36
-
37
-
38
-
39
-
40
-
41
-
42
-
43
-
44
-
45
-
46
-
47
-
48
-
49
-
50
-
51
-
 52
52 -
 53
53 -
 54
54 -
 55
55 -
 56
56 -
 57
57 -
 58
58 -
 59
59 -
 60
60 -
 61
61 -
 62
62 -
63
-
64
-
65
-
66
-
67
-
68
-
69
-
70
-
71
-
72
-
73
-
74
-
75
-
76
-
77
-
78
-
79
-
80
-
81
-
82
-
83
-
84
-
85
-
86
-
87
-
88
-
89
-
90
-
91
-
92
-
93
-
94
-
95
-
96
-
97
-
98
-
99
-
100
-
101
-
102
-
103
-
104
-
105
-
106
-
107
-
108
-
109
-
110
-
111
-
112
-
113
-
114
-
115
-
116
-
117
-
118
 |
 |