Epson 410W User's Guide - Page 68
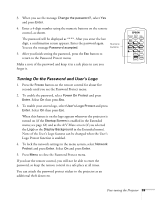
Setting a Password, button or when no image signal is available, select
 |
UPC - 010343873407
View all Epson 410W manuals
Add to My Manuals
Save this manual to your list of manuals |
Page 68 highlights
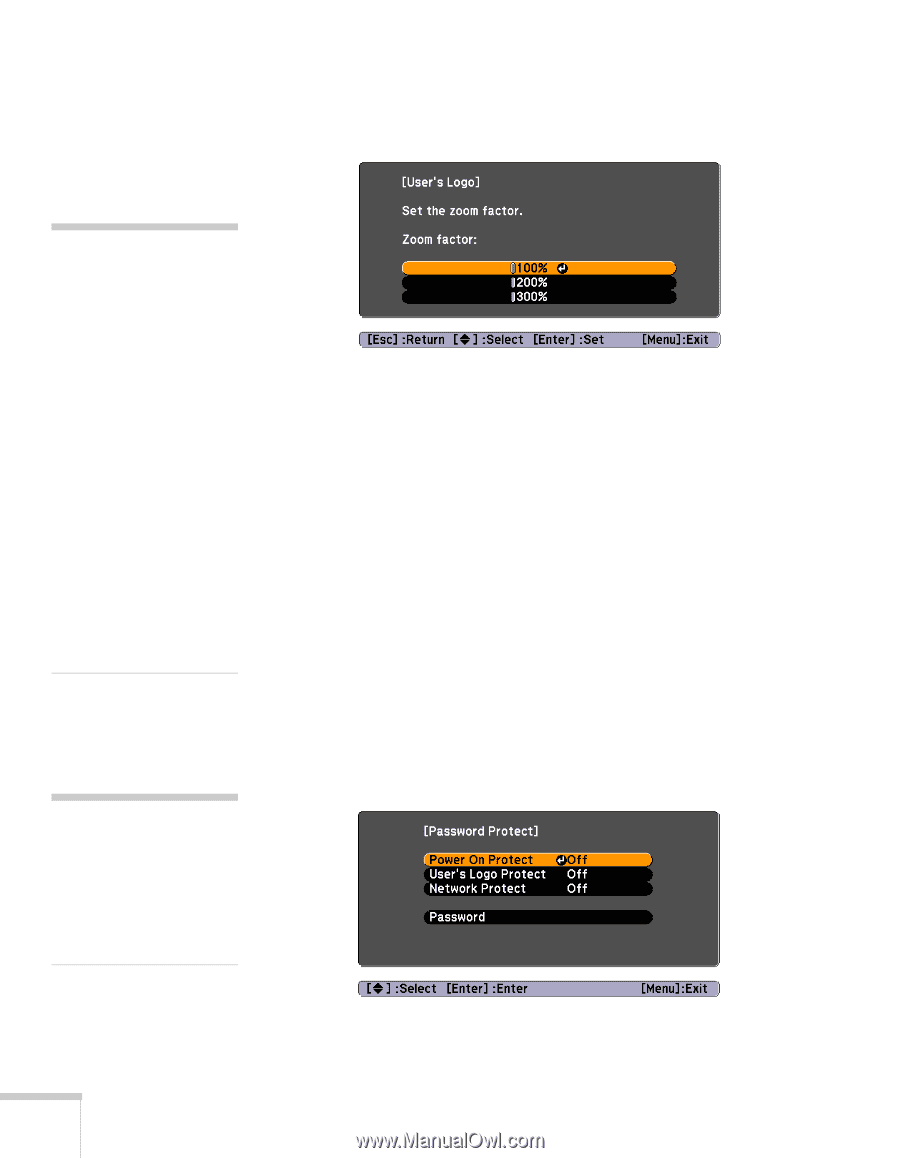
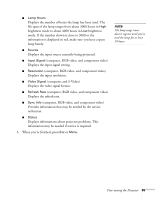
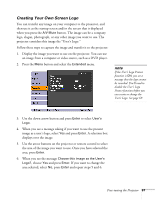
7. When you see this screen, select a zoom rate (display size), and then press Enter. note The default setting for the Startup Screen option menu is On. If the Startup Screen is set to Off, the logo will not display at startup. If the User's Logo Protect function has been set to On, the Display Background setting cannot be changed. You need to turn the protect function off first. See page 69 for details. Once you've saved a user's logo, you cannot reset the logo setting to its factory default (no logo). 8. When you see the message Save image as user's logo?, select Yes and press Enter. Saving the logo takes a few moments. Do not use the projector or other sources (computer, video, etc.) while the logo is being saved. When you see the message Completed, press Esc. 9. To display the logo as the background screen when you press the A/V Mute button or when no image signal is available, select the Extended menu and press Enter. Then select Display, Display Background, and Logo and press Enter. Select A/V Mute and Logo and press Enter. 10. When you're finished, press Menu to exit the menus. note If a password has already been set, you see the Password Protect Release screen. See "Starting the Projector with a Password" on page 70. Setting a Password 1. Press the Freeze button on the remote control for about five seconds until you see the Password Protect menu: 2. Select Password and press Enter. 68 Fine-tuning the Projector
-
 1
1 -
2
-
3
-
4
-
5
-
6
-
7
-
8
-
9
-
10
-
11
-
12
-
13
-
14
-
15
-
16
-
17
-
18
-
19
-
20
-
21
-
22
-
23
-
24
-
25
-
26
-
27
-
28
-
29
-
30
-
31
-
32
-
33
-
34
-
35
-
36
-
37
-
38
-
39
-
40
-
41
-
42
-
43
-
44
-
45
-
46
-
47
-
48
-
49
-
50
-
51
-
52
-
53
-
54
-
55
-
56
-
57
-
58
-
59
-
60
-
61
-
62
-
 63
63 -
 64
64 -
 65
65 -
 66
66 -
 67
67 -
 68
68 -
 69
69 -
 70
70 -
 71
71 -
 72
72 -
 73
73 -
74
-
75
-
76
-
77
-
78
-
79
-
80
-
81
-
82
-
83
-
84
-
85
-
86
-
87
-
88
-
89
-
90
-
91
-
92
-
93
-
94
-
95
-
96
-
97
-
98
-
99
-
100
-
101
-
102
-
103
-
104
-
105
-
106
-
107
-
108
-
109
-
110
-
111
-
112
-
113
-
114
-
115
-
116
-
117
-
118
 |
 |