Epson Artisan 700 Basics Guide - Page 12
Placing Originals for Copying or Scanning - & top will not close
 |
View all Epson Artisan 700 manuals
Add to My Manuals
Save this manual to your list of manuals |
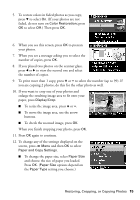
Page 12 highlights
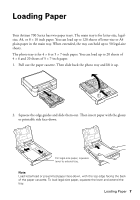
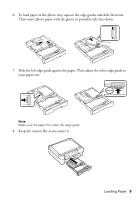
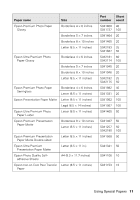
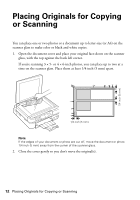
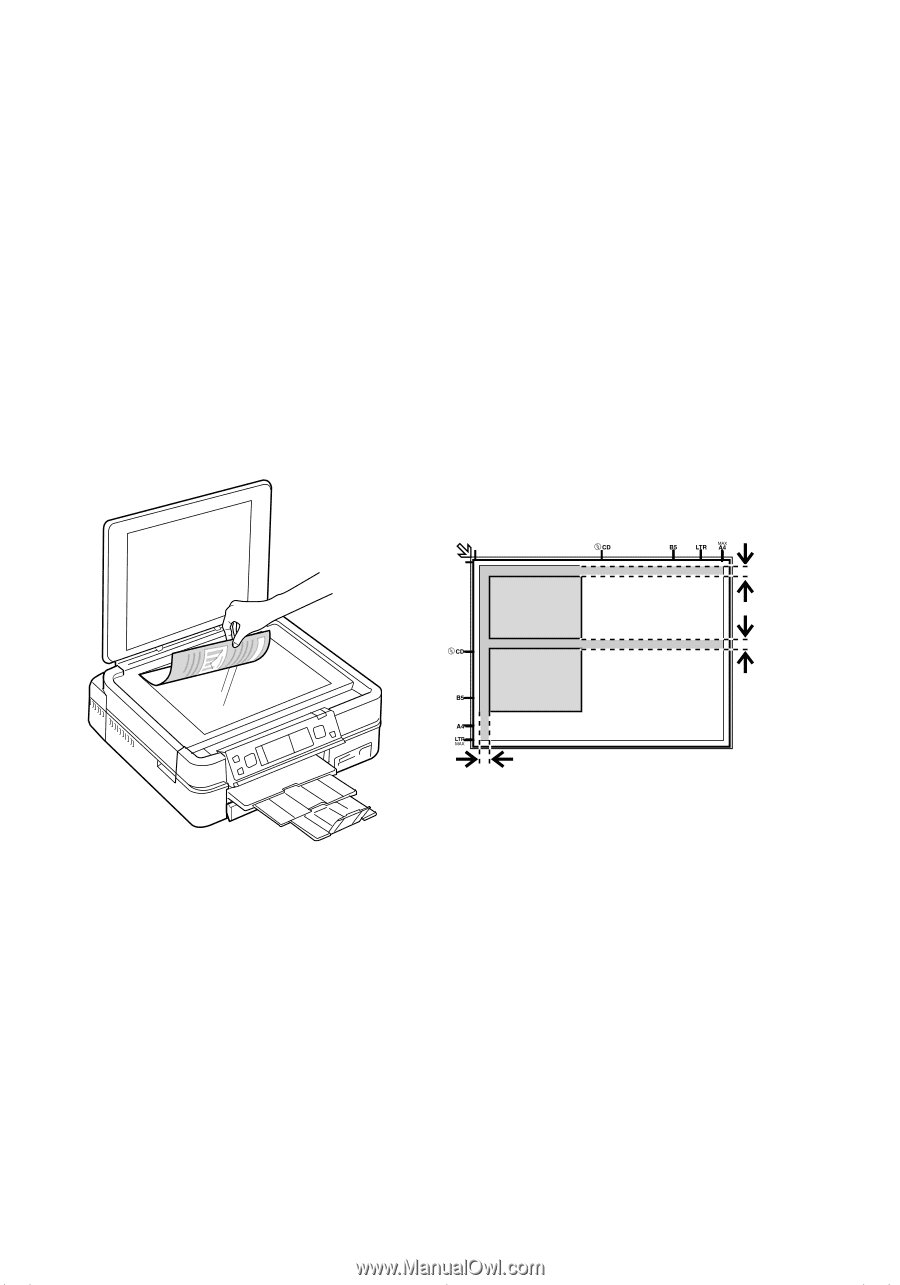
1/4 inch (5 mm) Placing Originals for Copying or Scanning You can place one or two photos or a document up to letter-size (or A4) on the scanner glass to make color or black and white copies. 1. Open the document cover and place your original face-down on the scanner glass, with the top against the back left corner. If you're scanning 3 × 5- or 4 × 6-inch photos, you can place up to two at a time on the scanner glass. Place them at least 1/4 inch (5 mm) apart. 1/4 inch (5 mm) Note: If the edges of your document or photo are cut off, move the document or photo 1/4 inch (5 mm) away from the corner of the scanner glass. 2. Close the cover gently so you don't move the original(s). 12 Placing Originals for Copying or Scanning
-
 1
1 -
2
-
3
-
4
-
5
-
6
-
 7
7 -
 8
8 -
 9
9 -
 10
10 -
 11
11 -
 12
12 -
 13
13 -
 14
14 -
 15
15 -
 16
16 -
 17
17 -
18
-
19
-
20
-
21
-
22
-
23
-
24
-
25
-
26
-
27
-
28
-
29
-
30
-
31
-
32
-
33
-
34
-
35
-
36
-
37
-
38
-
39
-
40
-
41
-
42
-
43
-
44
-
45
-
46
-
47
-
48
-
49
-
50
-
51
-
52
-
53
-
54
-
55
-
56
-
57
-
58
-
59
-
60
-
61
-
62
-
63
-
64
 |
 |
12
Placing Originals for Copying or Scanning
Placing Originals for Copying
or Scanning
You can place one or two photos or a document up to letter-size (or A4) on the
scanner glass to make color or black and white copies.
1.
Open the document cover and place your original face-down on the scanner
glass, with the top against the back left corner.
If you’re scanning 3 × 5- or 4 × 6-inch photos, you can place up to two at a
time on the scanner glass. Place them at least 1/4 inch (5 mm) apart.
Note:
If the edges of your document or photo are cut off, move the document or photo
1/4 inch (5 mm) away from the corner of the scanner glass.
2.
Close the cover gently so you don’t move the original(s).
1/4 inch (5 mm)
1/4 inch (5 mm)