Epson Endeavor User Setup Information - Page 30
Setting the Date and Time, Setting the Diskette Drive(s)
 |
View all Epson Endeavor manuals
Add to My Manuals
Save this manual to your list of manuals |
Page 30 highlights
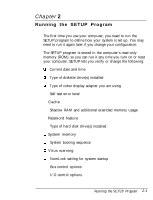
Setting the Date and Time The real-time clock in your computer continuously tracks the date and time-even when the computer is turned off. Once you set the date and time using SETUP, you should not need to change them, unless you need to adjust the time for daylight savings or other seasonal adjustments. (The computer automatically changes the date for leap years.) Use the cursor arrow keys to position the cursor over the portion of the date or time you want to change. For the date option, you can change the first two digits of the year field separately from the last two digits. Use the a or m keys to modify the date or time. You can also type numbers into the fields that accept numbers. Change the time using a 24-hour clock. For example, 5 p.m. would be 17. Setting the Diskette Drive(s) Your system probably came with one diskette drive installed and you may have another drive of a different size or capacity. The SETUP menu offers five possible selections for your diskette drives (A and B): 0 360KB, 5.25-inch 0 1.2MB, 5.25~inch Q 720KB, 3.5-inch Q 1.44MB, 3.5-inch D None. Check the settings for both drives and correct them if necessary. (If you have only one diskette drive, select None for drive B.) 2-4 Running the SETUP Program
-
 1
1 -
2
-
3
-
4
-
5
-
6
-
7
-
8
-
9
-
10
-
11
-
12
-
13
-
14
-
15
-
16
-
17
-
18
-
19
-
20
-
21
-
22
-
23
-
24
-
 25
25 -
 26
26 -
 27
27 -
 28
28 -
 29
29 -
 30
30 -
 31
31 -
 32
32 -
 33
33 -
 34
34 -
 35
35 -
36
-
37
-
38
-
39
-
40
-
41
-
42
-
43
-
44
-
45
-
46
-
47
-
48
-
49
-
50
-
51
-
52
-
53
-
54
-
55
-
56
-
57
-
58
 |
 |
