Epson MX-80II User Manual - Page 24
Installation of the Printer, MX-80 F/T Type II Dot Matrix Printer
 |
View all Epson MX-80II manuals
Add to My Manuals
Save this manual to your list of manuals |
Page 24 highlights
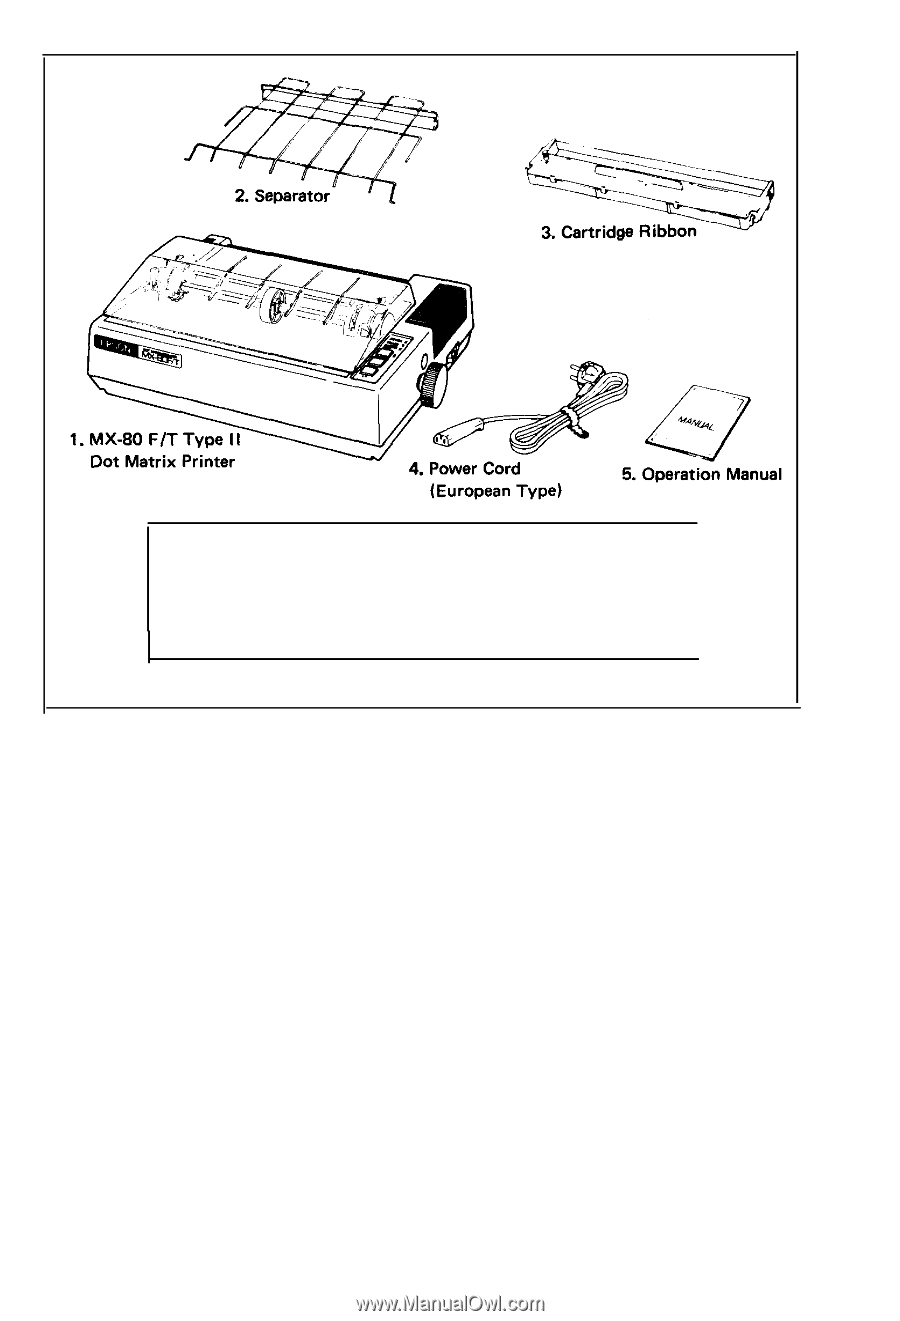
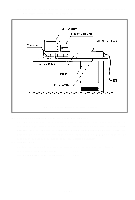
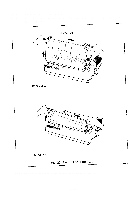
1. MX-80 F/T Type II Dot Matrix Printer 1 2. Separator 1 3. Cartridge Ribbon 1 4. Power Cord (Only European Type 220/24OV) 1 5. MX-80 F/T Type I I Operation Manual 1 Fig. 19 Contents of Carton 3. Installation of the Printer (1) Operating site selection When installing the MX-80 F/T Type I I, observe the following instructions. (a) Place the Printer on a bench, tabletop or any other convenient flat surface with enough room for the separator in the back of the Printer. Your layout may look like Fig. 20. NOTE: Rubber feet are provided to prevent the marring of the surface on which the MX-80 F/T Type I I is placed. (b) Avoid operating the MX-80 F/T Type. I I in places where it may be exposed to direct sunlight or where a great deal of greasy dust exists in the air. NOTE: Greasy dust may cause the malfunction of the print head. (c) Connect the power cord to an outlet separated from those connected to electric noise-generating equipment, such as large-power motors, refrigerators, etc. (d) Do not subject the Printer to temperatures below 5°C (40°F) or above 35°C (95°F) during operation, to sudden changes in temperature, or to extreme shock. -18-
-
 1
1 -
2
-
3
-
4
-
5
-
6
-
7
-
8
-
9
-
10
-
11
-
12
-
13
-
14
-
15
-
16
-
17
-
18
-
 19
19 -
 20
20 -
 21
21 -
 22
22 -
 23
23 -
 24
24 -
 25
25 -
 26
26 -
 27
27 -
 28
28 -
 29
29 -
30
-
31
-
32
-
33
-
34
-
35
-
36
-
37
-
38
-
39
-
40
-
41
-
42
-
43
-
44
-
45
-
46
-
47
-
48
-
49
-
50
-
51
-
52
-
53
-
54
-
55
-
56
-
57
-
58
-
59
-
60
-
61
-
62
-
63
-
64
-
65
-
66
-
67
-
68
-
69
-
70
-
71
-
72
-
73
-
74
-
75
-
76
-
77
-
78
-
79
-
80
-
81
-
82
-
83
-
84
-
85
-
86
-
87
-
88
-
89
-
90
-
91
-
92
-
93
-
94
-
95
-
96
-
97
-
98
-
99
-
100
-
101
-
102
-
103
 |
 |