Epson MX-80II User Manual - Page 28
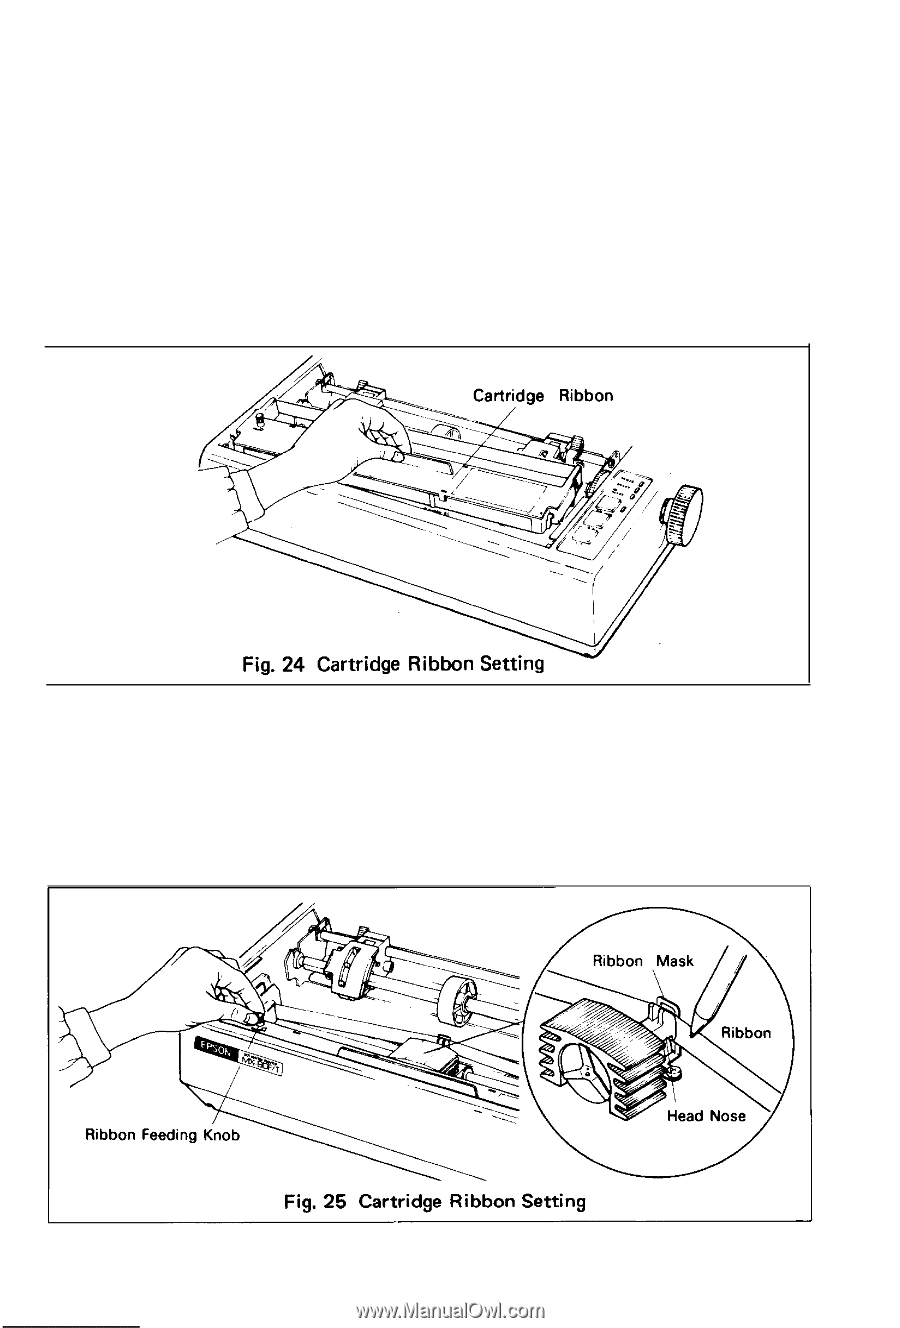
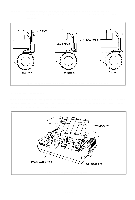
Cartridge Ribbon Setting, down. See Fig. 24.
 |
View all Epson MX-80II manuals
Add to My Manuals
Save this manual to your list of manuals |
Page 28 highlights
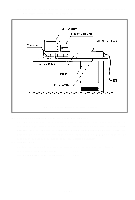
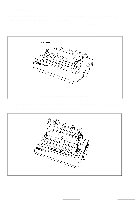
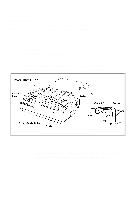
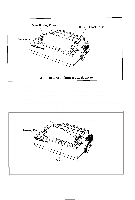
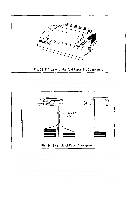
4. Cartridge Ribbon Setting EPSON's Cartridge Ribbon is compact, long-lasting, and very easy to set and remove. Furthermore, you have no need to soil your fingers in handling it. STEP 1. Open the printer lid (or remove it). STEP 2. Confirm that the scale (paper retainer) is turned toward the platen and is touching. STEP 3. Push the cartridge ribbon down and set it on the printer mechanism. To facilitate the cartridge ribbon setting, be sure to hold the projection at the center of the cartridge case when pushing the cartridge ribbon down. (See Fig. 24.) STEP 4. Put the ribbon between the head nose and the ribbon mask. In this case, the ribbon can be set easily by hooking it to the edge of the head nose and turning the ribbon feeding knob of the cartridge case in the direction of the arrow (i.e., counterclockwise) while depressing the ribbon with a ball-point pen. Then, tension the ribbon by turning the ribbon feeding knob counterclockwise. (See Fig. 25.) -22-
-
 1
1 -
2
-
3
-
4
-
5
-
6
-
7
-
8
-
9
-
10
-
11
-
12
-
13
-
14
-
15
-
16
-
17
-
18
-
19
-
20
-
21
-
22
-
 23
23 -
 24
24 -
 25
25 -
 26
26 -
 27
27 -
 28
28 -
 29
29 -
 30
30 -
 31
31 -
 32
32 -
 33
33 -
34
-
35
-
36
-
37
-
38
-
39
-
40
-
41
-
42
-
43
-
44
-
45
-
46
-
47
-
48
-
49
-
50
-
51
-
52
-
53
-
54
-
55
-
56
-
57
-
58
-
59
-
60
-
61
-
62
-
63
-
64
-
65
-
66
-
67
-
68
-
69
-
70
-
71
-
72
-
73
-
74
-
75
-
76
-
77
-
78
-
79
-
80
-
81
-
82
-
83
-
84
-
85
-
86
-
87
-
88
-
89
-
90
-
91
-
92
-
93
-
94
-
95
-
96
-
97
-
98
-
99
-
100
-
101
-
102
-
103
 |
 |