Epson MX-80II User Manual - Page 5
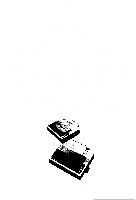
Fig. 52 Pulling Out Wires Hooked to Control Panel
 |
View all Epson MX-80II manuals
Add to My Manuals
Save this manual to your list of manuals |
Page 5 highlights
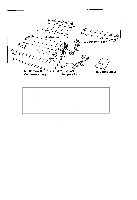
Fig. 41 Alignment of Side Edges 32 Fig. 42 Form Position Setting Mark 32 Fig. 43 Print Area 3 2 Fig. 44 Setting of Cut Paper Sheet 33 Fig. 45 Printer with Cut Paper Sheet Set Completely 33 Fig. 46 Gap Adjustment 35 Fig. 47 Switches and Indicators on Control Panel 36 Fig. 48 Printer Initial Check 38 Fig. 49 Flowchart of Paper Out Status Release Procedure 39 Fig. 50 Removing Manual Paper Feed Knob 41 Fig. 51 Loosening All 4 Screws 41 Fig. 52 Pulling Out Wires Hooked to Control Panel 42 Fig. 53 Construction of Type II Printer 43 Fig. 54 Location of DIP Switches 4 4 Fig. 55 Setting DIP Switches 4 4 Fig. 56 Setting Amount of Line Spacing 48 Fig. 57 Setting Form Length per Page 49 F i g , 5 8 S e t t i n g N u m b e r o f C o l u m n s p e r L i n e 50 Fig. 59 Setting Skip-over Perforation Function 51 Fig. 60 Dot Wire 53 Fig. 61 Formation of Character "E 53 Fig. 62 Line Spacing 54 Fig. 63 Relationship between Data and Dot Wires 71 Fig. 64 Data Transfer Sequence in Bit Image Mode 72 Fig. 65 Example of Graphic Pattern Formation 73 Fig. 66 Normal-Density and Dual-Density Modes 75 Fig. 67 Examples of Bit Image Printing 76 Fig. 68 Example of Expression of Brightness 77 Fig. 69 Replacement of Print Head 79 Fig. A1-1 Control Circuit Diagram Fig. A1-2 Driver Circuit Diagram ..... Fig. A2-1 Parallel Interface Timing ........ 84 85 89 -iv-
-
 1
1 -
 2
2 -
 3
3 -
 4
4 -
 5
5 -
 6
6 -
 7
7 -
 8
8 -
 9
9 -
 10
10 -
 11
11 -
12
-
13
-
14
-
15
-
16
-
17
-
18
-
19
-
20
-
21
-
22
-
23
-
24
-
25
-
26
-
27
-
28
-
29
-
30
-
31
-
32
-
33
-
34
-
35
-
36
-
37
-
38
-
39
-
40
-
41
-
42
-
43
-
44
-
45
-
46
-
47
-
48
-
49
-
50
-
51
-
52
-
53
-
54
-
55
-
56
-
57
-
58
-
59
-
60
-
61
-
62
-
63
-
64
-
65
-
66
-
67
-
68
-
69
-
70
-
71
-
72
-
73
-
74
-
75
-
76
-
77
-
78
-
79
-
80
-
81
-
82
-
83
-
84
-
85
-
86
-
87
-
88
-
89
-
90
-
91
-
92
-
93
-
94
-
95
-
96
-
97
-
98
-
99
-
100
-
101
-
102
-
103
 |
 |