Gigabyte GSmart MS800 User Manual - GSmart MS800 v2.0 English Version - Page 55
Taking A GeoTagged Photo, 4 Recorder
 |
View all Gigabyte GSmart MS800 manuals
Add to My Manuals
Save this manual to your list of manuals |
Page 55 highlights
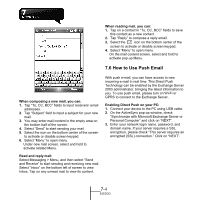
8.3 Taking A GeoTagged Photo You can take GeoTagged photos (photos that carry the coordinates of where you were when you took them) and easily share them with friends through online albums like flickr. 1. After turning on the camera, tap the GPS button on the bottom left of the preview screen to enable/disable the GPS coordinates photograph function. 2. After turning on GPS, it will start searching the current GPS coordination and the GPS button will display as . 3. When the device GPS has successfully locked on satellite signals, the GPS button will present the status as GPS ON . Under this mode, the photos you take will carry the current coordinates of where you are at in EXIF. 4. Aim the camera at the item you would like to capture, press halfway to focus, full press to take the picture. 5. Tap the button to view the photo you just took in "Pictures & Videos". Note: For your ease of use, the filename of photos with coordinates always ends with (GPS) on this device. Example: Camera0024 (GPS).jpg 8.4 Recorder Use recorder to record voice memo and make note taking simple and efficient. 1. Select Start > Programs > Multimedia > Recorder. 2. Tap on to activate sound recording function. 3. Tap on to stop recording sound. 4. Before you start recording, you may set the recording time in to set the duration of the recording. 5. Tap to view the list of all your recorded on screen. Tap on any recorded file to play the file. 6. Tap Menu > Save To to choose file location. 7. Tap to leave recorder screen while still keep recording on the background; or tap Menu > Exit to stop recording and exit. 8. When recording in the background, tap to return to Recorder. Tap to stop recording. 8-3 MS800
-
 1
1 -
2
-
3
-
4
-
5
-
6
-
7
-
8
-
9
-
10
-
11
-
12
-
13
-
14
-
15
-
16
-
17
-
18
-
19
-
20
-
21
-
22
-
23
-
24
-
25
-
26
-
27
-
28
-
29
-
30
-
31
-
32
-
33
-
34
-
35
-
36
-
37
-
38
-
39
-
40
-
41
-
42
-
43
-
44
-
45
-
46
-
47
-
48
-
49
-
 50
50 -
 51
51 -
 52
52 -
 53
53 -
 54
54 -
 55
55 -
 56
56 -
 57
57 -
 58
58 -
 59
59 -
 60
60 -
61
-
62
-
63
-
64
-
65
-
66
-
67
-
68
-
69
-
70
-
71
-
72
-
73
 |
 |
