Harman Kardon AVR 745 Owners Manual - Page 32
OK/Enter Button, Button, Steps 3 and 4, Navigation Buttons, Set Button, OK/Enter, Step 5
 |
View all Harman Kardon AVR 745 manuals
Add to My Manuals
Save this manual to your list of manuals |
Page 32 highlights
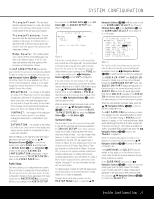
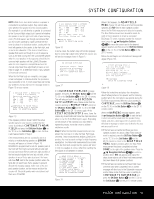
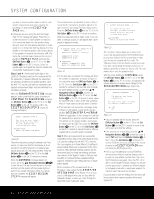
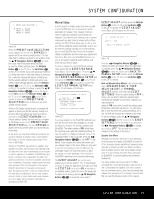
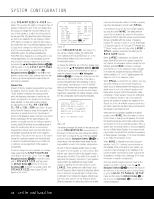
SYSTEM CONFIGURATION you wish to choose another option to skip the subwoofer measurements and either complete the EQ Design or return to the EZSET/EQ MAIN menu. • If there was an error during the test, the Design Step 2 Error message will appear. Follow the onscreen instructions to check speaker connections (if no sound was heard from the speaker during the test), check the microphone placement to make certain it is no further than half the distance from the speaker to the listening position and pointing directly at the speaker, or increase the volume by 5dB. After taking the corrective steps, make sure the cursor is pointing to REPEAT TEST and press the OK/Enter Button E on the TC 30 or the Set Button œ on the ZR 10 remote. Select the speaker again and repeat the steps as needed until a successful measurement is made. Steps 3 and 4: The third and fourth steps in the EzSet/EQ II Design process are the measurement for the subwoofers, if present. Although the subwoofers are generally considered one speaker position, since the AVR 745 may be used with two subwoofers, two separate measurement steps must be combined for a complete EQ Design. When the SUBWOOFER DESIGN message appears, make certain that the cursor is pointing to CONTINUE TO SUB DESIGN and press the OK/Enter Button E on the TC 30 or the Set Button œ on the ZR 10 remote control. The EZSET DESIGN STEP 3 (Figure 20) message will appear. EZSET DESIGN STEP 3 Put mic at ear level, 3ft/0.9m to the left Of the preferred listening position. → CONTINUE BACK TO EZSET/EQ MAIN Figure 20 Follow the instructions (using the extender rod if necessary), to make sure that the microphone is at ear level and to the left of where the microphone was placed during the Far Field measurements. Press the OK/Enter Button E on the TC 30 or the Set Button œ on the ZR 10 remote to continue. When the WARNING message appears on screen, press the ‹/› Navigation Buttons D© to start the test. The test tone will be sent to the subwoofer(s) and the system will then pause slightly to perform the needed calculations. When the calculations are complete, the EZSET DESIGN STEP 4 message will appear. The instructions here are identical to those in Step 3 except that the microphone should be placed to the right of where it was during Far Field measurements. Press the OK/Enter Button E on the TC 30 or the Set Button œ on the ZR 10 remote to continue. When the subwoofer tests in Steps 3 and 4 are complete, a message (Figure 21) will appear after a brief pause to display the results. * DESIGN STEP 3/4 RESULTS * EZSET successful Detected speaker config: SUBWOOFER 1:YES SUBWOOFER 2:NO → CONTINUE REPEAT SUBWOOFER BACK TO EZSET/EQ TEST MAIN Figure 21 • If the tests were successful, the message will show the number of subwoofers, as shown in Figure 21. You may either press the OK/Enter Button E on the TC 30 (or the Set Button œ on the ZR 10 remote) to continue to the next step and conclude the EzSet Design process, or press the ⁄/¤ Navigation Buttons D© and then the OK/Enter Button E on the TC 30 (or the Set Button œ on the ZR 10 remote) to either repeat the subwoofer test or return to the main EzSet/EQ menu. In most cases you should select "Continue." • If the tests were not successful, a message similar to Figure 21 will appear, except that the top line will flash DESIGN STEP 3/4 ERROR. Follow the suggestions in the message to verify that the subwoofer(s) is properly connected and that the microphone is in the proper position, and increase the volume level by 5dB. Then, press the OK/Enter Button E on the TC 30 or the Set Button œ on the ZR 10 remote to repeat the test as often as needed until a successful result is achieved. Step 5: When all measurements are successfully completed, the final step in the EzSet Design process is to save the settings into the AVR 745's memory. You may program up to three different EQ settings to accommodate differences in placement of the microphone to reflect alternate listening positions, but we recommend that you create two settings and leave one memory in the "bypass" mode so that you have the ability to compare the two equalized settings against a "straight through" setting that has no equalization applied. At the conclusion of the measurements for an EQ Design, make certain that the EZSET/EQ DESIGN DONE menu (Figure 22) is on your screen. It will appear when you are done with the Subwoofer design, or when you "skip" through the Near Field and/or Subwoofer steps. * EZSET DESIGN DONE * To test drive your Design, please connect audio source, adjust volume and play. → CONTINUE BACK TO EZSET/EQ MAIN Figure 22 The "test drive" feature allows you to listen to the source that was playing before the EzSet/EQ Design process was initiated, and it is a good way to make sure that you are pleased with the results. The "Warning" refers to the fact that the volume level may have been raised during the Design process, so it is always a good idea to lower the volume a bit. You may always raise it once the playback starts. With the cursor pointing to CONTINUE, press the OK/Enter Button E on the TC 30 or the Set Button œ on the ZR 10 remote, and playback will resume while the on-screen menu changes to the DESIGN PREVIEW page (Figure 23). * DESIGN PREVIEW * EQ design has been completed. Do you like your current listening experience? → YES NO Figure 23 • If you are pleased with the sound, press the OK/Enter Button E on the TC 30 or the Set Button œ on the ZR 10 remote to move to the next screen and store the settings. • If the sound is not to your liking, press the ⁄/¤ Navigation Buttons D© so that the cursor is next to NO and then the OK/Enter Button E on the TC 30 or the Set Button œ on the ZR 10 remote. Follow the on-screen prompts in the menus to return to the EZSET/EQ MAIN menu and repeat the EQ Design process. • If this is your first attempt at running EzSet/EQII, we recommend that you save the settings, even if you are not sure whether you like them, then rerun the EQ Design process again. Since the AVR 745 is able to store multiple EQ Design settings, this will give you the opportunity to compare two different designs to the bypass mode with no equalization applied. You may then select the preset you like best. If you proceed to store the settings, the next menu will let you select which memory position will be used (Figure 24). 32 SYSTEM CONFIGURATION
-
 1
1 -
2
-
3
-
4
-
5
-
6
-
7
-
8
-
9
-
10
-
11
-
12
-
13
-
14
-
15
-
16
-
17
-
18
-
19
-
20
-
21
-
22
-
23
-
24
-
25
-
26
-
 27
27 -
 28
28 -
 29
29 -
 30
30 -
 31
31 -
 32
32 -
 33
33 -
 34
34 -
 35
35 -
 36
36 -
 37
37 -
38
-
39
-
40
-
41
-
42
-
43
-
44
-
45
-
46
-
47
-
48
-
49
-
50
-
51
-
52
-
53
-
54
-
55
-
56
-
57
-
58
-
59
-
60
 |
 |
