HP 1040 User Guide
HP 1040 - Fax Manual
 |
UPC - 884962546512
View all HP 1040 manuals
Add to My Manuals
Save this manual to your list of manuals |
HP 1040 manual content summary:
- HP 1040 | User Guide - Page 1
HP 1040/1050 Fax series User Guide Part number: Q7270-90102 First edition: 10/2004 - HP 1040 | User Guide - Page 2
can step on or trip over the line cord, and where the line cord will not be damaged. • If the product does not operate normally, see the Troubleshooting section of this user guide. • No operator-serviceable parts inside. Refer servicing to qualified service personnel. • Use in a well ventilated area - HP 1040 | User Guide - Page 3
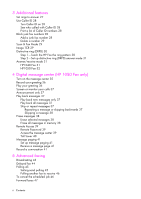
Load paper 1 Load documents to fax or copy 2 Send a fax 2 Receive a fax 3 Make a copy 3 Make a telephone call 4 2 HP Fax basics The HP Fax 1040/1050 6 Parts of the HP Fax 6 Control Panel of HP FAX 7 The menus 12 Overview of menu options 13 BASIC FAX menu 13 ADVANCED FAX menu 14 SET UP SOUND menu - HP 1040 | User Guide - Page 4
Mode 29 Image TCR 29 Distinctive ring (DRPD) 30 Step 1-Teach the HP Fax the ring pattern 30 Step 2-Set up distinctive ring (DRPD) answer mode 31 Answer/receive mode 31 HP1040 Fax 31 HP1050 Fax 32 4 Digital message center (HP 1050 Fax only) Turn on the message center 35 Record your greeting 36 Play - HP 1040 | User Guide - Page 5
Print reports 51 Automatic reports 51 Reports you can print 51 Reprinting faxes 52 Clearing memory 53 Loudspeaker-HP 1040 Fax 53 Speakerphone-HP 1050 Fax 53 Redial a number in memory 54 7 Care and maintenance Print cartridge information 55 View ink level 55 Print the self test 56 Replace the print - HP 1040 | User Guide - Page 6
Declaration of conformity 78 Use Hewlett-Packard support services 79 Hewlett-Packard LIMITED WARRANTY STATEMENT 80 iv Contents - HP 1040 | User Guide - Page 7
to the basic functions of your new fax machine. Please refer to the later chapters for detailed instructions. 1 The "arrow buttons" located under paper's packaging. Always load with the print side facing you. 1 Slide the Paper Guide to Ltr or A4 paper width. Be sure not to bind the paper stack. - HP 1040 | User Guide - Page 8
copy You can load up to 10 pages in the document feeder. Load the documents face down (printed side toward the machine). Adjust guides to document width. Send a fax 1. Place the document to be sent (up to 10 pages) in the document feeder. 2. Dial the number by using one of these methods: • Entering - HP 1040 | User Guide - Page 9
on page 27), then switches to FAX receiving. TEL answer mode If the answer Mode is set to TEL, you must manually receive faxes. 1. Answer the telephone. 2. If you hear fax tones, press the Start/Enter button. 3. Once you hear fax tones from both machines (this may take several seconds), you should - HP 1040 | User Guide - Page 10
the handset and dial the number. • Press and hold a One Touch number. This turns on the speaker. When you are connected, pick up the handset (HP 1050 Fax does not have to pick up handset since it has a speakerphone.) For more information, see One-touch dialing on page 24. • Press the Speed Dial - HP 1040 | User Guide - Page 11
HP Fax and introduces you to the machine. For detailed instructions, refer to the later chapters. The HP Fax features The HP Fax offers the following features: • 100 page fax memory • 50 page paper tray • 10 page document feeder • Scan & Fax 51). The HP 1050 Fax only The HP 1050 Fax also offers a - HP 1040 | User Guide - Page 12
The HP Fax 1040/1050 The HP Fax 1040/1050 Parts of the HP Fax Figure 2-1 Front view 8 7 6 5 Figure 2-2 Rear view 1 Document support 2 Paper tray 1 3 Paper tray cover 4 Document guide 2 3 5 Document feeder 4 6 Handset 7 Paper guide 8 Paper support 1 Power cord socket 1 6 HP Fax basics - HP 1040 | User Guide - Page 13
HP Fax basics HP Fax basics HP Fax basics HP Fax basics HP Fax basics HP Fax basics HP Fax basics Figure 2-3 Bottom view The HP Fax 1040/1050 3 21 1 Connect handset to the HANDSET port. 2 Connect telephone line to the LINE port. 3 HP 1040 only: Connect answering machine or extension phone to the - HP 1040 | User Guide - Page 14
volume on page 28 for instructions on using the menu. The button is lit when Silent Mode 1 is turned on. HP 1050 Fax 3 Report/Help: Prints status reports or the Help file, which will provide information on using your HP Fax. 4 Access Cartridge: Moves the print cartridge to the center so it - HP 1040 | User Guide - Page 15
HP Fax basics HP Fax basics HP Fax basics HP Fax basics HP Fax basics HP Fax basics HP Fax basics The HP Fax 1040/1050 Figure 2-7 HP 1040 & HP 1050 Fax control panel-Middle 4 67 ABC DEF GHI PQRS JKL MNO TUV WXYZ 6 Space: [The 1 key]. Enters a space between words when entering a name in a - HP 1040 | User Guide - Page 16
HP Fax 1040/1050 Figure 2-9 HP 1040 & HP 1050 Fax control panel-Right side lower 13 Copy: • Press twice to copy a document with the default 13 copy settings. 14 • Press once then set options. Press Start/Enter between options. Press Copy to copy the document. 14 Start/Enter: • Starts a fax - HP 1040 | User Guide - Page 17
changes the contrast for faxing and copying. Figure 2-12 HP 1050 Fax only control panel-Upper right 21 22 23 24 25 21 Greeting: Press and hold to record the greeting for the Digital Messaging Center. Press again to stop the recording. 22 Play/Rec: Use to play answering machine messages or to - HP 1040 | User Guide - Page 18
Set Delayed Fax Set Fax Forward Set Polling Send Cancel Schedule Man Fax Rcv Code* ECM Mode Distinctive Ring *HP 1040 Fax only Alarm Sound Key Sound Silent Mode Fax Header Dial/Schedule Fax Log Faxes in Memory SET UP TAM (HP 1050 Fax only) Clean Cartridge Align Cartridge View Ink Level Adjust - HP 1040 | User Guide - Page 19
machine as both a telephone and a fax machine (AUTO or TAM mode), we suggest you set the ring count to at least 4 (HP 1040) or 2 (HP 1050 with Toll Saver turned on) to give you time to answer time you send a fax. OFF: never prints a confirmation report (You can print one manually using the Report/ - HP 1040 | User Guide - Page 20
the next 24 hours. Set Fax Forward Allows you to forward incoming faxes to another fax number. Set Polling Send Allows you to set a fax to be polled by another machine. Cancel Schedule Cancels all scheduled faxes. Man Fax Rcv Code (HP 1040 only) The Manual Fax Receive Code allows you to start - HP 1040 | User Guide - Page 21
you to troubleshoot problems. SET UP TAM menu Option Settings Toll Saver Adds 2 rings to the rings to answer setting unless a message has been received. Call Monitor Allows you to screen calls. ICM Record Time Adjusts the amount of time a caller has to record a message. HP Fax basics 15 - HP 1040 | User Guide - Page 22
speaker, as this may result in howling. Speakerphone-HP 1050 Fax The HP 1050 Fax has full speakerphone capabilities. You never have to lift the handset if you do not want to. Press Speakerphone to make and receive calls as well as listening to your answering machine messages. While you are using the - HP 1040 | User Guide - Page 23
HP Fax basics HP Fax basics HP Fax basics HP Fax basics HP Fax basics HP Fax basics HP Fax basics Navigate the menus Navigate the menus Ready mode Whenever the HP Fax is ready for faxing and copying (called Ready mode), it will display the date, time, and answer mode. For example, OCT-05 02:23PM - HP 1040 | User Guide - Page 24
you selected the correct one for your country when setting up your HP Fax (see Set the date and time on page 49). • Some N O 6 7 P Q R S 7 8 T U V 8 9 W X Y Z 9 0 0 * nothing if text field, use the 0 key to enter * # nothing if text field, use the 0 key to enter # 18 HP Fax basics - HP 1040 | User Guide - Page 25
HP Fax basics HP Fax basics HP Fax basics HP Fax basics HP Fax basics HP Fax basics HP Fax basics Enter dates, times, text, and telephone numbers For example, to enter 'Jacque & Baja, Inc.' follow these steps. Press Result 'JACQUE' will display. & Enters a space. ''''''''' '&' - HP 1040 | User Guide - Page 26
Enter dates, times, text, and telephone numbers Press (, !, ) # #' , $, *, ' Result '456' will display. '- 'will display. '7890' will display 20 HP Fax basics - HP 1040 | User Guide - Page 27
press Start/Enter. If you do not want a name, just skip this step by pressing Start/Enter. TIP: If you have subscribed to a Caller ID service, we recommend that you enter a name. 5. Press Cancel to exit. HP Fax basics 21 - HP 1040 | User Guide - Page 28
book Dialing works the same for both faxes and telephone calls. If a document is loaded, the HP Fax sends the fax. One-touch dialing ! Press and 'MNO'. • The machine finds the closest entry. • If the machine cannot find a name that begins with the given letter, the machine shows the message Not - HP 1040 | User Guide - Page 29
HP Fax basics HP Fax basics HP Fax basics HP Fax basics HP Fax basics HP Fax basics HP Fax basics Paper types and sizes Paper types and sizes The HP Fax is designed to the print quality before buying large quantities of paper. Your machine uses a variety of papers including: • Copier paper • Bond - HP 1040 | User Guide - Page 30
. TIP: You can also change the default settings for all documents using the menu. See BASIC FAX menu on page 13. We recommend you use documents printed using a high quality printer, felt tip pen, black ink, or typewriter. The paper should be white or very light, and of normal weight, not cardboard - HP 1040 | User Guide - Page 31
of the ringer. • Whenever you press the button, it will increase or decrease the volume. • The volume 0 indicates that the machine will not ring when a call is received. Speaker volume 1. Press Loudspeaker (HP 1040) or Speakerphone (HP 1050). 2. Then press!" to adjust the volume of the speaker - HP 1040 | User Guide - Page 32
If you have an extension phone on the same line as your HP Fax you can remotely start receiving a fax. 1. Answer the call on the extension phone. 2. Press *9* (manual fax receive code) in sequence when you hear a fax tone. • Your fax machine detects the code and starts to receive the document. • The - HP 1040 | User Guide - Page 33
the instructions. 1 Set rings to answer You can select the number of rings that will occur before the fax answers an incoming call. If you are using your machine as both a telephone and a fax machine, we suggest you set the ring count to at least 4 to give you time to answer. TIP: HP 1050 Fax: The - HP 1040 | User Guide - Page 34
a voice call. After the 5 additional rings, the answering machine will answer. Use Caller ID Many countries have the Caller ID Caller ID services through your local phone company, your machine can display caller information. Turn Caller ID on 1. Press Menu repeatedly until BASIC FAX displays and - HP 1040 | User Guide - Page 35
until Delete displays and press Start/Enter. The machine shows the first junk number. 4. Press !" to scroll to the junk fax number you want to delete and press Start/Enter. Scan & Fax Mode Scan & Fax Mode causes the HP Fax to scan all the pages of the fax into memory before starting to send. This is - HP 1040 | User Guide - Page 36
answering machine, do not set up distinctive ring with your HP Fax. If you have this service follow both of these instructions in this order to set it up and use it. Step 1-Teach the HP Fax the ring pattern The HP Fax will learn the ring pattern when you call it from another telephone or fax machine - HP 1040 | User Guide - Page 37
How are you going to use your HP Fax? • Fax machine with few or no voice calls. • Telephone and fax machine without an external answering machine connected. • As a fax machine with an external answering machine. • Using Distinctive Ring (DRPD) service to set up a separate telephone number for your - HP 1040 | User Guide - Page 38
by lifting the handset and pressing Start/Enter. HP1050 Fax How are you going to use your HP Fax? • Telephone and fax with the integrated answering machine in the Digital Message Center. • Telephone and fax machine without the answering machine. Read about... TAM AUTO mode Additional features 32 - HP 1040 | User Guide - Page 39
Answer/receive mode How are you going to use your HP Fax? • Fax machine with few or no voice calls. • Using Distinctive Ring (DRPD) service to set up a separate telephone number for your HP Fax on the same physical line as your other numbers. • Telephone with few or no fax calls Read about... FAX - HP 1040 | User Guide - Page 40
caller's message if they leave one. If the machine detects a fax signal, it goes into receive mode. • When your answering machine answers an incoming call, it records a fax tone until it realizes a fax is coming through. Due to this, your answering machine may tell you a voice message has been left - HP 1040 | User Guide - Page 41
button on the control panel are designated by !"in the instructions. 1 Turn on the message center NOTE: You cannot Answer button to turn on the Digital Message Center. • The Answer button lights up. • TM appears in the display. Digital message center (HP 1050 Fax only) 35 FAX ONLY) FAX ONLY) FAX - HP 1040 | User Guide - Page 42
plays whenever a call comes in and the device is in TAM mode (the Answer button is lit and TM is displayed). Your greeting can be between 3 and greeting The greeting plays whenever the message center takes a call or when the answering machine is turned on. You can also play it at any time. ! Press - HP 1040 | User Guide - Page 43
1050 center (HP 1050 center (HP 1050 Digital message Digital message Digital message Digital message Digital message Digital message Digital message Screen or monitor your calls Screen or monitor your calls The HP Fax allows you listen to messages being recorded so you can decide whether to answer - HP 1040 | User Guide - Page 44
messages, the memory will become full. If the memory becomes full, the HP Fax will disconnect the current caller and fail to answer the phone until memory is made available by erasing messages. Erase selected messages the messages and return to Ready mode. Digital message center (HP 1050 Fax only) 38 - HP 1040 | User Guide - Page 45
FAX ONLY) FAX ONLY) FAX ONLY) FAX ONLY) center (HP 1050 center (HP 1050 center (HP 1050 center (HP 1050 center (HP 1050 center (HP 1050 center (HP 1050 with #. Follow these instructions to change the remote HP Fax from a Touch Tone phone. 2. Enter your remote password when the device answers - HP 1040 | User Guide - Page 46
answer on page 27.) Follow these instructions to turn Toll Saver on and off. 1. Press Menu repeatedly until SET UP TAM displays and press Start/Enter. 2. Press !"until Toll Saver displays and press Start/Enter. 3. Press !" until On displays and press Start/Enter. Digital message center (HP 1050 Fax - HP 1040 | User Guide - Page 47
FAX ONLY) FAX ONLY) FAX ONLY) FAX ONLY) center (HP 1050 center (HP 1050 center (HP 1050 center (HP 1050 center (HP 1050 center (HP 1050 center (HP 1050 Paging Greeting. The paging greeting will be played to you when you answer the phone at the forwarded number. 5. Press Start/Enter and speak - HP 1040 | User Guide - Page 48
Record a conversation Digital message center (HP 1050 Fax only) 42 - HP 1040 | User Guide - Page 49
use the advanced fax features of your machine. 1 The "arrow buttons" located under the Menu button on the control panel are designated by !"in the instructions. 1 Broadcasting With Broadcasting you can have your HP Fax send your fax to up to 15 (HP 1040 Fax) or 20 (HP 1050 Fax) fax numbers at once - HP 1040 | User Guide - Page 50
machine. 2. Press Menu repeatedly until ADVANCED FAX appears and press Start/Enter. 3. Select Set Delayed Fax by pressing !" and press Start/Enter. 4. Enter the fax repeat steps from 4. • If you have finished entering all the numbers, answer N and press Start/Enter. 6. Enter the name if you want to - HP 1040 | User Guide - Page 51
Setting send polling You can program your fax machine to send a document when it is requested by a remote fax machine. NOTE: Your HP Fax allows you to set one poll job shows POLLING SEND in the display. If the answer mode was TEL, the machine changes it to FAX mode automatically. • When it is polled, - HP 1040 | User Guide - Page 52
Start/Enter. NOTE: If the other fax machine does not have a poll code, enter 0000. The HP Fax receives and prints the polled document. NOTE: Not all fax machines have polling capability, and polling incompatibility sometimes occurs between fax machines made by different manufacturers. To cancel the - HP 1040 | User Guide - Page 53
1040: During forwarding time, the answer mode temporarily changes to FX. • HP 1050: During forwarding time, the answer mode continues to say FW. The machine will receive and forward faxes and answer and record voice messages. TIP: HP 1050: This procedure only forwards faxes, if you also want to be - HP 1040 | User Guide - Page 54
Forward faxes Advanced faxing 48 - HP 1040 | User Guide - Page 55
features of the HP Fax that you may want to use from time to time. 1 The "arrow buttons" located under the Menu button on the control panel are designated by !"in the instructions. 1 Set the date and time The current date and time are shown in the display when the machine is on and - HP 1040 | User Guide - Page 56
sounds of the HP Fax (including ringing) fax header prints your name and fax number on the top of every fax you send. 1. Press Menu repeatedly until !" SET FAX HEADER displays and press Start/Enter. 2. Press Start/Enter when the display shows Fax Number. 3. Enter the fax number to which your machine - HP 1040 | User Guide - Page 57
Print reports Your fax machine can print many reports for your use. Automatic reports These reports print automatically. Report name Content Multi-Communication This report prints automatically if you have faxed documents to more than one location by using Broadcasting. Power Fail Report If - HP 1040 | User Guide - Page 58
will be erased to make room for new faxes. NOTE: HP 1040 Fax: Unplugging the fax machine power cord and plugging it back in again clears the memory including all unprinted or unsent faxes. A power outage also clears the fax machine memory. NOTE: HP 1050 Fax: The device has 30 minutes of backup - HP 1040 | User Guide - Page 59
the handset beside the speaker, as this may result in howling. Speakerphone-HP 1050 Fax The HP 1050 Fax has full speakerphone capabilities. Press Speakerphone to make and receive calls as well as listening to your answering machine messages. While you are using Speakerphone, do not place the handset - HP 1040 | User Guide - Page 60
press Start/Enter. 3 Press !" to find the number you want to dial. 4 Press Start/Enter when the correct number appears. If a document is loaded, the machine automatically begins to send. Feature reference 54 - HP 1040 | User Guide - Page 61
follow the instructions below: • Always use the HP 20 (C6614) ink cartridge. NOTE: Your HP Fax was shipped with a starter ink cartridge. Replace it with the HP 20 cartridge. • DO NOT unpack the cartridge until you are ready to use it. • Store it in the same environment as the fax machine. • If you - HP 1040 | User Guide - Page 62
stored in memory. You must manually print the faxes from memory (see Reprinting faxes on page 52.) until you replace the ink cartridge (see Replace the print cartridge on page 56.). TIP: If memory become full before the print cartridge is replaced, the HP Fax will stop answering the phone. Be sure - HP 1040 | User Guide - Page 63
toward you and remove it. 3 To load the cartridge insert the cartridge as shown below. When the cartridge is pushed to the back of the cartridge carrier, push the top of the cartridge until it clicks into place. If the cartridge moves loosely in the carrier, it has not clicked into place. Repeat - HP 1040 | User Guide - Page 64
ink you have left. TIP: If you mix up several used cartridges, it is not possible to check the correct amount of remaining ink. Once you have put in a new cartridge machine. 2. Press Cancel. 3. If this was a fax, reprint the fax. For more information, see Reprinting faxes on page 52. Care and - HP 1040 | User Guide - Page 65
discussed above does not help and you are certain the cartridge has plenty of ink, the problem may be caused by dried ink on the print cartridge nozzles and contacts or the print cartridge carrier contacts. Follow these two sets of instructions for manual cleaning. Clean the nozzles 1. Press Access - HP 1040 | User Guide - Page 66
, send polling, or faxes received into memory. CAUTION: Once you have unplugged the power cord from the machine, all data in memory will be lost. 1. Press Access Cartridge. 2. Open the control panel and cartridge compartment cover and remove the cartridge. See Replace the print cartridge on page 56 - HP 1040 | User Guide - Page 67
glass. If they are dirty, documents sent to another fax machine will not be clear. CAUTION: When you turn the power off to clean the scanner, documents stored in memory will 3 3. Wipe the white roller surface and the driver roller surface with a soft cloth dampened with water. Care and maintenance - HP 1040 | User Guide - Page 68
Clean the document scanner area 4. Clean the document feeder rubber piece at the back of the control panel. 5. Carefully wipe the scanning glass with a soft, dry, lint free cloth. • If the glass is very dirty, first wipe it with a slightly dampened cloth, then with a dry one. • Be careful not to - HP 1040 | User Guide - Page 69
Start/Enter. • The machine starts to scan the document this problem as faxes will be stored in memory. You must manually print them, see Reprinting faxes on page 52. Install ink cartridge Print cartridge is not installed or improperly installed. Install mono ink cartridge The print cartridge - HP 1040 | User Guide - Page 70
print cartridge. New Fax Received The machine is low on ink and has received faxes into memory. You must replace the print cartridge (see Replace the print cartridge on page 56.) and reprint the faxes from memory (see Reprinting faxes on page 52.). No answer from remote fax The other machine has - HP 1040 | User Guide - Page 71
(15.4 in.). System Busy Try again later The fax machine is busy doing something else. To redial now, The machine is waiting (three minutes) to automatically redial press Start/Enter the fax number that was busy or did not answer. CARE AND MAINTENANCE CARE AND MAINTENANCE CARE AND MAINTENANCE - HP 1040 | User Guide - Page 72
" on page 63. The chart below shows other problems you can solve yourself. For problems you cannot resolve here, see Use Hewlett-Packard support services on page 79. Fax problems Problem Solution The machine is not working, there is Unplug the power cord and plug it in again. Check that your no - HP 1040 | User Guide - Page 73
CARE AND MAINTENANCE CARE AND MAINTENANCE Troubleshooting Problem Solution Spots or lines missing from the fax you receive. Check if the print cartridge is ok by making a copy. See Maintain the print cartridge on page 59. Check with the telephone company to see if your phone line is noisy. - HP 1040 | User Guide - Page 74
Troubleshooting Print quality problems Problem Light or blurred characters. Smudged or dark characters. Characters with white lines. Improperly formed or misaligned characters. Abnormal black horizontal lines Solution Check ink level as described in View ink level on page 55. To install a new print - HP 1040 | User Guide - Page 75
Troubleshooting Digital Message Center problems Problem Solution Paging message repeats This is normal. The message repeats to give you time to enter the access code to retrieve your message. Attempts to receive fax even when message center is turned off. This is normal. The fax machine answer - HP 1040 | User Guide - Page 76
Troubleshooting Care and maintenance 70 - HP 1040 | User Guide - Page 77
, and regulatory statements. Paper types and sizes The HP Fax is designed to work optimally with plain cotton bond paper. The following paper sizes and weight can be used with your machine: Paper size Dimensions Paper weight A4 Letter Legal 210mm x 297mm (8.3in x 11.7in - HP 1040 | User Guide - Page 78
Print cartridge Print cartridge The HP Fax uses the following print cartridge. HP 20 black inkjet print cartridge C6614 scanning width 8.27 inches (210 mm) Effective recording width 8 inches (203 mm) Power consumption Standby: 4.9Wh Printing Mode: Maximum 15 Wh Voltage 110 - 127~ Frequency - HP 1040 | User Guide - Page 79
dpi Faxing Standard: 98 x 203 dpi Fine: 196 x 203 dpi Super Fine: 392 x 203 dpi Speed dials 80 (HP 1040) or 100 (HP 1050) ECM mode YES Grey scale 64 levels User memory capacity 1 Mbyte (capable of 100 pages at ITU#1 test chart (2.5% coverage on A4) Ink Cartridge Part Number HP 20 (28ml - HP 1040 | User Guide - Page 80
A sample of ITU #1 test chart (reduced to 60.5%) A sample of ITU #1 test chart (reduced to 60.5%) Specifications and regulatory information 74 - HP 1040 | User Guide - Page 81
a voluntary program established to encourage the development of energy-efficient office products. ENERGY STAR is a U.S. registered service mark of the U.S. EPA. As an ENERGY STAR partner, HP has determined that this product meets ENERGY STAR guidelines for energy efficiency. For more information on - HP 1040 | User Guide - Page 82
the marketing name (HP 1040/1050 Fax series) or product FCC compliant telephone cord and modular plug service. If you experience trouble with this equipment, please contact the manufacturer, or look elsewhere in this manual other electronic device, including fax machines, to send any message unless - HP 1040 | User Guide - Page 83
installed and used in accordance with the instructions, may cause harmful interference to radio How to Identify and Resolve Radio-TV Interference Problems. This booklet is available from the U.S. that the electrical ground connections of the power utility, telephone lines and internal metallic - HP 1040 | User Guide - Page 84
Guide 22 and EN 45014 Manufacturer's Name: Hewlett-Packard Company Manufacturer's Address: declares, that the product Regulatory Model Number : 16399 West Bernardo Drive San Diego CA 92127, USA SDGOB-0403-01, -02 Product Name: HP Fax 1040 (Q7270A) Series (-01) HP Fax 1050 (Q7278A) Series - HP 1040 | User Guide - Page 85
support services Use Hewlett-Packard support services www.hp.com/support If you are unable to find the answer problem in detail. 4 Be near your unit when you call. Prepare your unit for shipment If you are requested to send in your unit for service, do the following: • Remove the print cartridge - HP 1040 | User Guide - Page 86
either the warranty to the customer or any HP support contract with the customer. However, if product failure or damage is attributable to the use of a non-HP or refilled ink cartridge, HP will charge its standard labor and materials charges to service the product for the failure or damage. If - HP 1040 | User Guide - Page 87
SPECIFICATIONS SPECIFICATIONS SPECIFICATIONS SPECIFICATIONS SPECIFICATIONS SPECIFICATIONS SPECIFICATIONS AND REGULATORY AND REGULATORY AND REGULATORY AND REGULATORY AND REGULATORY AND REGULATORY AND REGULATORY INFORMATION INFORMATION INFORMATION INFORMATION INFORMATION INFORMATION INFORMATION - HP 1040 | User Guide - Page 88
Hewlett-Packard LIMITED WARRANTY STATEMENT Specifications and regulatory information 82 - HP 1040 | User Guide - Page 89
monitor menu 15 call screening 37 Caller ID 28 junk faxes 28 list 28 report 52 turning on 28 Caller ID menu 13 calling the answering machine 39 Cancel button 10 cancel schedule menu 14 cancelling a scheduled job 46 cartridge cleaning 59 maintenance 55 part number 73 replacing 56 changing language - HP 1040 | User Guide - Page 90
help 79 Greeting button 11 greeting length of 36 playing 36 recording 36 greeting only 37 H HANDSET port 7 help 79 help list 51 HP Fax parts of 6 HP support 79 I ICM Record Time menu 15 image TCR 29 menu 13 incoming messages length of 15 ink cartridge maintenance 59 part number 55, 72 replacing 56 - HP 1040 | User Guide - Page 91
53 M making a copy 3 man fax rcv code, HP 1040 menu 14 memory clearing 53 Menu button 9 menu BASIC FAX, options 13 picture 12 using 17 menu 13 paper tray capacity 5 part number ink cartridge 72 pause 21 phone book 21, 51 dialing 22 print 22 searching 22 photo faxing 25 Play/Rec button 11 polling 14 - HP 1040 | User Guide - Page 92
14, 30 ring volume 25 rings to answer 27, 32 menu 13 rings to answer. See also toll saver S Scan & Fax 29 Scan & Fax Mode button 8 scanner adjustment 63 scanner area cleaning 61 schedule a fax 44 schedule inform 51 scheduled fax 14 scheduled faxes 51 scheduled job cancelling 46 scheduled jobs - HP 1040 | User Guide - Page 93
TEL mode 32, 34 telephone dialing 4 telephone numbers entering 18 text entering 18 time, setting 49 toll saver 40 menu 15 tone dialing 15 troubleshooting fax problems 66 messages 63 paper feeding 68 print quality 68 U unwanted faxes 13 V view ink level menu 15 volume ring 25 speaker 25 W warranty 80 - HP 1040 | User Guide - Page 94
-
 1
1 -
 2
2 -
 3
3 -
 4
4 -
 5
5 -
 6
6 -
 7
7 -
8
-
9
-
10
-
11
-
12
-
13
-
14
-
15
-
16
-
17
-
18
-
19
-
20
-
21
-
22
-
23
-
24
-
25
-
26
-
27
-
28
-
29
-
30
-
31
-
32
-
33
-
34
-
35
-
36
-
37
-
38
-
39
-
40
-
41
-
42
-
43
-
44
-
45
-
46
-
47
-
48
-
49
-
50
-
51
-
52
-
53
-
54
-
55
-
56
-
57
-
58
-
59
-
60
-
61
-
62
-
63
-
64
-
65
-
66
-
67
-
68
-
69
-
70
-
71
-
72
-
73
-
74
-
75
-
76
-
77
-
78
-
79
-
80
-
81
-
82
-
83
-
84
-
85
-
86
-
87
-
88
-
89
-
90
-
91
-
92
-
93
-
94
 |
 |

HP 1040/1050 Fax series
User Guide
Part number: Q7270-90102
First edition: 10/2004