| Section |
Page |
| All-in-one basics |
19 |
| All-in-one configurations |
20 |
| HP LaserJet 3050 all-in-one |
20 |
| HP LaserJet 3052/3055 all-in-one |
21 |
| HP LaserJet 3390/3392 all-in-one |
22 |
| All-in-one features |
23 |
| All-in-one parts |
25 |
| HP LaserJet 3050 all-in-one parts |
25 |
| Front view |
25 |
| Back view |
26 |
| Interface ports |
26 |
| Control panel |
27 |
| HP LaserJet 3052/3055 all-in-one parts |
28 |
| Front view |
28 |
| Back view |
28 |
| Interface ports |
29 |
| Control panel |
29 |
| HP LaserJet 3390/3392 all-in-one parts |
30 |
| Front view |
30 |
| Back view |
30 |
| Interface ports |
31 |
| Control panel |
31 |
| Software |
33 |
| Software installation |
34 |
| Typical installation |
34 |
| Minimum installation |
34 |
| Printer drivers |
35 |
| Supported printer drivers |
35 |
| Additional drivers |
35 |
| Select the correct printer driver |
36 |
| Printer-driver Help (Windows) |
36 |
| Gaining access to the printer drivers |
37 |
| What other software is available? |
37 |
| Software for Windows |
38 |
| Software components for Windows |
38 |
| HP ToolboxFX |
38 |
| Embedded Web server (EWS) |
38 |
| Using Add or Remove Programs to uninstall |
38 |
| Software for Macintosh |
39 |
| HP Director |
39 |
| Macintosh Configure Device (Mac OS X V10.3 and Mac OS X V10.4) |
39 |
| PDEs (Mac OS X V10.3 and Mac OS X V10.4) |
40 |
| Installing software for Macintosh |
40 |
| Installing Macintosh printing system software for direct connections (USB) |
40 |
| Installing Macintosh printing system software for networks |
41 |
| To remove software from Macintosh operating systems |
41 |
| Media specifications |
43 |
| General guidelines |
44 |
| Choosing paper and other media |
44 |
| HP media |
44 |
| Media to avoid |
45 |
| Media that can damage the all-in-one |
45 |
| Guidelines for using media |
46 |
| Paper |
46 |
| Labels |
47 |
| Label construction |
47 |
| Transparencies |
47 |
| Envelopes |
48 |
| Envelope construction |
48 |
| Envelopes with double-side seams |
48 |
| Envelopes with adhesive strips or flaps |
49 |
| Envelope storage |
49 |
| Card stock and heavy media |
49 |
| Card stock construction |
49 |
| Card stock guidelines |
49 |
| Letterhead and preprinted forms |
50 |
| Supported media weights and sizes |
51 |
| Printing and storage environment |
54 |
| Using the all-in-one |
55 |
| Loading media into the input trays |
56 |
| Loading documents to fax, copy, or scan |
56 |
| Loading input trays, HP LaserJet 3050/3052/3055 all-in-one |
58 |
| Priority input slot |
58 |
| 250-sheet input tray (tray 1) |
58 |
| Loading input trays, HP LaserJet 3390/3392 all-in-one |
59 |
| Single-sheet priority input slot (tray 1) |
59 |
| 250-sheet input tray (tray 2 or optional tray 3) |
59 |
| Controlling print jobs |
60 |
| Print-settings priorities |
60 |
| Selecting a source |
60 |
| Selecting a type or size |
60 |
| Using the all-in-one control panel |
61 |
| Changing the all-in-one control-panel display language |
61 |
| Changing the default media size and type |
61 |
| To change the default media size |
61 |
| To change the default media type |
62 |
| Changing the default tray configuration |
62 |
| Using the all-in-one volume controls |
63 |
| Changing the alarm volume |
63 |
| Changing the volume for the fax |
63 |
| Changing the ring volume of the fax |
64 |
| Changing the all-in-one control-panel key-press volume |
64 |
| Printing |
65 |
| Using features in the Windows printer driver |
66 |
| Creating and using quick sets |
66 |
| Creating and using watermarks |
67 |
| Resizing documents |
67 |
| Setting a custom paper size from the printer driver |
68 |
| Using different paper and printing covers |
68 |
| Printing a blank first page or last page |
68 |
| Printing multiple pages on one sheet of paper |
69 |
| Printing on both sides |
69 |
| To print on both sides automatically (HP LaserJet 3390/3392 all-in-one) |
70 |
| To print on both sides manually (HP LaserJet 3050/3052/3055 all-in-one) |
70 |
| To print on both sides manually (HP LaserJet 3390/3392 all-in-one) |
72 |
| Using features in the Macintosh printer driver |
73 |
| Creating and using presets in Mac OS X V10.3 and Mac OS X V10.4 |
73 |
| Printing a cover page (Macintosh) |
74 |
| Printing multiple pages on one sheet of paper (Macintosh) |
74 |
| Printing on both sides (Macintosh) |
75 |
| To print on both sides automatically (HP LaserJet 3390/3392 all-in-one) |
75 |
| To print on both sides manually (HP LaserJet 3050/3052/3055 all-in-one) |
75 |
| To print on both sides manually (HP LaserJet 3390/3392 all-in-one) (Macintosh) |
77 |
| Selecting an output location (HP LaserJet 3390/3392 all-in-one) |
78 |
| Printing on special media |
79 |
| Printing on special media (HP LaserJet 3050/3052/3055 all-in-one) |
79 |
| Printing on special media (HP LaserJet 3390/3392 all-in-one) |
80 |
| Transparencies and labels |
81 |
| Custom-size media and card stock |
81 |
| Colored paper |
81 |
| Envelopes |
82 |
| Heavy paper |
82 |
| Letterhead and preprinted forms |
82 |
| Canceling a print job |
83 |
| Fax |
85 |
| Basic fax features and tasks |
86 |
| Fax control-panel buttons |
86 |
| Specifying the fax settings |
86 |
| Setting the time and date |
87 |
| Setting the fax header |
87 |
| Sending faxes |
88 |
| Using manual dial |
91 |
| Redialing manually |
92 |
| To redial manually |
92 |
| Canceling a fax job |
93 |
| To cancel the current fax job |
93 |
| To cancel a fax job by using the Fax Job Status |
93 |
| Changing the default light/dark (contrast) setting |
93 |
| Changing resolution settings |
94 |
| Changing the default glass-size setting |
95 |
| Selecting tone-dialing or pulse-dialing mode |
95 |
| Changing the redial settings |
96 |
| Changing autoreduction settings for incoming faxes |
97 |
| Blocking or unblocking fax numbers |
98 |
| Advanced fax features and tasks |
99 |
| Using speed-dial entries, one-touch keys, and group-dial entries |
99 |
| Using dialing characters |
99 |
| To insert a pause |
99 |
| To program or edit speed-dial entries and one-touch keys |
100 |
| To delete speed-dial entries and one-touch keys |
101 |
| To program speed-dial entries or one-touch keys quickly |
101 |
| To manage group-dial entries |
102 |
| To program group-dial entries |
102 |
| To delete group-dial entries |
102 |
| To delete an individual from a group-dial entry |
103 |
| To delete all phone book entries |
103 |
| Inserting a dial prefix |
104 |
| Sending a delayed fax |
105 |
| Using billing codes |
106 |
| Reprinting a fax |
107 |
| Automatic two-sided printing (duplexing) of received faxes (HP LaserJet 3390/3392 all-in-one only) |
108 |
| Deleting faxes from memory |
108 |
| Using fax forwarding |
109 |
| Using fax polling |
109 |
| Changing the silence-detect mode |
110 |
| Creating stamp-received faxes |
110 |
| Setting the fax-error-correction mode |
111 |
| Changing the V.34 setting |
111 |
| Changing the sound-volume settings |
112 |
| To change the fax-sounds (line-monitor) volume (HP LaserJet 3050 all-in-one) |
112 |
| To change the fax-sounds (line-monitor) volume (HP LaserJet 3055/3390/3392 all-in-one) |
112 |
| To change the ring volume |
112 |
| Fax logs and reports |
113 |
| Printing the fax activity log |
113 |
| Printing a fax call report |
114 |
| Setting print times for the fax call report |
114 |
| Including the first page of each fax on the fax call report |
115 |
| Printing a phone book report |
115 |
| Printing the billing-code report |
115 |
| Printing the block-fax list |
116 |
| Printing all fax reports |
116 |
| Sending and receiving faxes by using a computer |
117 |
| Other ways to set up your fax |
120 |
| To receive faxes when you hear fax tones |
120 |
| Setting the answer mode |
120 |
| Changing ring patterns (distinctive ring) |
122 |
| Changing the rings-to-answer setting |
123 |
| Using the rings-to-answer setting |
123 |
| To set the number of rings-to-answer |
123 |
| Sending a fax by dialing from an extension telephone |
124 |
| Changing the detect-dial-tone setting |
124 |
| Receiving faxes on a shared phone line |
125 |
| To receive faxes when you hear fax tones |
125 |
| Making an extension telephone available to receive faxes |
125 |
| Connecting the all-in-one to a phone line (HP LaserJet 3050/3055 all-in-one) |
126 |
| Connecting the all-in-one to a phone line (HP LaserJet 3390/3392 all-in-one) |
127 |
| Connecting additional devices |
129 |
| Using a dedicated fax line |
129 |
| Using a shared telephone line |
129 |
| To connect additional devices to the HP LaserJet 3050/3055 all-in-one |
130 |
| To connect additional devices to the HP LaserJet 3390/3392 all-in-one |
133 |
| Copy |
137 |
| Starting a copy job |
138 |
| Canceling a copy job |
139 |
| Adjusting the copy quality |
140 |
| Adjusting the lighter/darker (contrast) setting |
141 |
| Reducing or enlarging copies |
142 |
| Adjusting the copy size |
142 |
| Changing the number of copies |
144 |
| Changing the copy-collation setting |
145 |
| Copying onto media of different types and sizes |
146 |
| Copying two-sided documents (HP LaserJet 3050 all-in-one) |
148 |
| Copying two-sided documents (HP LaserJet 3052/3055 all-in-one) |
149 |
| Using automatic two-sided printing (duplexing) to copy documents (HP LaserJet 3390/3392 all-in-one) |
150 |
| Changing tray selection (HP LaserJet 3390/3392 all-in-one) |
152 |
| Copying photos and books (HP LaserJet 3052/3055/3390/3392 all-in-one only) |
153 |
| Viewing copy settings (HP LaserJet 3390/3392 all-in-one only) |
155 |
| Scan |
157 |
| Understanding scanning methods |
158 |
| Scanning from the all-in-one control panel (Windows) |
159 |
| Programming the all-in-one Scan To button |
159 |
| To create, modify, or delete destinations |
160 |
| Scanning to e-mail |
160 |
| Scanning to a file |
161 |
| Scanning to other programs |
161 |
| Scanning by using HP LaserJet Scan (Windows) |
162 |
| Scanning from the all-in-one and HP Director (Macintosh) |
163 |
| Scanning to e-mail |
163 |
| Scanning to a file |
163 |
| Scanning to a software program |
164 |
| Using page-by-page scanning |
164 |
| Canceling a scan job |
164 |
| Scanning by using other software |
165 |
| Using TWAIN-compliant and WIA-compliant software |
165 |
| Scanning from a TWAIN-enabled program |
165 |
| To scan from a TWAIN-enabled program |
165 |
| Scanning from a WIA-enabled program (Windows XP only) |
165 |
| To scan from a WIA-enabled program |
165 |
| Scanning a photo or a book |
166 |
| Scanning by using optical character recognition (OCR) software |
167 |
| Readiris |
167 |
| Scanner resolution and color |
168 |
| Resolution and color guidelines |
169 |
| Color |
169 |
| To clean the scanner glass |
170 |
| Networking |
171 |
| Set up the all-in-one and use it on the network (HP LaserJet 3052/3055/3390/3392 all-in-one only) |
172 |
| Configuring a network-port-connected all-in-one |
172 |
| Configuring a direct-connected shared all-in-one |
173 |
| Changing from a direct-connected shared all-in-one to a network-port-connected all-in-one |
174 |
| Using the embedded Web server or HP ToolboxFX |
175 |
| Setting a network password |
175 |
| Using the all-in-one control panel |
176 |
| Network configuration page |
176 |
| Configuration page |
176 |
| IP configuration |
176 |
| Manual configuration |
176 |
| Automatic configuration |
177 |
| Link speed and duplex settings |
177 |
| Supported network protocols |
178 |
| TCP/IP configuration |
180 |
| Server-based, AutoIP, and manual TCP/IP configuration |
180 |
| Server-based TCP/IP configuration |
180 |
| Default IP address configuration (AutoIP) |
180 |
| TCP/IP configuration tools |
181 |
| Using DHCP |
181 |
| UNIX systems |
181 |
| Windows systems |
182 |
| Windows NT 4.0 Server |
182 |
| Windows 2000 Server |
184 |
| NetWare systems |
185 |
| To discontinue DHCP configuration |
185 |
| Using BOOTP |
186 |
| Why use BOOTP? |
186 |
| BOOTP on UNIX |
187 |
| Systems that use Network Information Service (NIS) |
187 |
| Configuring the BOOTP server |
187 |
| Bootptab file entries |
187 |
| Configuring for LPD printing |
189 |
| Introduction |
189 |
| About LPD |
190 |
| Requirements for configuring LPD |
191 |
| LPD setup overview |
191 |
| Step 1. Setting up IP parameters |
191 |
| Step 2. Setting up print queues |
191 |
| Step 3. Printing a test file |
191 |
| LPD on UNIX systems |
192 |
| Configuring print queues for BSD-based systems |
192 |
| Example: Printcap entry |
192 |
| Example: Creating spooling directory |
193 |
| Configuring print queues using SAM (HP-UX systems) |
193 |
| Printing a test file |
194 |
| LPD on Windows NT/2000 systems |
195 |
| Installing TCP/IP software (Windows NT) |
195 |
| Configuring a network all-in-one for Windows 2000 systems |
197 |
| Configuring a network all-in-one for Windows NT 4.0 systems |
198 |
| Verifying the configuration |
198 |
| Printing from Windows clients |
198 |
| LPD on Windows XP systems |
199 |
| Adding Windows optional networking components |
199 |
| Configuring a network LPD all-in-one |
199 |
| Adding a new LPD all-in-one |
199 |
| Creating an LPR port for an installed all-in-one |
200 |
| TCP/IP |
201 |
| Introduction |
201 |
| Internet Protocol (IP) |
201 |
| Transmission Control Protocol (TCP) |
201 |
| User Datagram Protocol (UDP) |
201 |
| IP address |
202 |
| IP address: network portion |
202 |
| IP address: host portion |
202 |
| IP address structure and class |
202 |
| Configuring IP parameters |
203 |
| Dynamic Host Configuration Protocol (DHCP) |
203 |
| BOOTP |
203 |
| Subnets |
204 |
| Subnet mask |
204 |
| Gateways |
204 |
| Default gateway |
204 |
| Convenience stapler (HP LaserJet 3392 all-in-one only) |
205 |
| Understanding the convenience stapler |
206 |
| Loading staples |
207 |
| Using the convenience stapler |
209 |
| Clearing stapler jams |
211 |
| How do I? |
213 |
| Print: How do I? |
214 |
| Change the all-in-one print settings, such as volume or print quality, in HP ToolboxFX |
214 |
| Print on both sides (Windows) |
215 |
| To print on both sides automatically (HP LaserJet 3390/3392 all-in-one) |
215 |
| To print on both sides manually (HP LaserJet 3050/3052/3055 all-in-one) |
215 |
| To print on both sides manually (HP LaserJet 3390/3392 all-in-one) |
217 |
| Print on both sides (Macintosh) |
218 |
| To print on both sides automatically (HP LaserJet 3390/3392 all-in-one) |
218 |
| To print on both sides manually (HP LaserJet 3050/3052/3055 all-in-one) |
219 |
| To print on both sides manually (HP LaserJet 3390/3392 all-in-one) (Macintosh) |
220 |
| Use the single-sheet priority input slot (tray 1) |
220 |
| Print on special media |
221 |
| Printing on special media (HP LaserJet 3050/3052/3055 all-in-one) |
221 |
| Printing on special media (HP LaserJet 3390/3392 all-in-one) |
222 |
| Transparencies and labels |
223 |
| Custom-size media and card stock |
223 |
| Colored paper |
223 |
| Envelopes |
223 |
| Heavy paper |
224 |
| Letterhead and preprinted forms |
224 |
| Fax: How do I? |
225 |
| Use the Setup Wizard |
225 |
| Send a fax from the all-in-one |
225 |
| Reprint a fax |
226 |
| Print the fax activity log |
227 |
| Forward received faxes to another fax number |
228 |
| Send and receive faxes by using a computer |
229 |
| Add or delete a contact |
231 |
| To delete speed-dial entries and one-touch keys |
232 |
| Fax phone book |
232 |
| To program or edit speed-dial entries and one-touch keys |
234 |
| Create a new group list |
235 |
| To program group-dial entries |
235 |
| To delete group-dial entries |
236 |
| To delete an individual from a group-dial entry |
236 |
| To delete all phone book entries |
237 |
| Import contacts from another source |
237 |
| Change the default light/dark (contrast) setting |
238 |
| Change resolution settings |
239 |
| Use the all-in-one control-panel buttons |
240 |
| Enter text from the control panel |
240 |
| Copy: How do I? |
241 |
| Copy two-sided documents (HP LaserJet 3050 all-in-one) |
241 |
| Copy two-sided documents (HP LaserJet 3052/3055 all-in-one) |
242 |
| Use automatic two-sided printing (duplexing) to copy documents (HP LaserJet 3390/3392 all-in-one) |
243 |
| Reduce or enlarge copies |
245 |
| Adjusting the copy size |
245 |
| Adjust the lighter/darker (contrast) setting |
246 |
| Change the copy-collation setting |
247 |
| Adjust the copy quality |
248 |
| Copy onto media of different types and sizes |
249 |
| Change tray selection (HP LaserJet 3390/3392 all-in-one) |
250 |
| Change the number of copies |
251 |
| Scan: How do I? |
252 |
| Use HP LaserJet Scan |
252 |
| Scan from the all-in-one control panel |
252 |
| Program the all-in-one Scan To button |
253 |
| Create, modify, or delete destinations |
253 |
| Scan to e-mail |
254 |
| Scan to a folder |
254 |
| Network: How do I? |
255 |
| Set up the all-in-one and use it on the network |
255 |
| To configure a network port-connected all-in-one configuration (direct mode or peer-to-peer printing ... |
255 |
| To configure a direct-connected shared all-in-one (client server printing) |
256 |
| To change from a direct-connected shared all-in-one to a network port-connected all-in-one configura ... |
257 |
| Set my network password |
257 |
| Other: How do I? |
258 |
| Clean the paper path |
258 |
| To clean the paper path from HP ToolboxFX |
258 |
| To clean the paper path from the all-in-one control panel |
259 |
| Restore the factory-set defaults |
259 |
| Use the Embedded Web server (EWS) |
260 |
| Find the user guide |
260 |
| User guide links |
260 |
| Where to look for more information |
260 |
| Setting up the all-in-one |
260 |
| Using the all-in-one |
261 |
| Receive toner warnings |
261 |
| Receive toner warnings from the all-in-one at the all-in-one control panel (HP LaserJet 3390/3392 al ... |
261 |
| Receive toner warnings from the all-in-one at my computer (HP LaserJet 3390/3392 all-in-one) |
261 |
| Receive toner warning e-mail messages from the all-in-one (HP LaserJet 3390/3392 all-in-one) |
262 |
| View the control-panel menu items for the all-in-one (HP LaserJet 3390/3392 all-in-one) |
262 |
| Use the convenience stapler |
263 |
| Load staples |
265 |
| Clear stapler jams |
267 |
| Replace the print cartridge |
269 |
| Clear jams |
271 |
| Clear jams from the print cartridge area |
271 |
| Clear jams from the input trays (HP LaserJet 3050/3052/3055 all-in-one) |
272 |
| Clear jams from the input trays (HP LaserJet 3390/3392 all-in-one) |
272 |
| Clear jams from the output bin |
276 |
| Clear jams from the straight-through output path (HP LaserJet 3390/3392 all-in-one) |
277 |
| Clear jams from the automatic two-sided printing (duplexing) path |
279 |
| Clear jams from the automatic document feeder (ADF) |
282 |
| Order new supplies |
284 |
| Managing the all-in-one and maintenance |
285 |
| Information pages |
286 |
| Demo page |
286 |
| Usage page |
286 |
| Configuration page |
286 |
| Supplies Status page (HP LaserJet 3390/3392 all-in-one) |
288 |
| Network configuration page |
289 |
| Fax logs and reports |
289 |
| HP ToolboxFX |
290 |
| To view HP ToolboxFX |
290 |
| Status |
291 |
| Event log |
291 |
| Alerts |
292 |
| Set up status alerts |
292 |
| Set up e-mail alerts |
292 |
| Fax |
293 |
| Fax tasks |
293 |
| Fax phone book |
293 |
| Fax send log |
295 |
| Fax receive log |
295 |
| Help |
295 |
| System settings |
296 |
| Device information |
296 |
| Paper handling |
297 |
| Print quality |
297 |
| Paper types |
297 |
| System setup |
298 |
| Service |
298 |
| Device Polling |
298 |
| Print settings |
298 |
| Printing |
298 |
| PCL 5e |
299 |
| PostScript |
299 |
| Network settings |
299 |
| Macintosh Configure Device (Mac OS X V10.3 and Mac OS X V10.4) |
300 |
| Embedded Web server |
301 |
| Features |
301 |
| Managing supplies |
302 |
| Checking status and ordering supplies (HP LaserJet 3390/3392 all-in-one only) |
302 |
| To check supplies status by using the control panel |
302 |
| To check supplies status by using HP ToolboxFX |
302 |
| Storing supplies |
303 |
| Replacing and recycling supplies |
303 |
| HP policy on non-HP supplies |
303 |
| Resetting the all-in-one for non-HP supplies (HP LaserJet 3390/3392 all-in-one) |
303 |
| HP fraud hotline |
303 |
| Cleaning the all-in-one |
305 |
| To clean the exterior |
305 |
| To clean the scanner glass and white platen (HP LaserJet 3050 all-in-one) |
305 |
| To clean the scanner glass (HP LaserJet 3052/3055/3390/3392 all-in-one) |
306 |
| To clean the lid backing (HP LaserJet 3052/3055/3390/3392 all-in-one) |
307 |
| To clean the automatic document feeder (ADF) pickup roller assembly (HP LaserJet 3052/3055/3390/3392 ... |
308 |
| Cleaning the paper path |
311 |
| To clean the paper path from HP ToolboxFX |
311 |
| To clean the paper path from the all-in-one control panel |
312 |
| Changing the print cartridge |
313 |
| Changing the automatic document feeder (ADF) on the HP LaserJet 3390/3392 all-in-one |
315 |
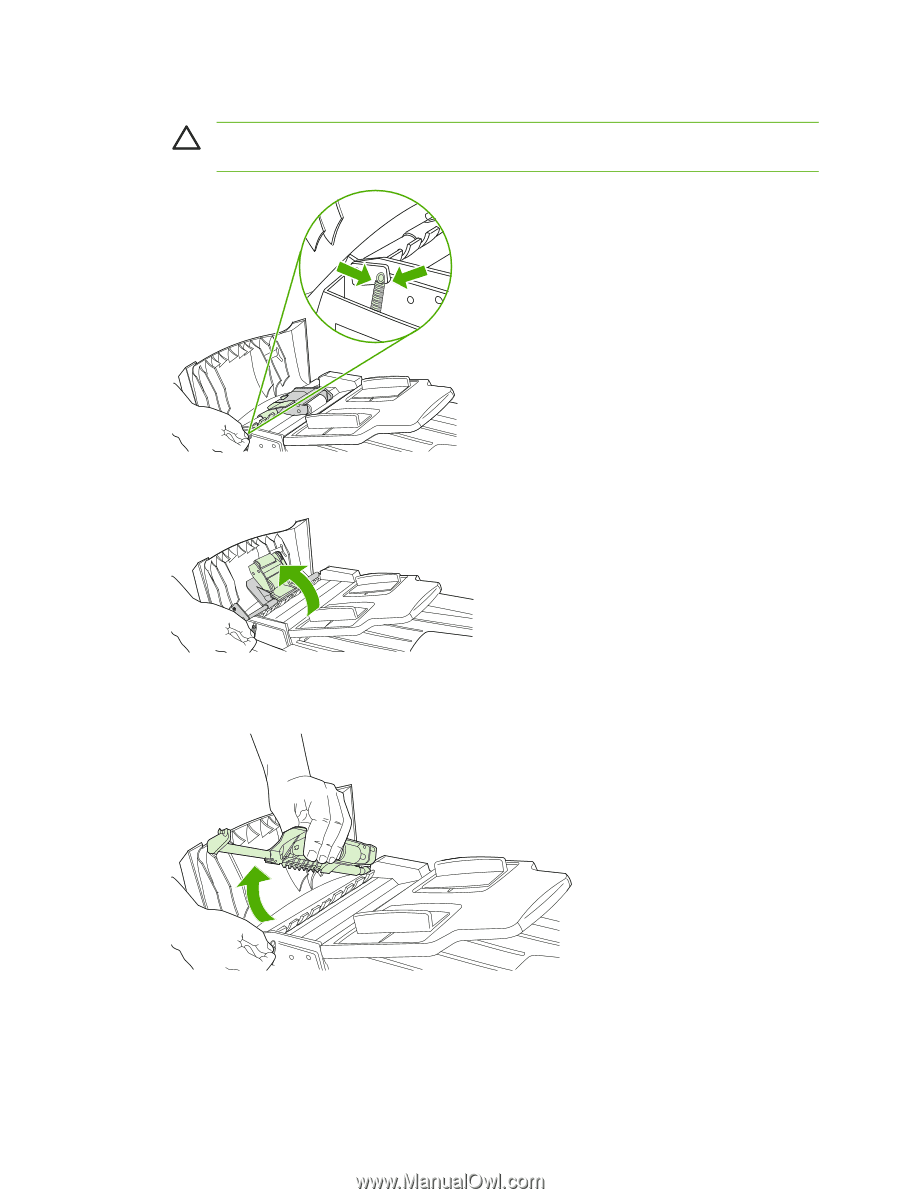
| Changing the automatic document feeder (ADF) pickup roller and load arm assembly (HP LaserJet 3052/3 ... |
317 |
| Troubleshooting |
321 |
| Troubleshooting checklist |
322 |
| Clearing jams |
326 |
| Causes of jams |
326 |
| Tips to avoid jams |
326 |
| Where to look for jams |
327 |
| Print cartridge area |
327 |
| Input trays (HP LaserJet 3050/3052/3055 all-in-one) |
329 |
| Input trays (HP LaserJet 3390/3392 all-in-one) |
330 |
| Output bin |
333 |
| Straight-through output path (HP LaserJet 3390/3392 all-in-one) |
333 |
| Automatic two-sided printing (duplexing) path (HP LaserJet 3390/3392 all-in-one) |
335 |
| Jams occur in the automatic document feeder (ADF) |
338 |
| Control-panel messages |
341 |
| Alert and warning messages |
341 |
| Alert and warning message tables |
341 |
| Critical error messages |
348 |
| Critical error message-tables |
348 |
| Print problems |
350 |
| Print quality problems |
350 |
| Improving print quality |
350 |
| Understanding print-quality settings |
350 |
| To temporarily change print-quality settings |
350 |
| To change print-quality settings for all future jobs |
350 |
| Identifying and correcting print defects |
351 |
| Print-quality checklist |
351 |
| General print-quality issues |
351 |
| Media-handling problems |
355 |
| Print-media guidelines |
356 |
| Solving print-media problems |
356 |
| Performance problems |
357 |
| Fax problems |
359 |
| Problems receiving faxes |
359 |
| Problems sending faxes |
361 |
| Voice-call problems |
363 |
| Media-handling problems |
363 |
| Performance problems |
364 |
| Copy problems |
365 |
| Preventing problems |
365 |
| Image problems |
365 |
| Media-handling problems |
366 |
| Performance problems |
368 |
| Scan problems |
369 |
| Solving scanned-image problems |
369 |
| Scan-quality problems |
371 |
| Preventing problems |
371 |
| Solving scan-quality problems |
371 |
| Network problems |
372 |
| Verifying that the all-in-one is on and online |
372 |
| Resolving communication problems with the network |
372 |
| Control-panel display problems |
374 |
| Stapler problems (HP LaserJet 3392 all-in-one) |
374 |
| Troubleshooting PostScript (PS) errors |
375 |
| Troubleshooting common Macintosh problems |
376 |
| Problems with Mac OS X V10.3 and Mac OS X V10.4 |
376 |
| Troubleshooting tools |
377 |
| All-in-one pages and reports |
377 |
| Demo page |
377 |
| Configuration page |
377 |
| Supplies Status page (HP LaserJet 3390/3392 all-in-one) |
377 |
| Fax reports |
378 |
| Fax activity log |
379 |
| Fax call report |
379 |
| Phone book report |
379 |
| Billing-code report |
380 |
| HP ToolboxFX |
380 |
| To view HP ToolboxFX |
380 |
| Troubleshooting tab |
380 |
| Service menu |
381 |
| Restoring the factory-set defaults |
381 |
| Cleaning the paper path |
381 |
| T.30 protocol trace |
382 |
| Archive print |
382 |
| Accessories and ordering information |
383 |
| Supplies |
384 |
| Memory (HP LaserJet 3390/3392 all-in-one) |
384 |
| Cable and interface accessories |
384 |
| Paper-handling accessories (HP LaserJet 3390 all-in-one) |
384 |
| User-replaceable parts |
385 |
| Paper and other print media |
385 |
| Supplementary documentation |
386 |
| Service and support |
389 |
| Hewlett-Packard limited warranty statement |
390 |
| Print Cartridge Limited Warranty Statement |
391 |
| Availability of support and service |
392 |
| HP Customer Care |
392 |
| Hardware service |
393 |
| Extended warranty |
393 |
| Guidelines for repacking the printer |
394 |
| All-in-one specifications |
395 |
| Physical specifications |
396 |
| Electrical specifications |
396 |
| Power consumption |
397 |
| Environmental specifications |
397 |
| Acoustic emissions |
398 |
| Regulatory information |
399 |
| FCC compliance |
400 |
| Environmental Product Stewardship program |
401 |
| Protecting the environment |
401 |
| Ozone production |
401 |
| Power consumption |
401 |
| HP LaserJet printing supplies |
402 |
| Nederlands |
403 |
| Taiwan |
403 |
| Disposal of waste equipment by users in private household in the European Union |
404 |
| Material safety data sheet |
404 |
| For more information |
404 |
| Telephone Consumer Protection Act (United States) |
405 |
| IC CS-03 requirements |
406 |
| EU statement for telecom operation |
407 |
| New Zealand telecom statements |
407 |
| Declaration of conformity (HP LaserJet 3390, 3392, 3055, and 3050) |
408 |
| Declaration of conformity (HP LaserJet 3052) |
409 |
| Country-/region-specific safety statements |
410 |
| Laser safety statement |
410 |
| Canadian DOC statement |
410 |
| Korean EMI statement |
410 |
| Finnish laser statement |
411 |
| Glossary |
413 |

 1
1 313
313 314
314 315
315 316
316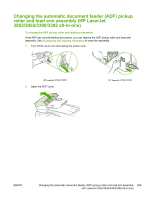 317
317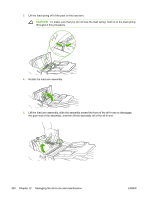 318
318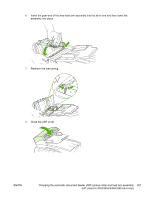 319
319 320
320 321
321 322
322 323
323