HP 6120XG HP ProCurve Series 6120 Blade Switches Installation and Getting Star - Page 22
Installing a mini-GBIC, SFP+ or XFP transceiver, Removing a mini-GBIC, Caution
 |
View all HP 6120XG manuals
Add to My Manuals
Save this manual to your list of manuals |
Page 22 highlights
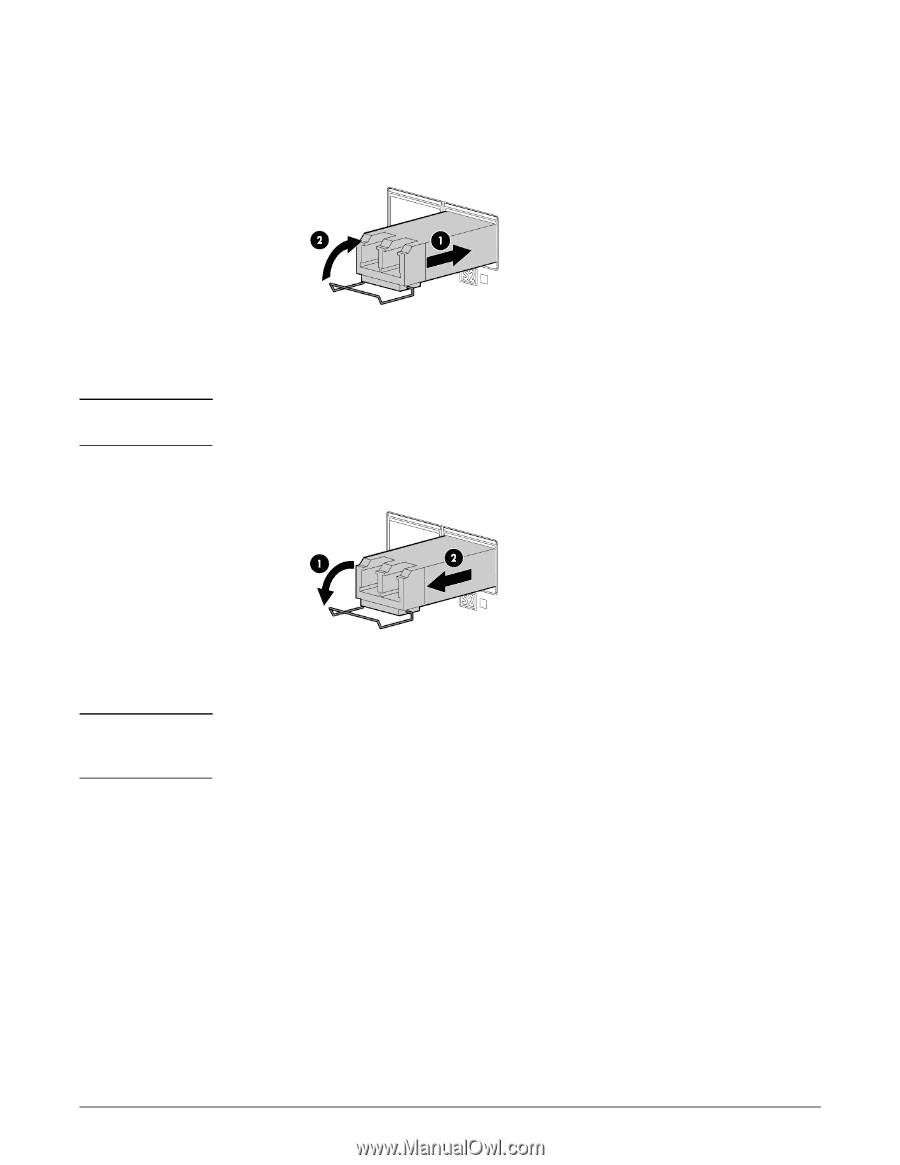
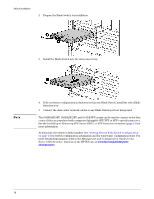
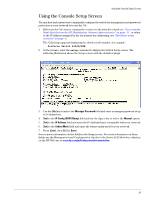
Switch Installation Installing a mini-GBIC, SFP+ or XFP transceiver 1. Remove the dust cap and save it for future use. 2. Install the transceiver with the label side up. Ensure the latch is closed and the transceiver is fully seated. Note Figure 8. Inserting a transceiver Removing a mini-GBIC Removing and installing a transceiver can shorten the useful life. Do not remove and insert transceivers more often than is necessary. 1. Disconnect all cables. 2. Open the latch and remove the transceiver. Caution Figure 9. Removing a transceiver 3. Install dust plugs on the transceiver and rubber plugs on the fiber-optic cable. Be sure to install the dust plugs on the fiber-optic transceiver and the rubber plugs on the fiberoptic cable. The plugs and caps protect the transceiver ports and cables from contamination and ambient light. 14
-
 1
1 -
2
-
3
-
4
-
5
-
6
-
7
-
8
-
9
-
10
-
11
-
12
-
13
-
14
-
15
-
16
-
 17
17 -
 18
18 -
 19
19 -
 20
20 -
 21
21 -
 22
22 -
 23
23 -
 24
24 -
 25
25 -
 26
26 -
 27
27 -
28
-
29
-
30
-
31
-
32
-
33
-
34
-
35
-
36
-
37
-
38
-
39
-
40
-
41
-
42
-
43
-
44
-
45
-
46
-
47
-
48
-
49
-
50
-
51
-
52
-
53
-
54
-
55
-
56
-
57
-
58
-
59
-
60
-
61
-
62
 |
 |