HP 9040 HP LaserJet 9040mfp/9050mfp - Software Technical Reference (external) - Page 78
Printer messages during the firmware update, Upload New Firmware Image - hard drive
 |
UPC - 829160792927
View all HP 9040 manuals
Add to My Manuals
Save this manual to your list of manuals |
Page 78 highlights
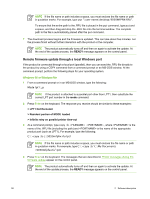
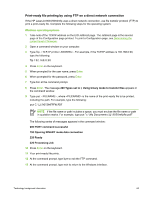
3 Open the Device Management folder in the drop-down list in the Navigation panel. Navigate to the Device Lists folder. 4 Expand the Device Lists folder and select All Devices. Locate the product that you want to update in the list of products, and click to select it. 5 Locate the drop-down box for Device Tools in the upper-right corner of the window. Select Update Printer Firmware from the choose action list. 6 If the name of the .RFU file is not listed in the All Available Images dialog box, click Browse in the Upload New Firmware Image dialog box and navigate to the location of the .RFU file that you downloaded from the Web at the start of this procedure. If the filename is listed, select it. 7 Click Upload to move the .RFU file from your hard drive to the HP Web Jetadmin server. 8 Refresh the browser. 9 Select the .RFU file from the Printer Firmware Update drop-down menu. 10 Click Update Firmware. HP Web Jetadmin sends the selected .RFU file to the product. The messages that are described in Printer messages during the firmware update appear on the control panel. NOTE The product automatically turns off and then on again to activate the update. At the end of the update process, the READY message appears on the control panel. HP Web Jetadmin version 7.8 and later can also be used to perform multiple or unattended installations. Complete the following steps for multiple or unattended installations. 1 Start HP Web Jetadmin. 2 Create a device group. A simple way to do this is to follow these steps: a. Click Device Management, then click All Devices. -or- b. Shift-click to select products that you want to be included in the group, and then click OK. -or- c. When prompted, type a name for the new device group, and then click OK. 3 To modify several products in a group, click the group name, and then click Open. 4 The drop-down menu for Device Group Tools appears on the right side of the window. Scroll if necessary to view it. 5 In the Device Group Tools drop-down box, select an action. Type in the appropriate information. Click Return to Device Group when finished. Printer messages during the firmware update Three messages appear during a normal update process. 62 2 Software description
-
 1
1 -
2
-
3
-
4
-
5
-
6
-
7
-
8
-
9
-
10
-
11
-
12
-
13
-
14
-
15
-
16
-
17
-
18
-
19
-
20
-
21
-
22
-
23
-
24
-
25
-
26
-
27
-
28
-
29
-
30
-
31
-
32
-
33
-
34
-
35
-
36
-
37
-
38
-
39
-
40
-
41
-
42
-
43
-
44
-
45
-
46
-
47
-
48
-
49
-
50
-
51
-
52
-
53
-
54
-
55
-
56
-
57
-
58
-
59
-
60
-
61
-
62
-
63
-
64
-
65
-
66
-
67
-
68
-
69
-
70
-
71
-
72
-
 73
73 -
 74
74 -
 75
75 -
 76
76 -
 77
77 -
 78
78 -
 79
79 -
 80
80 -
 81
81 -
 82
82 -
 83
83 -
84
-
85
-
86
-
87
-
88
-
89
-
90
-
91
-
92
-
93
-
94
-
95
-
96
-
97
-
98
-
99
-
100
-
101
-
102
-
103
-
104
-
105
-
106
-
107
-
108
-
109
-
110
-
111
-
112
-
113
-
114
-
115
-
116
-
117
-
118
-
119
-
120
-
121
-
122
-
123
-
124
-
125
-
126
-
127
-
128
-
129
-
130
-
131
-
132
-
133
-
134
-
135
-
136
-
137
-
138
-
139
-
140
-
141
-
142
-
143
-
144
-
145
-
146
-
147
-
148
-
149
-
150
-
151
-
152
-
153
-
154
-
155
-
156
-
157
-
158
-
159
-
160
-
161
-
162
-
163
-
164
-
165
-
166
-
167
-
168
-
169
-
170
-
171
-
172
-
173
-
174
-
175
-
176
-
177
-
178
-
179
-
180
-
181
-
182
-
183
-
184
-
185
-
186
-
187
-
188
-
189
-
190
-
191
-
192
-
193
-
194
-
195
-
196
-
197
-
198
-
199
-
200
-
201
-
202
-
203
-
204
-
205
-
206
-
207
-
208
-
209
-
210
-
211
-
212
-
213
-
214
-
215
-
216
-
217
-
218
-
219
-
220
-
221
-
222
-
223
-
224
-
225
-
226
-
227
-
228
-
229
-
230
-
231
-
232
-
233
-
234
-
235
-
236
-
237
-
238
-
239
-
240
-
241
-
242
-
243
-
244
-
245
-
246
-
247
-
248
-
249
-
250
-
251
-
252
-
253
-
254
-
255
-
256
-
257
-
258
-
259
-
260
-
261
-
262
-
263
-
264
-
265
-
266
-
267
-
268
-
269
-
270
-
271
-
272
-
273
-
274
-
275
-
276
-
277
-
278
-
279
-
280
-
281
-
282
-
283
-
284
-
285
-
286
-
287
-
288
-
289
-
290
-
291
-
292
-
293
-
294
-
295
-
296
-
297
-
298
-
299
-
300
-
301
-
302
-
303
-
304
-
305
-
306
-
307
-
308
-
309
-
310
-
311
-
312
-
313
-
314
-
315
-
316
-
317
-
318
-
319
-
320
-
321
-
322
-
323
-
324
-
325
-
326
-
327
-
328
-
329
-
330
 |
 |