HP DesignJet T7200 Using Your Printer - Page 164
The paper has jammed, Prints do not stack correctly in the bin
 |
View all HP DesignJet T7200 manuals
Add to My Manuals
Save this manual to your list of manuals |
Page 164 highlights
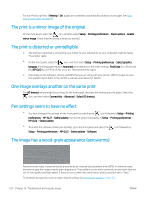
The paper has jammed If a paper jam occurs, follow the instructions on the front panel. These are the steps to follow: 1. Open the window. 2. The printer may ask whether you see jammed paper. If you reply no, the printer will offer to run a diagnostic to check whether there is a problem with the carriage. 3. Move the carriage aside and remove jammed paper from the platen. 4. Go to the rear of the printer and open the rear door. 5. Cut the paper with a sharp knife along the line indicated, and remove all the paper that you can find. 6. Close the rear door. 7. If printer still detects paper present, it will ask you to try again. If it still detects paper after the retry, it will offer to run a diagnostic to check whether there is a problem with the paper sensor. 8. Restart the printer. 9. Reload the paper. If you are using self-adhesive paper and performing frequent roll switches, you may start to see paper jams in the paper input path. This problem can be caused by adhesive deposited from the edge of the paper onto the conical surface of the paper sensor. To solve this particular problem, use a soft cotton cloth to clean all the adhesive from the paper sensor. Prints do not stack correctly in the bin ● Paper often tends to curl near the end of a roll, which can cause stacking problems. Load a new roll, or remove prints manually as they are completed. ● If you are mixing prints or nesting sets of several different sizes, you might experience stacking problems because of the different sizes of paper in the bin. 156 Chapter 17 Troubleshoot paper issues ENWW
-
 1
1 -
2
-
3
-
4
-
5
-
6
-
7
-
8
-
9
-
10
-
11
-
12
-
13
-
14
-
15
-
16
-
17
-
18
-
19
-
20
-
21
-
22
-
23
-
24
-
25
-
26
-
27
-
28
-
29
-
30
-
31
-
32
-
33
-
34
-
35
-
36
-
37
-
38
-
39
-
40
-
41
-
42
-
43
-
44
-
45
-
46
-
47
-
48
-
49
-
50
-
51
-
52
-
53
-
54
-
55
-
56
-
57
-
58
-
59
-
60
-
61
-
62
-
63
-
64
-
65
-
66
-
67
-
68
-
69
-
70
-
71
-
72
-
73
-
74
-
75
-
76
-
77
-
78
-
79
-
80
-
81
-
82
-
83
-
84
-
85
-
86
-
87
-
88
-
89
-
90
-
91
-
92
-
93
-
94
-
95
-
96
-
97
-
98
-
99
-
100
-
101
-
102
-
103
-
104
-
105
-
106
-
107
-
108
-
109
-
110
-
111
-
112
-
113
-
114
-
115
-
116
-
117
-
118
-
119
-
120
-
121
-
122
-
123
-
124
-
125
-
126
-
127
-
128
-
129
-
130
-
131
-
132
-
133
-
134
-
135
-
136
-
137
-
138
-
139
-
140
-
141
-
142
-
143
-
144
-
145
-
146
-
147
-
148
-
149
-
150
-
151
-
152
-
153
-
154
-
155
-
156
-
157
-
158
-
 159
159 -
 160
160 -
 161
161 -
 162
162 -
 163
163 -
 164
164 -
 165
165 -
 166
166 -
 167
167 -
 168
168 -
 169
169 -
170
-
171
-
172
-
173
-
174
-
175
-
176
-
177
-
178
-
179
-
180
-
181
-
182
-
183
-
184
-
185
-
186
-
187
-
188
-
189
-
190
-
191
-
192
-
193
-
194
-
195
-
196
-
197
-
198
-
199
-
200
-
201
-
202
-
203
-
204
-
205
-
206
-
207
-
208
 |
 |
