HP Deskjet 6980 User Guide - Macintosh - Page 141
Print postcards, Guidelines, Prepare to print
 |
UPC - 882780129580
View all HP Deskjet 6980 manuals
Add to My Manuals
Save this manual to your list of manuals |
Page 141 highlights
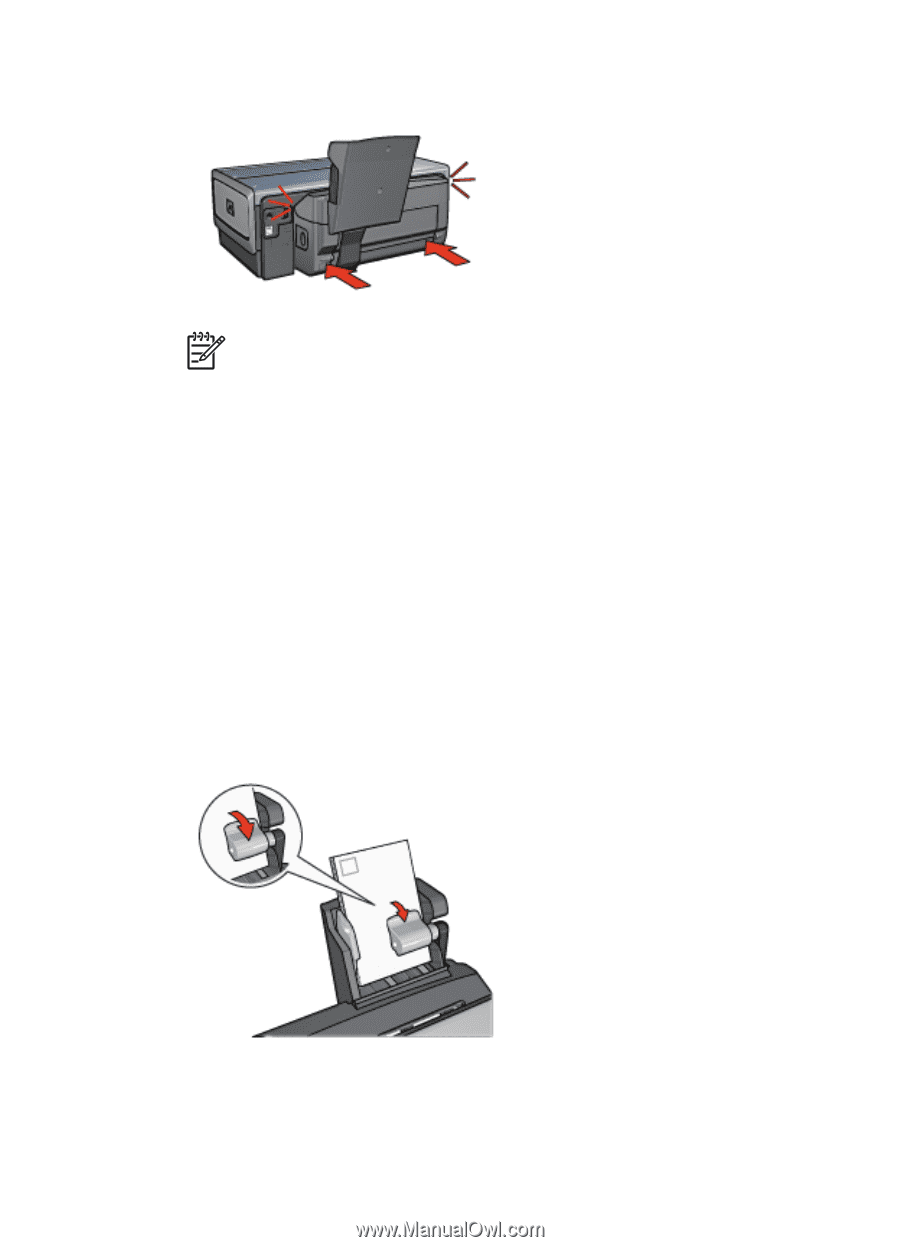
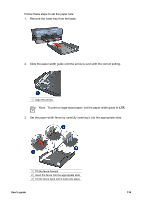
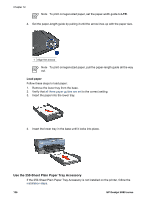
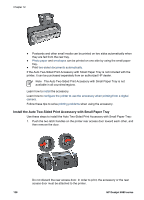
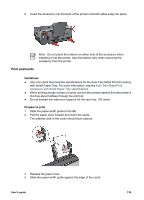
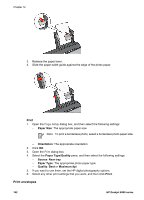
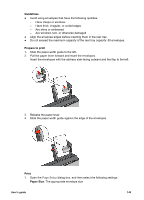
2. Insert the accessory into the back of the printer until both sides snap into place. Note Do not press the buttons on either side of the accessory when installing it into the printer. Use the buttons only when removing the accessory from the printer. Print postcards Guidelines ● Use only cards that meet the specifications for the Auto Two-Sided Print Accessory with Small Paper Tray. For more information, see the Auto Two-Sided Print Accessory with Small Paper Tray specifications. ● When printing a large number of cards, remove the printed material from the printer's Out tray about halfway through the print job. ● Do not exceed the maximum capacity for the rear tray: 100 cards. Prepare to print 1. Slide the paper-width guide to the left. 2. Pull the paper lever forward and insert the cards. The address side of the cards should face outward. 3. Release the paper lever. 4. Slide the paper-width guide against the edge of the cards. User's guide 139
-
 1
1 -
2
-
3
-
4
-
5
-
6
-
7
-
8
-
9
-
10
-
11
-
12
-
13
-
14
-
15
-
16
-
17
-
18
-
19
-
20
-
21
-
22
-
23
-
24
-
25
-
26
-
27
-
28
-
29
-
30
-
31
-
32
-
33
-
34
-
35
-
36
-
37
-
38
-
39
-
40
-
41
-
42
-
43
-
44
-
45
-
46
-
47
-
48
-
49
-
50
-
51
-
52
-
53
-
54
-
55
-
56
-
57
-
58
-
59
-
60
-
61
-
62
-
63
-
64
-
65
-
66
-
67
-
68
-
69
-
70
-
71
-
72
-
73
-
74
-
75
-
76
-
77
-
78
-
79
-
80
-
81
-
82
-
83
-
84
-
85
-
86
-
87
-
88
-
89
-
90
-
91
-
92
-
93
-
94
-
95
-
96
-
97
-
98
-
99
-
100
-
101
-
102
-
103
-
104
-
105
-
106
-
107
-
108
-
109
-
110
-
111
-
112
-
113
-
114
-
115
-
116
-
117
-
118
-
119
-
120
-
121
-
122
-
123
-
124
-
125
-
126
-
127
-
128
-
129
-
130
-
131
-
132
-
133
-
134
-
135
-
 136
136 -
 137
137 -
 138
138 -
 139
139 -
 140
140 -
 141
141 -
 142
142 -
 143
143 -
 144
144 -
 145
145 -
 146
146 -
147
-
148
-
149
-
150
-
151
-
152
-
153
-
154
 |
 |