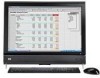
HP Dx9000 Service Reference Guide: HP dx9000 TouchSmart Business PC
HP Dx9000 - TouchSmart - 4 GB RAM Manual
 |
UPC - 884420541578
View all HP Dx9000 manuals
Add to My Manuals
Save this manual to your list of manuals |
HP Dx9000 manual content summary:
- HP Dx9000 | Service Reference Guide: HP dx9000 TouchSmart Business PC - Page 1
Service Reference Guide HP dx9000 TouchSmart Business PC - HP Dx9000 | Service Reference Guide: HP dx9000 TouchSmart Business PC - Page 2
contains proprietary information that is protected by copyright. No part of this document may be photocopied, reproduced, or translated to another language without the prior written consent of Hewlett-Packard Company. Service Reference Guide Business PCs First Edition (January 2009) Document - HP Dx9000 | Service Reference Guide: HP dx9000 TouchSmart Business PC - Page 3
About This Book WARNING! Text set off in this manner indicates that failure to follow directions could result in bodily harm or loss of life. CAUTION: Text set off in this manner indicates that failure to follow directions could result in damage to equipment or loss of information. NOTE: Text set - HP Dx9000 | Service Reference Guide: HP dx9000 TouchSmart Business PC - Page 4
iv About This Book - HP Dx9000 | Service Reference Guide: HP dx9000 TouchSmart Business PC - Page 5
Replacement Procedures Opening the HP TouchSmart PC ...7 Adding Memory ...11 Before you begin ...11 Removing a memory module 11 Installing a memory module 13 Stand assembly ...16 Back cover ...16 Optical drive ...18 Manually removing an optical disc 18 Removing and installing the hard disk drive - HP Dx9000 | Service Reference Guide: HP dx9000 TouchSmart Business PC - Page 6
Index ...45 vi - HP Dx9000 | Service Reference Guide: HP dx9000 TouchSmart Business PC - Page 7
the following available spare parts for the HP TouchSmart PC. Description Whole unit replacement Mouse, wireless, 2.4 GHz, optical, blue Keyboard, wireless, 2.4 GHz, English Keyboard, wireless, 2.4 GHz, French Power adapter, 150W Power cord Hard drive, 320 GB, 7200 rpm, SATA SODIMM, 2 GB, PC6400 - HP Dx9000 | Service Reference Guide: HP dx9000 TouchSmart Business PC - Page 8
2 Components Front and right side Item A B C D Item Component LCD display optimized for The HP TouchSmart PC integrates a state-of-the-art 56-cm (22-in) diagonal Touch widescreen high-definition display with HP BrightView technology. It has a resolution of 1680 x 1050 and a response time of 5 - HP Dx9000 | Service Reference Guide: HP dx9000 TouchSmart Business PC - Page 9
not visible externally). The wireless LAN supports IEEE 802.11 b/g/n (pre-n). F Power/Sleep button Press the Power/Sleep button to turn on your HP TouchSmart PC, or put it in Sleep mode. To turn off your computer, tap the Windows Vista start button , tap the Arrow button next to the Lock icon - HP Dx9000 | Service Reference Guide: HP dx9000 TouchSmart Business PC - Page 10
Left-side components Item A B C Item USB 2.0 Audio line in Headphones Component Connect USB devices (USB 2.0) such as printers, external hard disk drives, digital cameras, and MP3 players. Connect MP3 players or other audio players. Listen to music without disturbing anyone, by connecting your - HP Dx9000 | Service Reference Guide: HP dx9000 TouchSmart Business PC - Page 11
such as printers, external hard disk drives, digital cameras, and MP3 players. Gigabit Ethernet LAN (10/100/1G) Supports 4.1 and 5.1 speakers. Audio line out Connect external 2.0 and 2.1 powered speakers. Computer stand Slide stand for stability and best viewing angle. The stand supports - HP Dx9000 | Service Reference Guide: HP dx9000 TouchSmart Business PC - Page 12
the power state; blue indicates power on, and amber indicates Sleep mode. Hard disk drive Indicates hard disk drive activity. Memory card reader Indicates memory card reader activity. When the LED is flashing, do not remove your memory card. When the LED is off, no card is inserted. A solid LED - HP Dx9000 | Service Reference Guide: HP dx9000 TouchSmart Business PC - Page 13
the computer. 2. Disconnect any external devices that are connected to the computer. 3. Tap the Windows Vista Start button™ , and then tap Shut Down. 4. After the system has completely shut down, disconnect the power adapter (A) from the back of the HP TouchSmart PC. Opening the HP TouchSmart PC 7 - HP Dx9000 | Service Reference Guide: HP dx9000 TouchSmart Business PC - Page 14
gap on the bottom-left side of the cover (A), and then pulling gently. 6. Disconnect all other attached cables from the back of the HP TouchSmart PC. 7. Place the computer face down on a soft flat surface. HP recommends that you set down a blanket, towel, or other soft cloth (A) to protect the touch - HP Dx9000 | Service Reference Guide: HP dx9000 TouchSmart Business PC - Page 15
to an upright position, about 90 degrees (B) from the computer, and then move the latch to the left until it is in the locked position (C). 9. Using the notch on the wireless keyboard and mouse receiver, pull the receiver out of and away from the back of the computer. Opening the HP TouchSmart PC 9 - HP Dx9000 | Service Reference Guide: HP dx9000 TouchSmart Business PC - Page 16
up the memory cover slightly on the bottom edge to release it (B), then, gently slide the cover down toward the bottom of the computer (C), and then remove it. WARNING! Beware of sharp edges inside the chassis. To upgrade your hard disk drive, see Removing and installing the hard disk drive on page - HP Dx9000 | Service Reference Guide: HP dx9000 TouchSmart Business PC - Page 17
Adding Memory The HP TouchSmart PC comes with random access memory (RAM), which temporarily stores data and instructions on your computer. The HP TouchSmart PC ships with one or two memory modules that you can replace. Before you begin Observe the following requirements before removing and replacing - HP Dx9000 | Service Reference Guide: HP dx9000 TouchSmart Business PC - Page 18
2. Push the two latches of the retaining clips away from the memory module. It may be easier to push one latch at a time. The memory module pops up at an angle. Both memory modules can be removed by using the same procedure. 12 Chapter 3 Removal and Replacement Procedures - HP Dx9000 | Service Reference Guide: HP dx9000 TouchSmart Business PC - Page 19
on the connector edge. 4. Store the memory module in antistatic packaging. Installing a memory module Upgrade the memory in your HP TouchSmart PC with memory of the same type and speed as the memory originally installed. The capacity for both memory modules must match for optimal performance. Both - HP Dx9000 | Service Reference Guide: HP dx9000 TouchSmart Business PC - Page 20
2. Align the memory module with the socket, so that the key slot on the connector edge is same as the module that you removed. NOTE: The sockets are keyed. If the module slot does not match the socket, turn the memory module over. 14 Chapter 3 Removal and Replacement Procedures - HP Dx9000 | Service Reference Guide: HP dx9000 TouchSmart Business PC - Page 21
work properly. In the following illustration, a memory module is installed incorrectly (A), with the gold edge showing. 4. Close the HP TouchSmart PC. See Closing the HP TouchSmart PC on page 31. NOTE: If a blank screen is displayed after you replace or add a memory module, the memory is installed - HP Dx9000 | Service Reference Guide: HP dx9000 TouchSmart Business PC - Page 22
the computer. 4. Lift the stand off of the PC. To install the stand, reverse the removal procedures. Back cover 1. Remove the wireless keyboard and mouse receiver from its USB slot on the bottom edge of the system. 2. Remove the I/O cover and the I/O cable guide. 16 Chapter 3 Removal and Replacement - HP Dx9000 | Service Reference Guide: HP dx9000 TouchSmart Business PC - Page 23
, first squeeze the tabs at its sides and then pull the guide off its mounting post. 4. Remove the memory door and the stand. 5. Remove the optical disc drive cover panel. 6. Remove the nine screws that secure the back cover to the computer, as follows: a. 2 screws are located near the optical disc - HP Dx9000 | Service Reference Guide: HP dx9000 TouchSmart Business PC - Page 24
and remove it from the PC To install the back cover, reverse the removal procedures. Optical drive Manually removing an optical disc NOTE: The optical drive may have a small pin hole on its front face; if it does not, manual ejection is not possible. 18 Chapter 3 Removal and Replacement Procedures - HP Dx9000 | Service Reference Guide: HP dx9000 TouchSmart Business PC - Page 25
and DVD media can be removed from the optical drive manually, even if the system is not running. 1. Remove the optical drive cover panel from the computer by prying away the right side of the panel, and then pulling the panel off the computer. 2. Insert a sturdy straightened paper clip into the hole - HP Dx9000 | Service Reference Guide: HP dx9000 TouchSmart Business PC - Page 26
the factory-installed files. Removing the hard disk drive 1. Complete the procedures to prepare the HP TouchSmart PC. See Opening the HP TouchSmart PC on page 7. WARNING! To reduce the risk of personal injury from electrical shock or hot surfaces, disconnect the power cord from the wall outlet, and - HP Dx9000 | Service Reference Guide: HP dx9000 TouchSmart Business PC - Page 27
the HP TouchSmart PC on page 7. Remove the nine screws that secure the back cover to the chassis. Four of the screws are located along the bottom edge of the back cover, two are located on the sides of the optical drive, and three are located in the connector area. Removing and installing the hard - HP Dx9000 | Service Reference Guide: HP dx9000 TouchSmart Business PC - Page 28
back cover up from the bottom inside edge of the memory cover area to release it, place both hands under the bottom edge of the cover and lift it up, and then rotate the back cover up as far as it will go. 6. Lift away the back cover from the computer. 22 Chapter 3 Removal and Replacement - HP Dx9000 | Service Reference Guide: HP dx9000 TouchSmart Business PC - Page 29
the optical disc drive to the chassis, and then slide the drive toward the center of the computer to move it out of the way. You do not need to remove the optical drive cables. 8. Remove the screw that secures the hard disk drive cage to the chassis. Removing and installing the hard disk drive 23 - HP Dx9000 | Service Reference Guide: HP dx9000 TouchSmart Business PC - Page 30
9. Slide the hard disk drive cage toward the top of the computer, and then pull it away from the computer. 10. Disconnect the power and data cables by pressing the latches and then removing them from the drive. 24 Chapter 3 Removal and Replacement Procedures - HP Dx9000 | Service Reference Guide: HP dx9000 TouchSmart Business PC - Page 31
the hard disk drive out of the cage. Installing a hard disk drive 1. If necessary, remove the hard disk drive. See Removing and installing the hard disk drive on page 20. 2. Slide the hard disk drive into the cage, and then replace the four screws. Removing and installing the hard disk drive 25 - HP Dx9000 | Service Reference Guide: HP dx9000 TouchSmart Business PC - Page 32
3. Connect the power and data cables to the hard disk drive. 4. Lower the hard disk drive cage straight down, align the four hooks on the cage with the four holes on the back of the chassis, and then slide the cage toward the bottom of the computer until it rests against the bracket on the chassis. - HP Dx9000 | Service Reference Guide: HP dx9000 TouchSmart Business PC - Page 33
5. Replace the screw that secures the hard disk drive cage to the chassis. 6. Align the hooks on the optical disc drive with the holes on the computer, and then slide the optical disc drive toward the outer edge of the computer. Removing and installing the hard disk drive 27 - HP Dx9000 | Service Reference Guide: HP dx9000 TouchSmart Business PC - Page 34
that secures the optical disc drive to the chassis. 8. Replace the back cover. Align the hooks at the top edge of the back cover with the holes on the top of the computer. The screw holes on the back cover should be aligned with the screw holes on the back of the computer. 28 Chapter 3 Removal and - HP Dx9000 | Service Reference Guide: HP dx9000 TouchSmart Business PC - Page 35
back cover, two are located on the sides of the optical drive, and three are located in the connector area. CAUTION: You must replace the screws on each side of the optical disc drive to ensure that the drive slot is aligned properly with the back cover. Removing and installing the hard disk drive - HP Dx9000 | Service Reference Guide: HP dx9000 TouchSmart Business PC - Page 36
11. Replace the optical disc drive cover by aligning the tabs on the bottom edge of the optical drive cover with the hole on the computer, and then snapping the top edge into place. 12. Follow the steps in Closing the HP TouchSmart PC on page 31. 30 Chapter 3 Removal and Replacement Procedures - HP Dx9000 | Service Reference Guide: HP dx9000 TouchSmart Business PC - Page 37
steps in order after closing the HP TouchSmart PC. 1. If you removed it, replace the computer stand. Align the four screw holes of the stand over the four holes on the back of the computer, and then replace the four screws that secure the stand to the computer. Closing the HP TouchSmart PC 31 - HP Dx9000 | Service Reference Guide: HP dx9000 TouchSmart Business PC - Page 38
the stand and into place (A). Push down on both sides of the bottom edge of the memory cover to snap it into place (B). Push in the middle of the bottom edge to make sure the entire cover is pushed all the way down. 3. Replace the screw that secures the memory cover to the computer. 32 Chapter - HP Dx9000 | Service Reference Guide: HP dx9000 TouchSmart Business PC - Page 39
4. Push the computer stand back slightly beyond the locked position (A), holding it with one hand so it does not snap back when the lock is released, and then release the lock on the computer stand (B) with the other hand. 5. Replace the keyboard and mouse receiver. Closing the HP TouchSmart PC 33 - HP Dx9000 | Service Reference Guide: HP dx9000 TouchSmart Business PC - Page 40
the back of the computer and then reconnect the power cord to the power source. WARNING! To reduce the risk of electrical shock, fire, or equipment damage, do not plug telecommunications or telephone cables into the network interface card (NIC) (labeled as LAN). 34 Chapter 3 Removal and Replacement - HP Dx9000 | Service Reference Guide: HP dx9000 TouchSmart Business PC - Page 41
then replace the connector cover by aligning the three tabs on the side edge of the cover with the holes on the computer, and then rotating inward to snap it into place. 9. Reconnect external devices. 10. Turn on the HP TouchSmart PC and all devices connected to it. Closing the HP TouchSmart PC 35 - HP Dx9000 | Service Reference Guide: HP dx9000 TouchSmart Business PC - Page 42
are pre-synchronized for your convenience, to work with your HP TouchSmart PC. They should work immediately after pulling the battery tabs, which activate the preinstalled batteries, and turning the mouse switch on (B). You may need to manually synchronize the wireless keyboard or mouse if they - HP Dx9000 | Service Reference Guide: HP dx9000 TouchSmart Business PC - Page 43
, such as a printer, a hard disk drive, a mouse, or a keyboard. Complete the following procedure to update a driver, or to revert to an earlier version of the driver if the new one does not solve your problem: 1. Click the Windows Vista start button, right-click Computer, and then select Properties - HP Dx9000 | Service Reference Guide: HP dx9000 TouchSmart Business PC - Page 44
update a driver, click Update Driver, and follow the on-screen instructions. - or - To revert to an earlier version of a driver, click Rollback Driver, and follow the on-screen instructions. Microsoft System Restore Microsoft Windows Vista includes a feature that enables you to restore your computer - HP Dx9000 | Service Reference Guide: HP dx9000 TouchSmart Business PC - Page 45
program you want to install, click Next, and follow the on-screen instructions. 5. When you have finished reinstalling, restart the computer. NOTE: Do not skip this last step. You must restart the computer when you are finished recovering software programs or hardware drivers. Software Program and - HP Dx9000 | Service Reference Guide: HP dx9000 TouchSmart Business PC - Page 46
from the recovery image stored on your hard disk drive. This image contains the operating system and software program files that were originally installed on your computer at the factory. You can create only one set of recovery discs for your computer. Furthermore, the recovery discs you create can - HP Dx9000 | Service Reference Guide: HP dx9000 TouchSmart Business PC - Page 47
www.hp.com/support and visit the Software & Driver downloads page for your computer model. Starting system recovery from the hard disk drive Choose one of the following procedures to reinstall the software from the recovery image on your hard disk drive: ● Starting system recovery from the Windows - HP Dx9000 | Service Reference Guide: HP dx9000 TouchSmart Business PC - Page 48
will prompt you to insert a recovery disc. 9. In the Recovery Manager Welcome window, click the Advanced options button. 10. Click Recover your computer to its original factory condition, and then click Next. 11. If you are prompted to back up files, and you have already done so, click No, and then - HP Dx9000 | Service Reference Guide: HP dx9000 TouchSmart Business PC - Page 49
or from your hard drive. 7. Choose to run from the recovery discs, and then click Next. 8. In the Recovery Manager Welcome window, click the Advanced options button. 9. Click Recover your computer to its original factory condition, and then click Next. 10. If you are prompted to back up files, and - HP Dx9000 | Service Reference Guide: HP dx9000 TouchSmart Business PC - Page 50
the Windows Vista start button, All Programs, the HP folder, and then click HP Update. ● Follow the on-screen instruction to download driver and software updates. 5. Turn off your computer, reconnect all peripheral devices that were originally connected to it, and then turn the computer back on - HP Dx9000 | Service Reference Guide: HP dx9000 TouchSmart Business PC - Page 51
6 hard drive 6 memory card reader 6 optical disc 6 power 6 webcam 6 wireless keyboard and mouse 6 M manually removing an optical disc 18 memory adding 11 installing 13 removing 11 memory card reader 3 memory card reader light 6 microphone 2 Microsoft System Restore 38 mouse 1 O opening the computer - HP Dx9000 | Service Reference Guide: HP dx9000 TouchSmart Business PC - Page 52
1 software problems 37 software reinstallation 39 spare parts 1 SPDIF 5 speakers 3 stand 5 stand assembly 16 system recovery 40 system recovery options 41 T TouchSmart button 3 U updating drivers 37 USB 2.0 4, 5 USB receiver, wireless 1 V volume 3 W webcam 2 webcam light 6 whole unit replacement
-
 1
1 -
 2
2 -
 3
3 -
 4
4 -
 5
5 -
 6
6 -
 7
7 -
8
-
9
-
10
-
11
-
12
-
13
-
14
-
15
-
16
-
17
-
18
-
19
-
20
-
21
-
22
-
23
-
24
-
25
-
26
-
27
-
28
-
29
-
30
-
31
-
32
-
33
-
34
-
35
-
36
-
37
-
38
-
39
-
40
-
41
-
42
-
43
-
44
-
45
-
46
-
47
-
48
-
49
-
50
-
51
-
52
 |
 |

Service Reference Guide
HP dx9000 TouchSmart Business PC