HP Dx9000 Service Reference Guide: HP dx9000 TouchSmart Business PC - Page 35
You must replace the screws on each side of the optical disc drive to ensure that
 |
UPC - 884420541578
View all HP Dx9000 manuals
Add to My Manuals
Save this manual to your list of manuals |
Page 35 highlights
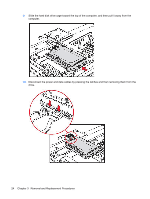
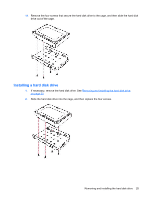
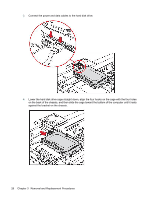
9. Press the top, side, and then bottom edges to snap the cover into place. 10. Replace the nine screws that secure the back cover to the computer. Four of the screws are located along the bottom edge of the back cover, two are located on the sides of the optical drive, and three are located in the connector area. CAUTION: You must replace the screws on each side of the optical disc drive to ensure that the drive slot is aligned properly with the back cover. Removing and installing the hard disk drive 29
-
 1
1 -
2
-
3
-
4
-
5
-
6
-
7
-
8
-
9
-
10
-
11
-
12
-
13
-
14
-
15
-
16
-
17
-
18
-
19
-
20
-
21
-
22
-
23
-
24
-
25
-
26
-
27
-
28
-
29
-
 30
30 -
 31
31 -
 32
32 -
 33
33 -
 34
34 -
 35
35 -
 36
36 -
 37
37 -
 38
38 -
 39
39 -
 40
40 -
41
-
42
-
43
-
44
-
45
-
46
-
47
-
48
-
49
-
50
-
51
-
52
 |
 |
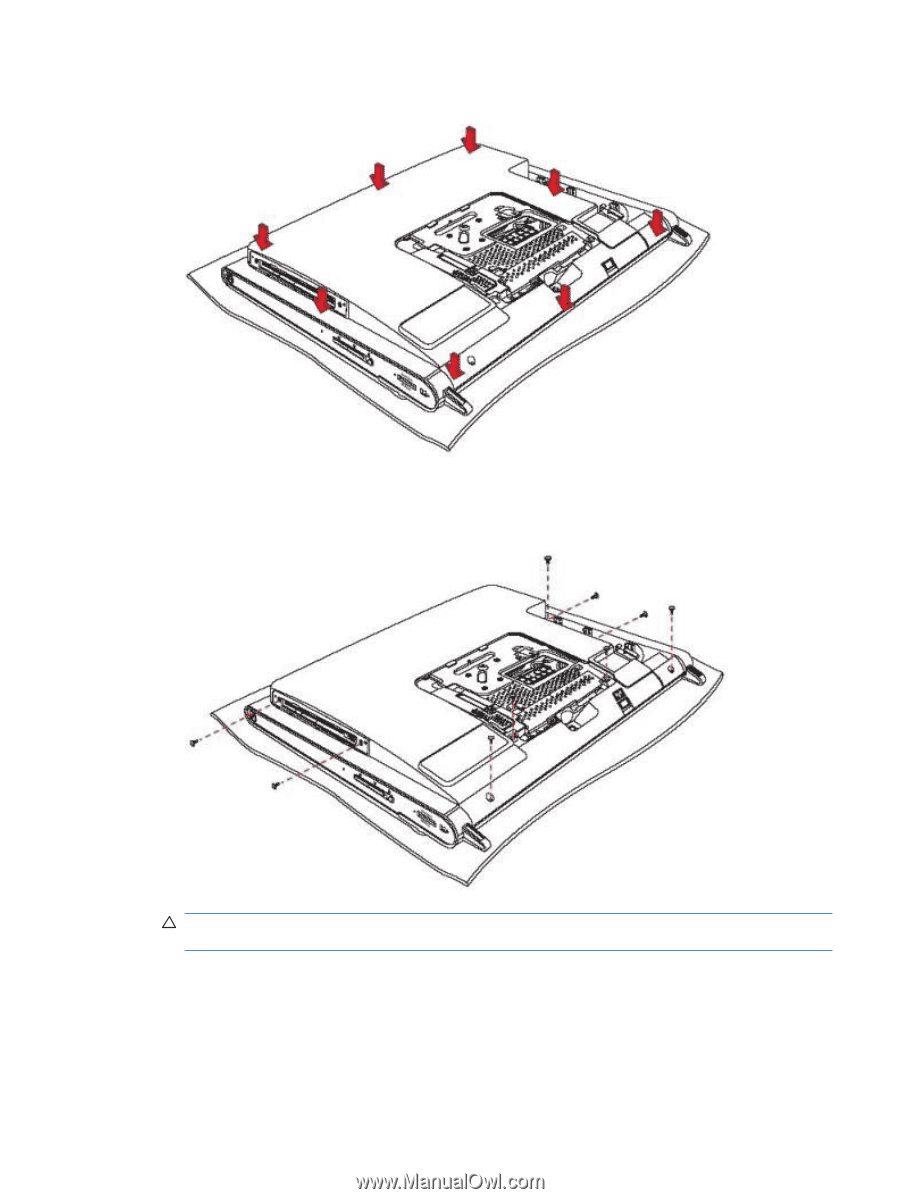
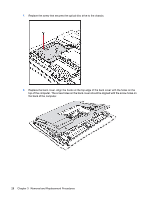
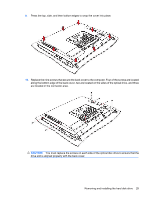
9.
Press the top, side, and then bottom edges to snap the cover into place.
10.
Replace the nine screws that secure the back cover to the computer. Four of the screws are located
along the bottom edge of the back cover, two are located on the sides of the optical drive, and three
are located in the connector area.
CAUTION:
You must replace the screws on each side of the optical disc drive to ensure that the
drive slot is aligned properly with the back cover.
Removing and installing the hard disk drive
29