HP Dx9000 Service Reference Guide: HP dx9000 TouchSmart Business PC - Page 21
Close the HP TouchSmart PC. See
 |
UPC - 884420541578
View all HP Dx9000 manuals
Add to My Manuals
Save this manual to your list of manuals |
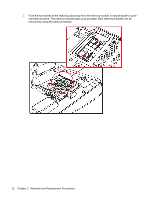
Page 21 highlights
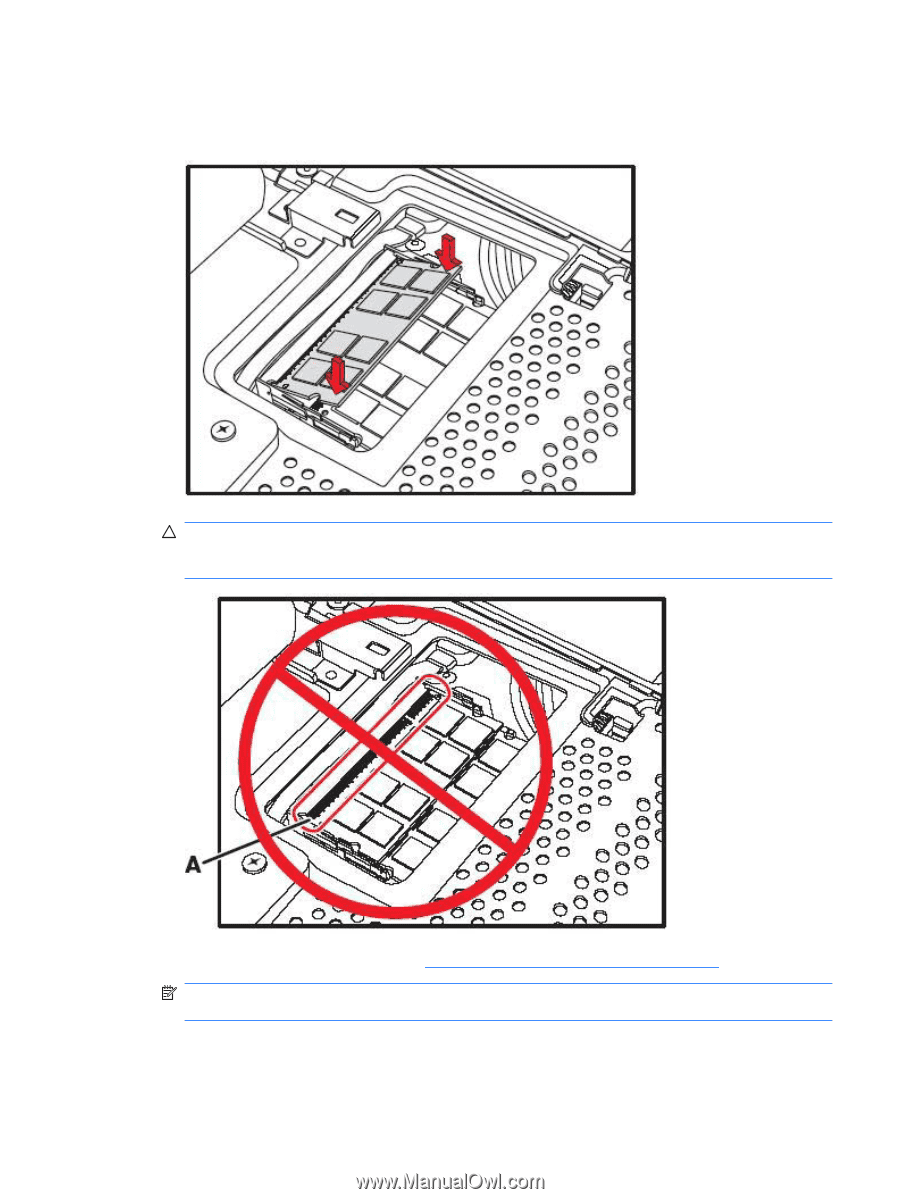
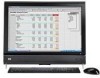
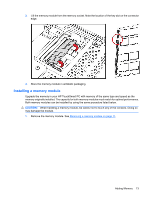
3. Slide the memory module all the way into the memory slot, until the gold edge is almost completely hidden in the slot, and then push down the outer edge of the memory module until the retaining clips snap into place. CAUTION: The memory module must be inserted all the way into the slot before it is snapped down into place; otherwise it will not work properly. In the following illustration, a memory module is installed incorrectly (A), with the gold edge showing. 4. Close the HP TouchSmart PC. See Closing the HP TouchSmart PC on page 31. NOTE: If a blank screen is displayed after you replace or add a memory module, the memory is installed incorrectly, or it is the wrong type of memory. Remove and reinstall the memory module. Adding Memory 15
-
 1
1 -
2
-
3
-
4
-
5
-
6
-
7
-
8
-
9
-
10
-
11
-
12
-
13
-
14
-
15
-
 16
16 -
 17
17 -
 18
18 -
 19
19 -
 20
20 -
 21
21 -
 22
22 -
 23
23 -
 24
24 -
 25
25 -
 26
26 -
27
-
28
-
29
-
30
-
31
-
32
-
33
-
34
-
35
-
36
-
37
-
38
-
39
-
40
-
41
-
42
-
43
-
44
-
45
-
46
-
47
-
48
-
49
-
50
-
51
-
52
 |
 |