HP ENVY 14-j100 Maintenance and Service Guide - Page 91
In the HP PC Hardware Diagnostics click
 |
View all HP ENVY 14-j100 manuals
Add to My Manuals
Save this manual to your list of manuals |
Page 91 highlights
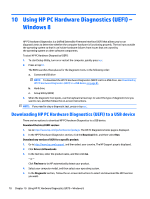
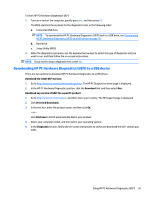
To start HP PC Hardware Diagnostics UEFI: 1. Turn on or restart the computer, quickly press esc, and then press f2. The BIOS searches three places for the diagnostic tools, in the following order: a. Connected USB drive NOTE: To download the HP PC Hardware Diagnostics (UEFI) tool to a USB drive, see Downloading HP PC Hardware Diagnostics (UEFI) to a USB device on page 78. b. Hard drive c. Setup Utility (BIOS) 2. When the diagnostic tool opens, use the keyboard arrow keys to select the type of diagnostic test you want to run, and then follow the on-screen instructions. NOTE: If you need to stop a diagnostic test, press esc. Downloading HP PC Hardware Diagnostics (UEFI) to a USB device There are two options to download HP PC Hardware Diagnostics to a USB device. Download the latest UEFI version: 1. Go to http://www.hp.com/go/techcenter/pcdiags. The HP PC Diagnostics home page is displayed. 2. In the HP PC Hardware Diagnostics section, click the Download link, and then select Run. Download any version of UEFI for a specific product: 1. Go to http://www.hp.com/support, and then select your country. The HP Support page is displayed. 2. Click Drivers & Downloads. 3. In the text box, enter the product name, and then click Go. - or - Click Find now to let HP automatically detect your product. 4. Select your computer model, and then select your operating system. 5. In the Diagnostic section, follow the on-screen instructions to select and download the UEFI version you want. Using HP PC Hardware Diagnostics (UEFI) 81
-
 1
1 -
2
-
3
-
4
-
5
-
6
-
7
-
8
-
9
-
10
-
11
-
12
-
13
-
14
-
15
-
16
-
17
-
18
-
19
-
20
-
21
-
22
-
23
-
24
-
25
-
26
-
27
-
28
-
29
-
30
-
31
-
32
-
33
-
34
-
35
-
36
-
37
-
38
-
39
-
40
-
41
-
42
-
43
-
44
-
45
-
46
-
47
-
48
-
49
-
50
-
51
-
52
-
53
-
54
-
55
-
56
-
57
-
58
-
59
-
60
-
61
-
62
-
63
-
64
-
65
-
66
-
67
-
68
-
69
-
70
-
71
-
72
-
73
-
74
-
75
-
76
-
77
-
78
-
79
-
80
-
81
-
82
-
83
-
84
-
85
-
 86
86 -
 87
87 -
 88
88 -
 89
89 -
 90
90 -
 91
91 -
 92
92 -
 93
93 -
 94
94 -
 95
95 -
 96
96 -
97
-
98
-
99
-
100
-
101
-
102
-
103
-
104
-
105
-
106
-
107
-
108
-
109
-
110
-
111
-
112
-
113
-
114
-
115
-
116
 |
 |