HP ENVY Photo 7800 User Guide - Page 106
Set up Web Services, Setup, Web Services Setup, Continue, Print, Scan & Fax
 |
View all HP ENVY Photo 7800 manuals
Add to My Manuals
Save this manual to your list of manuals |
Page 106 highlights
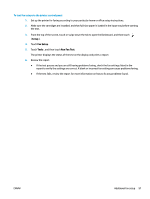
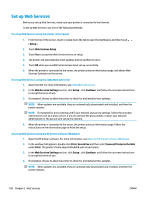
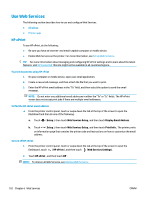
Set up Web Services Before you set up Web Services, make sure your printer is connected to the Internet. To set up Web Services, use one of the following methods. To set up Web Services using the printer control panel 1. From the top of the screen, touch or swipe down the tab to open the Dashboard, and then touch ( Setup ). 2. Touch Web Services Setup . 3. Touch Yes to accept the Web Services terms of setup. 4. The printer will automatically check updates and set up Web Services. 5. Touch OK when you see Web Services have been set up successfully. 6. When the printer is connected to the server, the printer prints an information page, and shows Web Services Summary on the screen. To set up Web Services using the embedded web server 1. Open the EWS. For more information, see Embedded web server. 2. In the Web Services Settings section, click Setup , click Continue, and follow the onscreen instructions to accept the terms of use. 3. If prompted, choose to allow the printer to check for and install printer updates. NOTE: When updates are available, they are automatically downloaded and installed, and then the printer restarts. NOTE: If prompted for proxy settings and if your network uses proxy settings, follow the onscreen instructions to set up a proxy server. If you do not have the proxy details, contact your network administrator or the person who set up the network. 4. When the printer is connected to the server, the printer prints an information page. Follow the instructions on the information page to finish the setup. To set up Web Services using the HP printer software (Windows) 1. Open the HP printer software. For more information, see Open the HP printer software (Windows). 2. In the window that appears, double-click Print, Scan & Fax and then select Connect Printer to the Web under Print. The printer's home page (embedded web server) opens. 3. In the Web Services Settings section, click Setup , click Continue, and follow the onscreen instructions to accept the terms of use. 4. If prompted, choose to allow the printer to check for and install printer updates. NOTE: When updates are available, they are automatically downloaded and installed, and then the printer restarts. 100 Chapter 6 Web Services ENWW
-
 1
1 -
2
-
3
-
4
-
5
-
6
-
7
-
8
-
9
-
10
-
11
-
12
-
13
-
14
-
15
-
16
-
17
-
18
-
19
-
20
-
21
-
22
-
23
-
24
-
25
-
26
-
27
-
28
-
29
-
30
-
31
-
32
-
33
-
34
-
35
-
36
-
37
-
38
-
39
-
40
-
41
-
42
-
43
-
44
-
45
-
46
-
47
-
48
-
49
-
50
-
51
-
52
-
53
-
54
-
55
-
56
-
57
-
58
-
59
-
60
-
61
-
62
-
63
-
64
-
65
-
66
-
67
-
68
-
69
-
70
-
71
-
72
-
73
-
74
-
75
-
76
-
77
-
78
-
79
-
80
-
81
-
82
-
83
-
84
-
85
-
86
-
87
-
88
-
89
-
90
-
91
-
92
-
93
-
94
-
95
-
96
-
97
-
98
-
99
-
100
-
 101
101 -
 102
102 -
 103
103 -
 104
104 -
 105
105 -
 106
106 -
 107
107 -
 108
108 -
 109
109 -
 110
110 -
 111
111 -
112
-
113
-
114
-
115
-
116
-
117
-
118
-
119
-
120
-
121
-
122
-
123
-
124
-
125
-
126
-
127
-
128
-
129
-
130
-
131
-
132
-
133
-
134
-
135
-
136
-
137
-
138
-
139
-
140
-
141
-
142
-
143
-
144
-
145
-
146
-
147
-
148
-
149
-
150
-
151
-
152
-
153
-
154
-
155
-
156
-
157
-
158
-
159
-
160
-
161
-
162
-
163
-
164
-
165
-
166
-
167
-
168
-
169
-
170
-
171
-
172
-
173
-
174
-
175
-
176
-
177
-
178
-
179
-
180
-
181
-
182
-
183
-
184
-
185
-
186
-
187
-
188
-
189
-
190
-
191
-
192
-
193
-
194
-
195
-
196
-
197
-
198
-
199
-
200
-
201
-
202
-
203
 |
 |
