HP LD4245tm Network Sign Manager User Guide - Page 30
On/Off Time Schedule Info, Saving and loading display configuration
 |
View all HP LD4245tm manuals
Add to My Manuals
Save this manual to your list of manuals |
Page 30 highlights
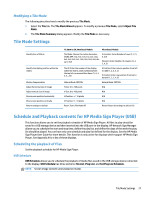
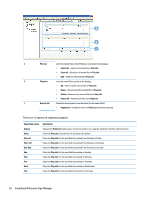
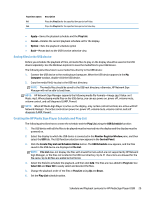
2. Set both On Time (time to turn the display on) and Off Time (time to turn the display off). You can specify On Time and Off Time separately by selecting each check box as shown below. 3. Set an input setting to use when the display is turned on - VOE (only available on select models), RGB (PC), DisplayPort, or HDMI/DVI (only available on select models). NOTE: Selecting No change will keep the last input setting. 4. Check whether the display On/Off Time settings are correct, and then click Set to save the changes. You can see your display on/off schedule added under On/ Off Time Schedule Info. On/Off Time Schedule Info On/Off Time Schedule Info is used to check and manage the power on/off schedule of the display. ● To delete the on/off schedule of the selected display, select a schedule (time) to delete, and then click Delete. The on/off schedules of all selected displays are deleted. ● To delete all schedules, select a list to delete, and then click Delete All. All the selected display on/off times are deleted. Saving and loading display configuration All display settings set in HP Network Sign Manager can be saved as a file. You can import the saved settings later when necessary. Saving display configuration The following describes how to save the current display settings: 1. Right-click a display for which the settings are to be saved. 2. Click Save Configuration from the shortcut menu. The Save As... dialog appears. 3. Enter a file name, and then click Save. The Finish Save Configuration message appears when it is successfully saved. All of the settings in the Control, A/V, Option, and Schedule tabs are saved. 24 Installing HP Network Sign Manager
-
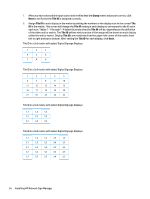
 1
1 -
2
-
3
-
4
-
5
-
6
-
7
-
8
-
9
-
10
-
11
-
12
-
13
-
14
-
15
-
16
-
17
-
18
-
19
-
20
-
21
-
22
-
23
-
24
-
 25
25 -
 26
26 -
 27
27 -
 28
28 -
 29
29 -
 30
30 -
 31
31 -
 32
32 -
 33
33 -
 34
34 -
 35
35 -
36
-
37
-
38
-
39
-
40
-
41
 |
 |
